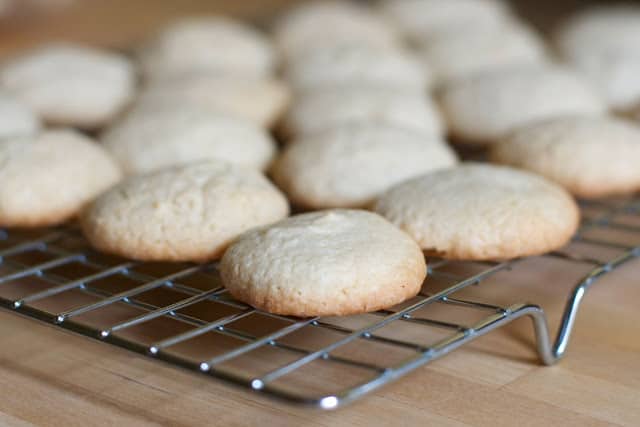
DIY Vanilla Wafers
Hello! Today I am so happy to be Guest Posting over at my friend Siri’s blog Siriously Delicious. If you aren’t familiar- she is a funny and talented gal whose site I’ve loved reading for awhile. She just had a new baby, so she needed some blog-love while she’s adjusting to having two kids.
So pop on over to Siri’s site for the recipe to these easy and delicious homemade Vanilla Wafers! And- check back here on Friday for a delicious dessert that uses these yummy cookies. Can you guess what?

DIY Vanilla Wafers
No Ratings
Ingredients
- 5 tablespoons butter, softened
- 1 cup sugar
- 1 large egg
- 2 teaspoons pure vanilla extract
- 1/4 cup milk, or half and half
- 2 cups all-purpose flour
- 2 teaspoons baking powder
- 1/4 teaspoon salt
Instructions
- Preheat oven to 350 degrees F.
- Cream the butter and sugar together in a large mixing bowl. Add the egg, vanilla, and milk and mix well. Sift in the flour, baking powder and salt. Stir well.
- Either scoop the dough into a large piping bag (or just a ziplock bag) and squeeze out rounds of dough. OR- just use a small scoop to portion 1inch rounds on a cookie sheet. Use your fingers to flatten slightly.
- Bake for 12-15 minutes until the bottoms begin to turn golden brown. Transfer cookies to a wire rack to cool. Serve or store in an airtight container.
Nutrition Information:
Serving Size: 1 gramsAmount Per Serving: Unsaturated Fat: 0g
I’ve always wanted to try making my own vanilla wafers! Heading over to get the recipe!
I was just looking at homemade vanilla wafer recipes! now i have a great one handy i cant wait to try it :)
YUM!! I love it with the banana awesomeness on top.
Love, love, love these!! SO fun!
Thanks again for the AMAZING guest post!! xo
Love these Audra, what we call wafers over here in the UK are those pink coloured brittle weaved-like textured things you thick in an ice cream. They’re a bit retro now. Love the difference. Will have to give them a try so I know what your ‘wafers’ are. :)
I absolutely love DIY recipes, especially when it comes to wafers! Heading over to check out the recipe now!
Just made these for my icecream and chocolate sauce… needed something with a crunch. Whoa they are good!
A work mate recommended me to your site. Thank you for the information.
Hello,
Without going into too much detail as to why I am scouring online versions of Banana Pudding recipes, I thank you for posting this unique version with homemade pudding (what else would one do, really) from the Magnolia Bakery (shocked to hear they do not make it from scratch, tsk, tsk), and these real little Nillas, as well. I mean what a treat after nearly thirty years of making this dessert to find a means of enhancing what has always been a beloved dish among family and friends.
I do have one question though. How many Nilla wafers does this recipe make if one holds to the 1 in. recommendation per cookie? I am guessing this recipe makes a sufficient number of wafers for your increased volume (1.5) of the original Magnolia Bakery recipe, In other words, the Nilla wafer recipe here is sufficient for the recipe on your site, i.e., 3/4 cp + 3T sugar; instead of the 1/2 cp. sugar + 2T on the MB site right? I am sure I have no need of saying this but it is usual and customary to inform your audience/readers the yield they should expect from the recipe you have written, or in this case, posted.
Thanks again for this recipe, I look forward to having it in my collection again.
The recipe yields about 4 dozen cookies
Hello Audra,
Thank you for both the recipe and the reply. I made the Banana Pudding you gave us with a few modifications I’ve picked up over the years; paying special attention to the underlying chemistry or alchemy of building a (cream or) pudding–the ingredient ratios were perfect. I think, in future, I will attempt to double the (cream or) pudding and will most definitely double the Nilla wafer recipe. I was unable to achieve the 4 dz. yield mentioned above and I made an effort to keeping them about 1″ across, granted, I am not a factory spitting out perfectly shaped Nillas; so, of course, some of them were slightly larger but I still baked only 30+ Nillas at most.
In spite of yields, the friends I prepared the pudding for enjoyed it very much and in the end, that is what truly matters. It was a first effort with this recipe combination and I cannot thank you enough for posting, making the necessary modifications (i.e., real pudding and increasing yields), testing both recipes and photographing your results and then talking to us about your adventures. Grateful on the West Coast!