Tata’s Homemade Pita Bread
My grandmother’s recipe, a staple in our house growing up, this pita bread is crisp, fluffy perfection!
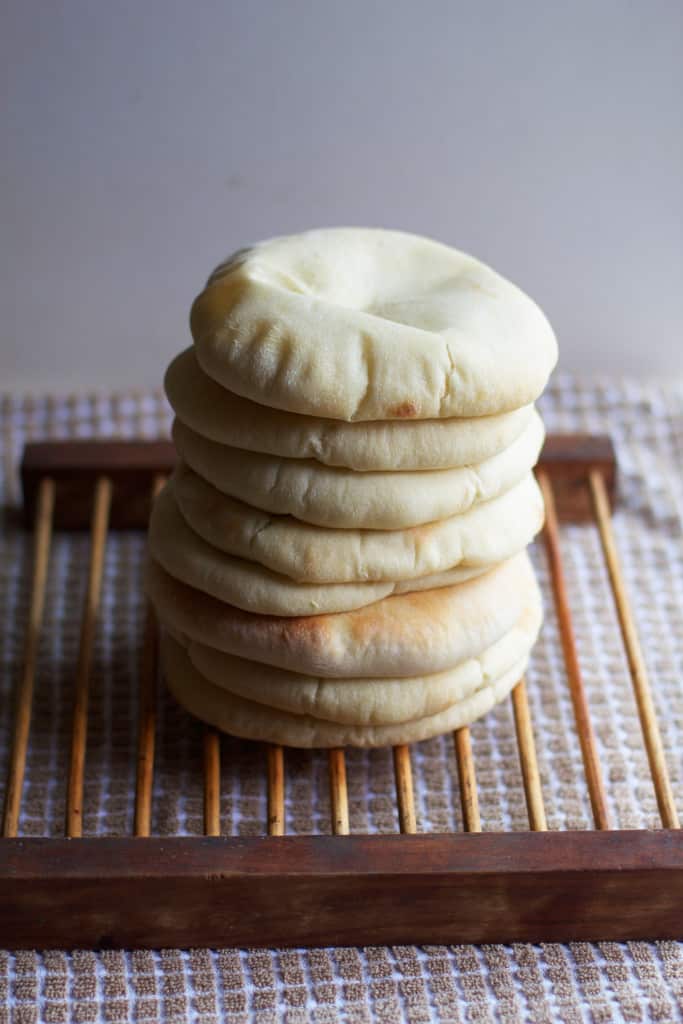
This didn’t start with me. It started in Jordan sometime in the 1940s, or maybe it was actually Palestine- and several years before that. My paternal grandmother who we called “Tata Em Saleem,” baked bread for her eleven children. Soft, puffy, and crispy rounds of pita bread that fed her family of thirteen.
When a family can’t always afford things like meat or even milk, three ingredients were easier to come by: flour, water and yeast, (a teeny bit of salt & sugar too I suppose…) My Dad’s fond memories of eating his Mom’s bread with every meal translated to our kitchen table, where no meal was complete without a few toasty rounds of bread.
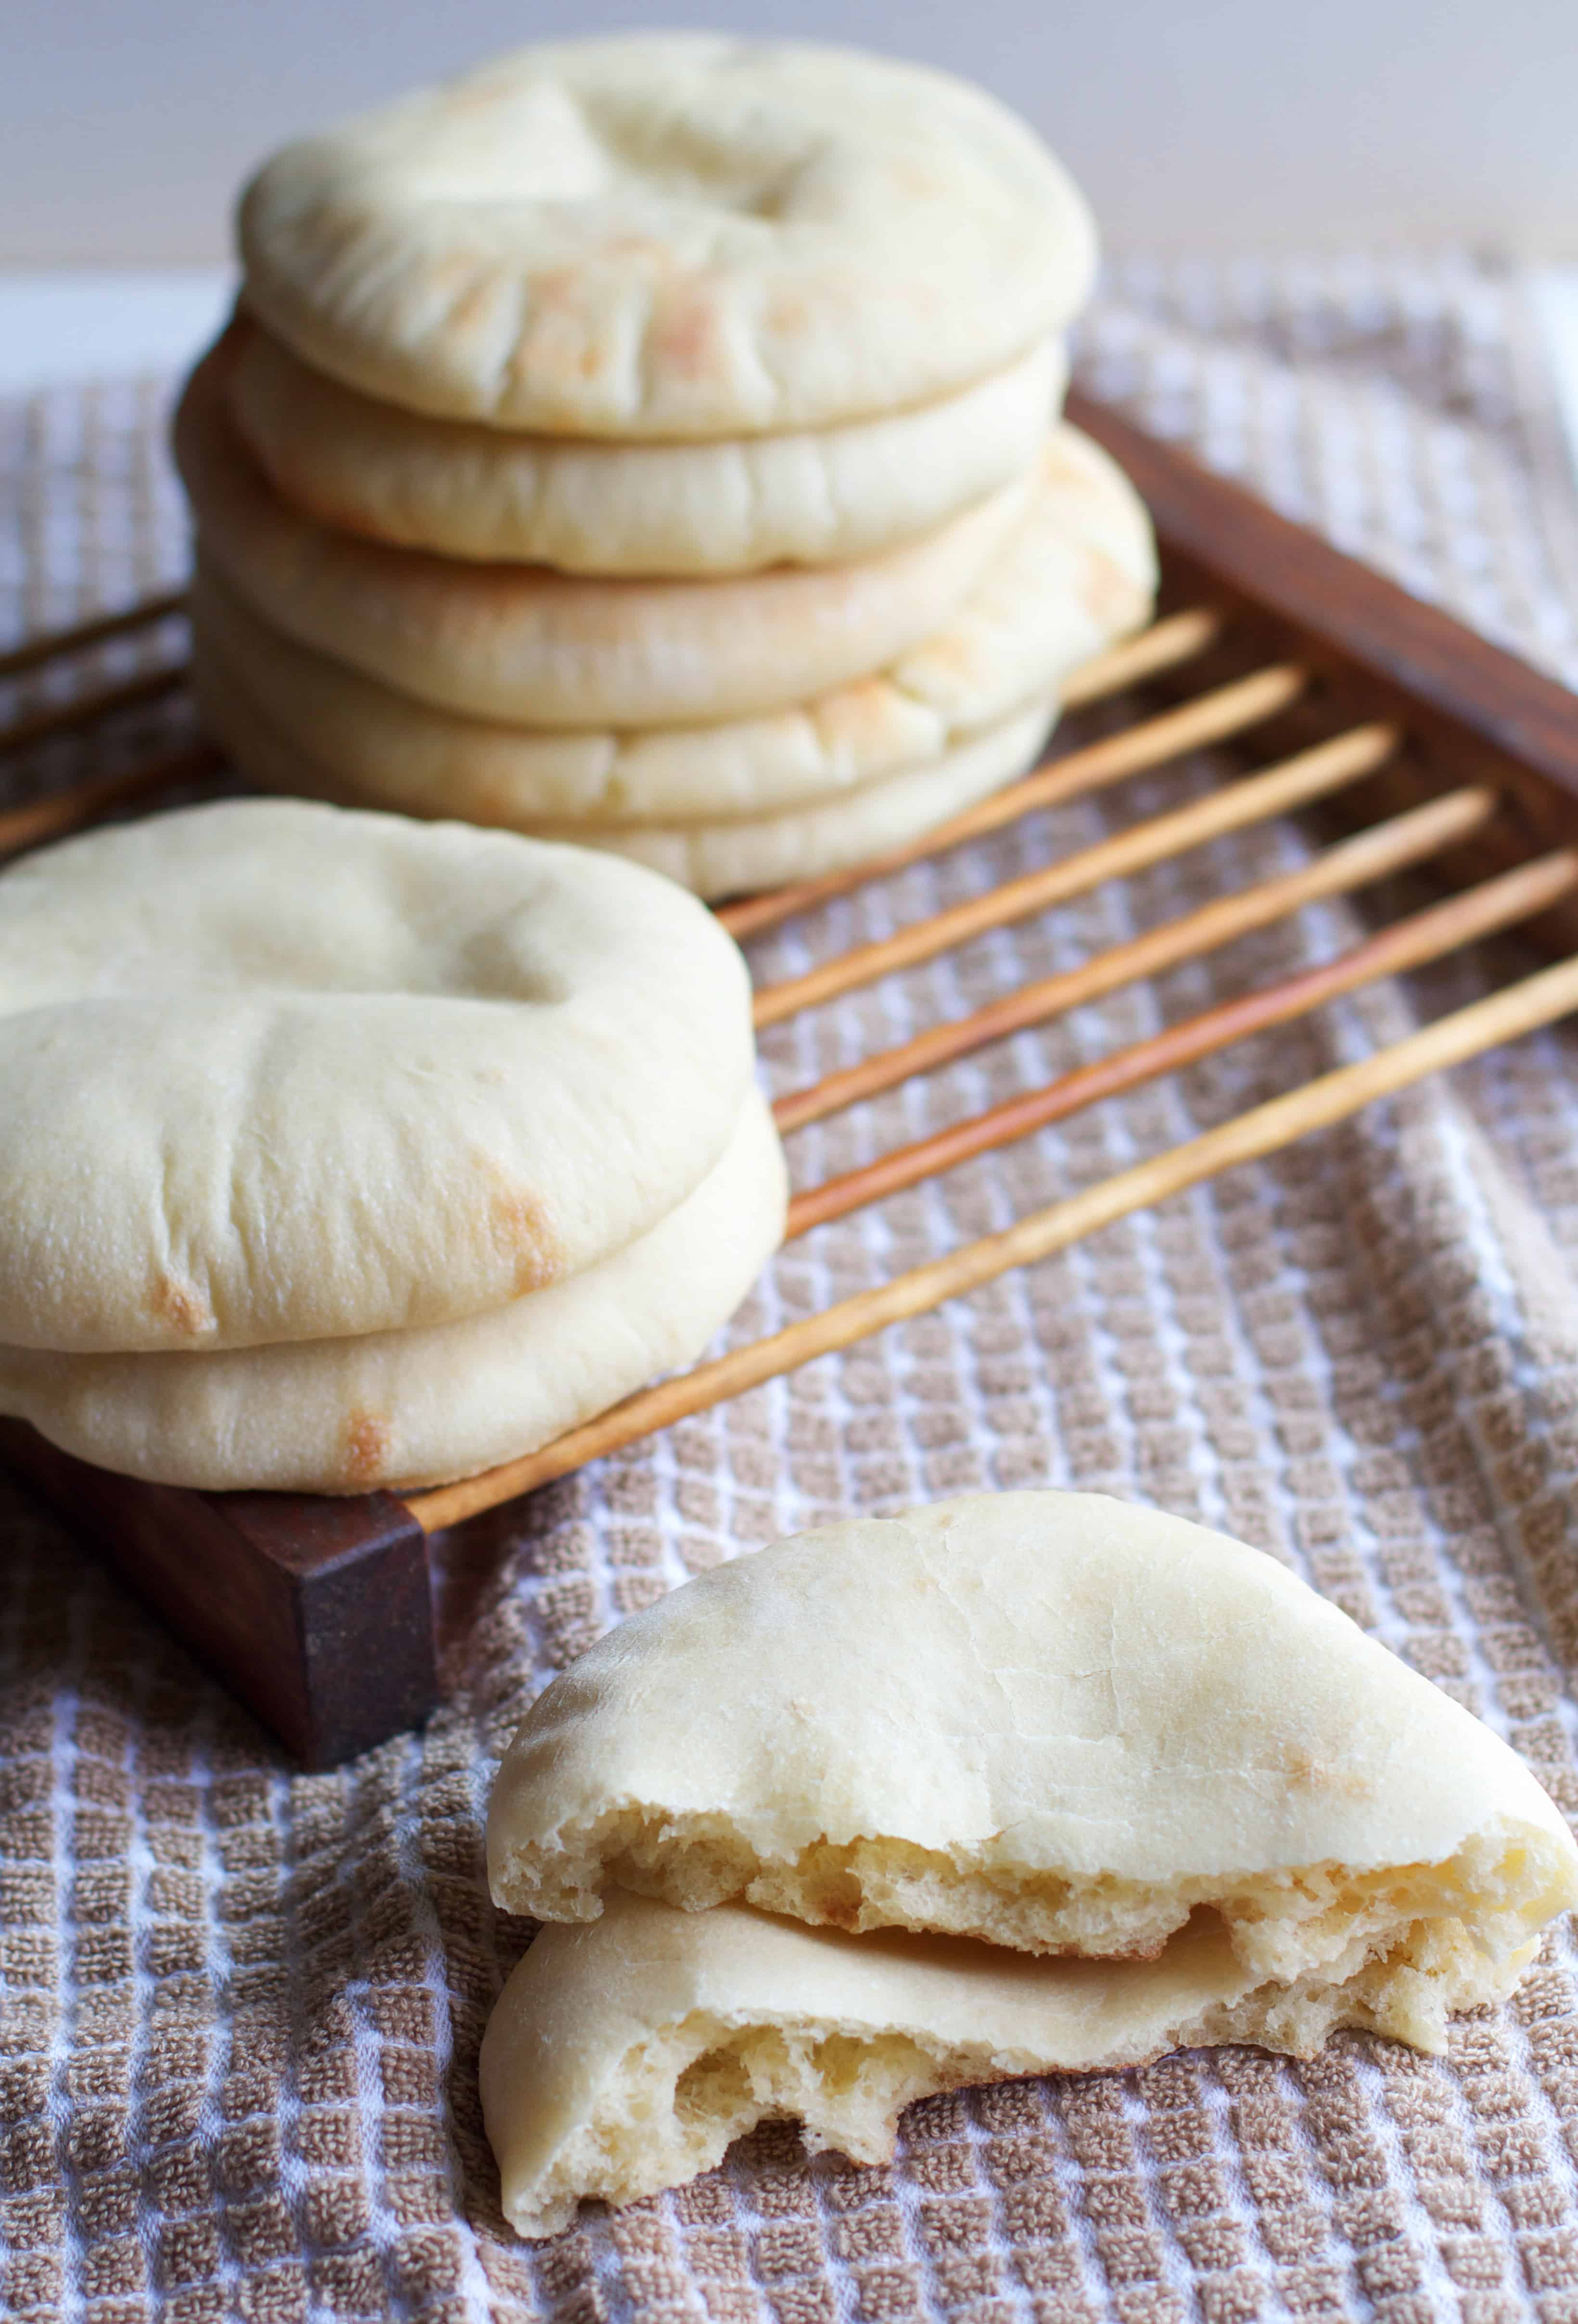
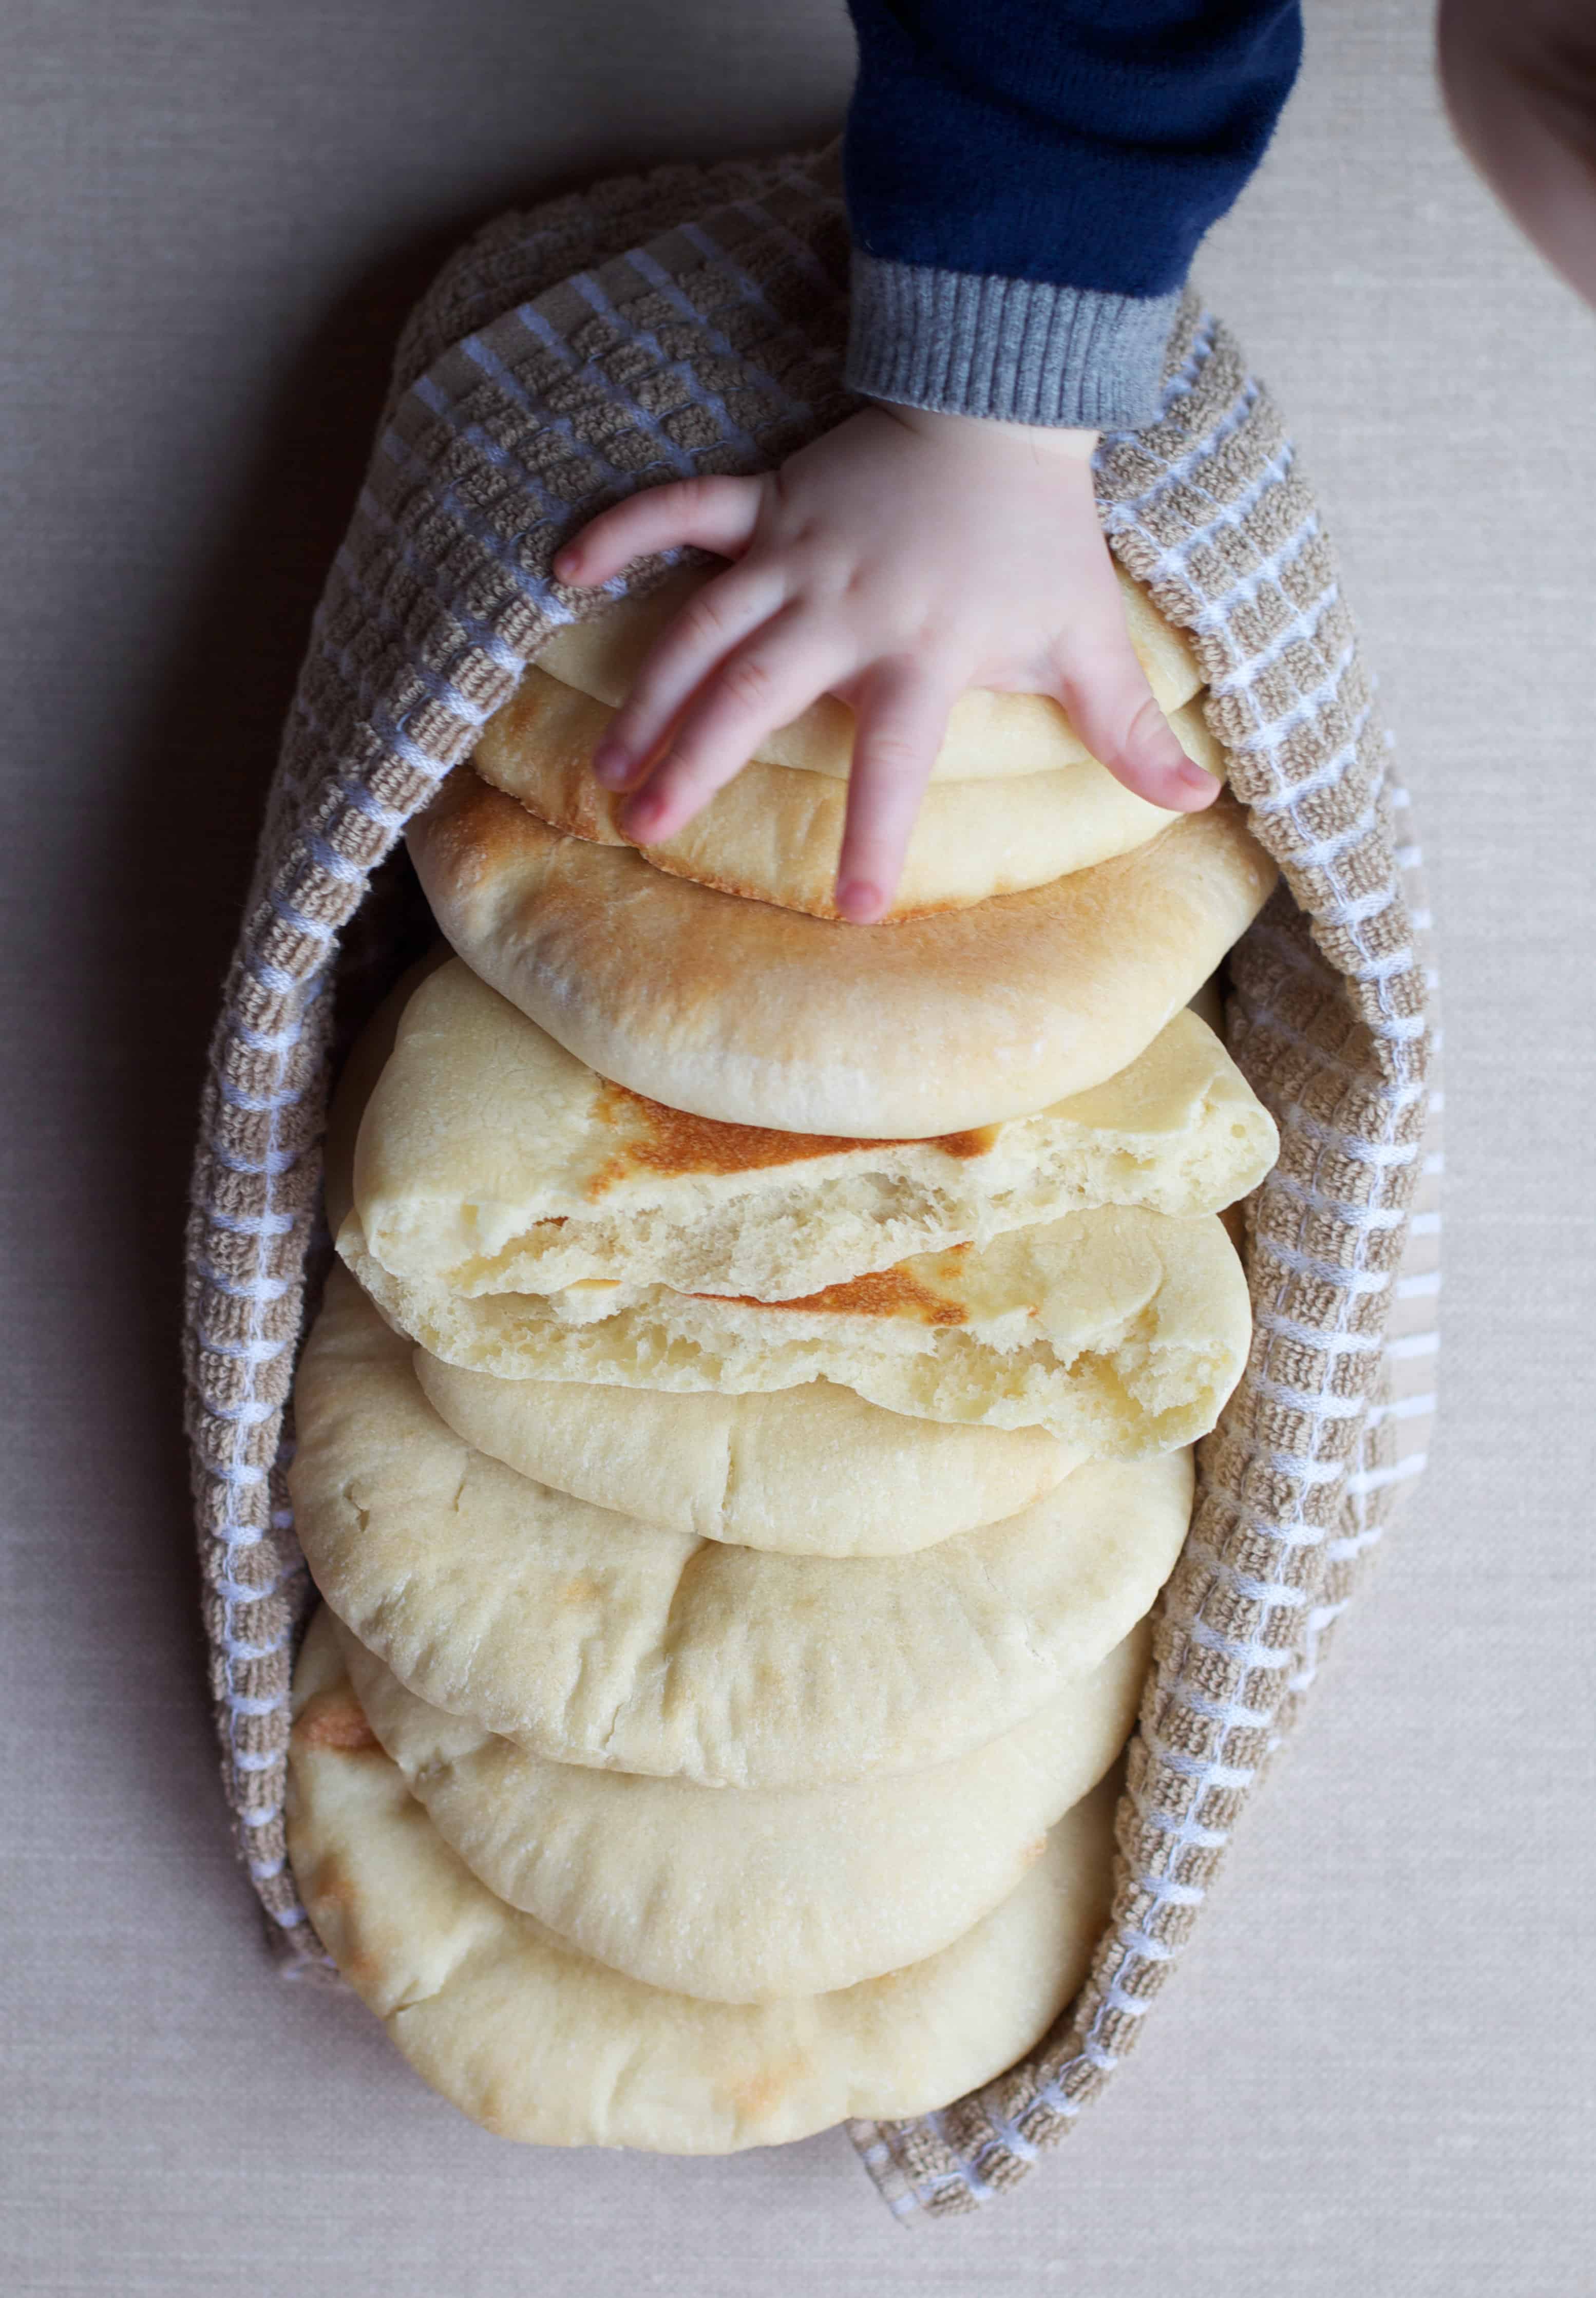
In our home, pita bread (called “khubez” in Arabic,) was more of a utensil than a side dish as most things we ate were dipped. As a result, my sisters & I grew up to be proficient “dippers,” knowing how to use a piece of bread to accurately scoop up a bit of whatever delicious thing my parents had prepared.
Throughout the years I was able to taste this amazing homemade bread several times when either my Tata was visiting or one of my Aunties prepared it, but I always knew learning to bake it myself was a must. Luckily my Mom took notes on Tata’s recipe from when she visited when I was a kid, and we worked from those notes to recreate this fluffy, wonderful bread.
 As far as bread recipes go, this one is pretty straightforward. Each step requires some proofing, but a couple hours of work results in the most perfect stack of puffy pitas. These are wonderful for making sandwiches, dipping, or anything else you heart desires. This recipe has officially become an heirloom for me and just maybe will for you too!
Note: After I first posted this recipe I have made it a few times, but my Mom is the one who has gone to make it every single week and really work out any kinks in the recipe. I made some edits as of 5/2018 that she insists make this a better recipe!
Tata’s Homemade Pita Bread
Ingredients
- 5 cups all purpose flour* (plus a little more for your work surface)
- 1 teaspoon yeast
- 1 teaspoon sugar
- 2 teaspoons salt
- 2-3 cups warm water
- 2 tablespoons olive oil plus more for bowl
Instructions
- In the bowl of a stand mixer fitted with a dough hook**, Stir together the flour, yeast, sugar, salt and olive oil.
- Turn the mixer on low and add the water, starting with 1 1/2 cups, and then adding about 1/2 cup at a time. You want the dough to be tacky, but not too sticky. You will know it is the right consistency when it sticks to the bottom of the bowl but pulls away from the sides. If you add too much water, add a little more flour until dough reaches the right consistency.
- Let the machine do it's magic for a few minutes until this consistency is achieved and the dough springs back when lightly pressed.
- Remove the dough, rub some oil onto the inside of the bowl and cover loosely with plastic wrap. Allow dough to proof in a warm place for 60-90 minutes or until doubled.
- When the dough is done proofing, punch it down and turn it onto a lightly floured surface. Use your hands to shape the dough into 8 equal-sized balls. (You can squeeze the dough through a small hole made with your fingers to shape it.)
- Place the balls of dough on a lightly floured surface and cover with a clean, damp, kitchen towel.
- On a floured surface, roll each dough ball into a thin round about 6 inches diameter. (1/4-1/2 inch thick) Cover rounds with the damp cloth while you finish rolling the rest.
- Let the rolled out dough rest for 20-30 minutes or until slightly puffy. (Depending on the temperature of your home your dough may not get puffy at this stage. If so don't worry, it will still bake up fine.)
- Preheat oven to 500F or as high as it will go. (The higher the better for this recipe.) Place an upside-down cookie sheet or pizza stone in the oven to get hot as well.
To bake:
- Carefully place 2-3 dough rounds onto the pre-heated cookie sheet or pizza stone.*** (You can transfer them into the oven directly or bring the cookie sheet out.)
- Bake for about 6 minutes, or until dough is puffed up, golden, and slightly crisp. Repeat with remaining dough.
Notes
*You can use up to half white whole wheat flour, but will likely need more water to reach the desired consistency.
** My Tata obviously did this by hand, but since we had a stand mixer at our disposal that is how we tested the recipe. You could obviously knead the dough by hand as well.
*** My Mom likes to place her shaped dough rounds on a plastic place mat which makes it super easy to peel off and transfer to the cookie sheet. You could also use parchment paper.
There’s just one thing I like more than a delicious piece of warm and moist cake, and that’s bread. Moreover, pita bread is one of my absolute favorite kinds, thanks to its simple flavor. I have to confess I’ve never tried to make it at home, since the bakery near my house makes such yummy ones, but we all know that homemade things always taste better, right?! So I think it’s time to give it a go! Thanks for sharing this family recipe!
xo, Elisa
What an amazing legacy your Tata has made for your family with this lovely bread! It really has to be the most perfect pita bread I’ve ever seen. I will have to make this for my boys!
Do you just use all purpose flour, or is there a certain type of flour to use?
AP Flour!
Omg that little baby hand, I just can’t. Too adorable.
Recipes from grandmas are always the absolute best.
I’ve always wanted to make my own!! These look awesome!
Homemade pita and your grandmother’s recipe?!
How special, Audra.
Thanks so much for sharing. We love pita and it’s plentiful here in Los Angeles,
but finding soft, fresh bunches is difficult.
I will have to try your Tata’s recipe!
Thanks so much for sharing it w us. xo
PS-Love Hugo’s little hands. They make the pita look even more yummy!
Oh I just love this post, Audra. It’s beautiful.
I love how simple it is to make this fluffy bread! And that chubby little hand — I can’t even.
These kinds of heirloom recipes are the absolute best. Thanks for sharing it and a little part of your world, Audra!
My husband’s grandmother is Lebanese, and we learned to make this a few years back. We live in Dubai now, and I’ve been visiting your site for Fall recipes. It’s our first Fall away from the Midwest, and I am JONESING for pumpkins and apples and spice. Your pumpkin bread and pumpkin pancakes helped a lot — thank you! Nice to see that we also share some Arabic ties. Grandma just taught us to say “habibi tabibi” to our little one.
Homemade pita bread! I need this, and I need to make homemade hummus and tzatziki to go with it, and then I’ll be the happiest girl around.
bread flour or all- purpose?
AP Flour! :)
What a beautiful story! How awesome that this has now been handed down, and you can hand it down as well. I love recipes like this! These pitas look absolutely amazing. Will be trying for sure!
My kitchen aid mixer just died. I make rolls, pizza dough, flour tortillas, etc in my food processor. I have asked for a new kitchen aid for Christmas, but in the meantime do you think I could make the dough in the food processor?
Teslam eidek Audra! These look amazing and I love Hugo’s little hand reaching for one, he’s well on his way to becoming a proficient dipper just like mama!
I have always wanted to make homemade pita bread! This recipe looks perfect!
Audra, thank you for sharing such beautiful family memories and a treasured recipe from your grandma. I just took a bread making class, so I am excited to try this recipe! Thank you again! Love Hugo’s hand on the pitas!
I’ve tried my hand at homemade pitas before but I’m sure they wouldn’t hold a candle to these!
I made this recipe today! It was a lot of fun, and I was surprised at how well the pitas turned out on my first try! I measured too much flour in the beginning, but with a little extra water, the dough turned out really well. I used my grandmother’s stand mixer, a nearly 30-year-old machine, and it made the job quick and easy. I think my Polish Buscia and your Tata Em Saleem would have gotten along well. :)
Daddy and I have relished our delicious pita bread all week. Wish you were here to bake more! I think we won’t want to go back to store-bought ever again.
Audra, this is fantastic! Such a great way to embrace your heritage! I’m from Ireland where pitta literally comes in packages that we re-heat in the toaster! This one is on my list! Thank you so much for sharing! :)
This recipe is lovely and I will try it without delay. We moved from LA to South Carolina a year ago and haven’t had a fresh bakery pita bread in that year. Would you have a never fail recipe for lavash? Or could I adapt the pita dough to make lavash? Lavash was our standard dinner bread and I have not found it anywhere since our move. I like to top it with olive oil and fresh herbs before putting it in a hot oven on a pizza stone for a few minutes to make a cracker. Thank you for your support and passion for tasty wonderful flavors.
I’m not too familiar with lavash. What is it like?
Thank you for your reply Audra. Lavash is another Middle East bread that is very thin and can be used for wraps or, as I use it, bake it for a few minutes until it becomes a cracker. I will look on the web for recipes, but just wondered if you had baked it. There is a Persian variety that I use to watch the bakers make that started as a small, very wet, ball and ended up being 3 feet long and 1 1/2 wide and less than 1/2 inch thick. They would be wrapped in parchment paper. People would drape them over their grocery carts. Again, thank you for your question.
Perhaps you mean Laffa? Sounds like Laffa. :)
Nope- this is pita bread :)
(in response to Rita’s “Lavash”)
can I double the recipe to make more than 8 loaves?
Audra, I just baked your pita recipe and deleted all the others in my collection. With some minor tweaks, these pitas were terrific!
Set oven to 550°F with a good quality pizza stone on the middle rack. All the pitas puffed quickly and were nicely done in under 3 minutes, the bottoms golden brown and the tops steaming like Old Faithful.
Used my processor on high to mix all the ingredients at once. Perhaps you could include metric weights to make duplicating results easier.
I was careful about using too much bench flour, which makes creating the dough balls difficult. It also creates a problem in getting the dough balls to have equal weights since the bench flour prevents good adherence of more dough from overweight balls.
Thank you for this excellent recipe.
Herman
One more important thing: I used Caputo 00 chef’s flour. This Italian flour is great for pizza crust and all other breads.
The bread tasted good, nice crumb, but didn’t really puff up. I admit to going half whole wheat with the AP flour which probably made it too heavy. Also half yogurt, half water but still…too heavy. Probably not the fault of the poster. Still looking for a reliable recipe. May try yours with strictly AP in the future. In the meantime, Chef John’s still seems at the top of my list. Thanks, though.
I’d definitely follow the recipe next time you try. You don’t want to be using yogurt in this recipe for sure. A small amount of WW flour mixed in can work, but usually I start with all AP and then gradually add WW in to see how I like it.
Oh? Yogurt is often included in many flatbread recipes, it seems to me. Why might Yogurt not be proper in this recipe?
I use this recipe weekly and end up with wonderful puffed up pitas. I have used the recipe with only WW flour and they still puffed up, not as much as AP, but they still had the pockets. My suggestion to you is to make sure your oven is set to its highest temperature and to use a pizza stone.
This recipe isn’t for flat bread- but pita with a pocket. Traditional recipes from the Middle East just contain flour, yeast, and water. :)
I tried your recipe yesterday! The taste is great, but my pitas did not rise after I rolled them flat :-/ Not sure why… Perhaps the type of yeast? Thanks for sharing!
If your yeast was fresh it should have been fine. I would check and make sure it’s fresh!
Thanks Audra for your reply! I used dry yeast so that may be the reason. Can’t find any fresh yeast where I live :-/
Hello,
I haven’t finished the recipe, but I can already tell it is going to be a waste of 4 1/2 cups of organic AP flour…
From my experience so far, there is way too much flour for the water. I had to add at least 1/2 cup of water to be able to form a dough, and 1/2 more so that the dough didn’t have the tecture of dried-up playdoh. I just found another reciepe calling for the same ingredients, but 3 cups of flour for 1 1/4 cup of water, which sounds like a much more reliable ratio.
I hereby solemnly promise that I will never ever again try recipes that don’t have reviews.
Confused by what you mean by your last sentence because there are several review of the recipe in the comments.
What you are looking for is a specific texture/consistency. Everyone’s climate and elevation is different which plays into how much water is needed. Add more if needed to the point where the dough no longer sticks to the bottom but is soft and supple.
But I’m going to make it more clear in the recipe that more water may be needed.
Thank you for already adding the comment about the water! I think I ended up almost doubling the quantity that is in the recipe.
I have to say that your indications about the texture made it really clear that what was is my bowl initially was NOT what I was looking for and helped me rectify.
In the end, they turned out ok, a bit stiff and less puffed up than should be, but not inedible. Still, I will try with just 3 or 3 1/2 cups of flour next time to get a more supple dough.
You’ve changed the recipe. I don’t know if I should use this new one or the one before as the previous one was perfect.
You’re right I did! I meant to write a note about why and I will include that.
Basically after I posted this recipe my Mom has gone on to make this bread 1/2x a week and insisted I edit the recipe to reflect what has worked so perfectly for her. She promised the edits are tried and true and more clear. I’m sorry for the confusion. Try this version and let me know what you think!
If you have the original recipe, I’ve been looking for it – for like 5 years.
Hi! Which recipe do you mean? The one I had originally shared? My Mom who makes it regularly said this new version was much better and more reliable, but I will see if I have the old version somewhere too.
Hi Audra, what kind of yeast do you use? Is it instant dry yeast? Active Dry?
Thanks so much!
Thank you for sharing this lovely memory and recipe. Making these as I type and they’re turning out so well!
In the UK where pretty much everything Middle Eastern is known as Lebanese, none of the Lebanese restaurants even know this bread. They all use a much thinner bread that has a more elastic consistency.The Syrians too. Fine for wraps but not as nice for dipping. The Egyptians have something similar called Khobez baladi but that too is not as fluffy and tastes a bit different. Iraqis have something called Samoon bread. Only places that do it are the Israeli Falafel shops and the odd Palestinian restaurants (very few). Makes me conclude that is should probably be called Palestinian Pita bread.
I may have commented with this story before… desperation drives me to try again.
Theres a middle eastern restaurant in my area with an actual taboon (the name of the restaurant is Taboon)… and they make the BEST PITA BREAD. I would routinely go in after work and buy a big bag of it to take home. There was a serious, high-strung older fellow that made the bread. He would handle that big, wooden paddle in and out of the mouth of that blazing hot oven with intensity. Sometimes, he would be crabby — muttering in Arabic. I always wondered what he was crabby about, worried he was sick of me coming in to buy big bags of bread (of course, I always ordered ahead of time!).
Maybe he was hot. Or tired. I have no idea.
Then, to my dismay, they closed that location down. So, I decided to give making pita bread at home a try. I did some searches online and settled on a recipe. It was surprisingly easy. Almost too easy. The bread that was coming out of my oven tasted identical to Taboon’s bread. I literally ate the whole recipe before they could cool off completely. Thinking it was a fluke, I tried again the next day — same result (though, I didn’t eat ALL of it the second day).
It was Spring at the time and pita bread is more of a cool weather activity if your oven is in the house. It wasn’t until about 2.5 years later I decided to make it again. I grabbed my haphazard stack of printed recipes to find the recipe I had used. I couldn’t find it but I remembered some very specific things about the recipe. They were so specific in fact I recalled thinking that first time, “I can definitely find this again online if I lose this piece of paper”.
Oh, the lies I tell myself.
The instructions said something like make a “well” in the flour, kneading was by hand, “500 degree” oven, “lowest rack”, “inverted baking sheet if you don’t have a baking stone” — and I was so sure, “Tata” and a bit about her story. Knowing such details I was pretty confident I would easily be able find the recipe again.
I was so wrong.
I embarked on a (rather nutty) journey to find that recipe or reproduce it.
I tore my house and office apart (several times) looking for the paper recipe. A couple of years ago I dedicated an entire afternoon to reading EVERY PITA BREAD recipe on Google. I made a system where I tried using different ingredients and longer rises. Honey vs sugar, sea salt vs kosher vs table salt, APF vs bread flour vs mixing different flours, regular yeast vs professional grade yeast. I tried adding powdered milk, yogurt. I had a little stack of yellow sticky notes with ingredients and measurements written on them. I would try one recipe and go to the next one. If the recipe was good, I put a star on the sticky note. I stuck the sticky notes into a notebook with the date and any pertinent notes next to it (positive or negative).
I still occasionally find a yellow sticky note in a drawer or something.
I did get close a couple of times. Some of the recipes were really good but they weren’t what I wanted. Eventually, the weather changed and I abandon the baking until the weather cools off again.
In the meantime, I researched how yeast works, how salt can mess with it, how over-proofing can mess with the yeasty flavor. I read articles about restaurants, I did a lot of digging about yeasty flavored pizza dough – at one point I had several marked bowls of modified pizza dough rising in the fridge thinking maybe a 1, 2 or 3 day slow, chilly, rise would get me where I wanted to be.
To date, I’ve tried at LEAST 20 different (half / quarter) recipes and a staggering amount of variations of those recipes. It wasn’t unusual for me to do 3 or 4 recipes in one day.
One recipe was very close (I think it had “Hilda” in the name?) I thought maybe it was the one I was looking for all along — but I wasn’t completely convinced. How could my memory be so wrong? Had I just injected the Tata story into a different recipe? Did I blend one recipe into another? Did I use the instructions from one recipe and the measurements and ingredients from another?
I have the Hilda sticky note on my refrigerator because it was hands down the closest I’ve come to that first recipe. On some level, I started to force myself to accept Hilda’s recipe as the go to — but it not quite right. I don’t know what’s wrong with it and my head spins when I think about what tweaks to try.
It eventually dawned on me that the first recipe I used years ago, the one I was so sure was “Tata’s”, may have been edited. I navigated to this page and carefully read everything. At the end, I saw the note that it had been edited (maybe more than once). I wasn’t sure if I would ever find the original but at least I felt like I hadn’t imagined the whole thing. I WAS able to find an older version of Tata’s — but it wasn’t the original.
I know some people think “tender” is an upgrade when it comes to bread. I disagree. I like chewy bread. I went on a similar recipe quest for a dry, flavorful, chewy tortilla recipe that would crack if I bent it — that’s what I wanted, but those qualities are considered negative so I never found one.
I believe (I can’t “know” it because I can’t prove it) that Tata’s original, old-school pita bread recipe was the recipe I started with. It was perfect. And I had it in my possession. And I lost it. And every year when the weather begins to cool off I think of Tata’s hands expertly making dough without measuring anything. I can see it in my head like a movie. I can smell it. I can taste it. I can see the piece of paper I printed that had gotten wet. I can remember so clearly not being alarmed about the paper being destroyed by water because I was positive I would be able to find it again.
This is not meant to downplay the improvements your mother made. If a tasty, soft, tender pita that always poofs up is the gold-standard, this is a great recipe for that. But, if someone wants a flavorful, old-school, chewy pita that may or may not poof (I couldn’t care less about the poof) and eating it requires a robust amount of saliva generation to swallow the bread, our hands are empty and sad.
My hands.
My hands are empty and sad.
I’m debating if I should make my first pita recipe this Winter. I’m grinding my teeth and fretting internally about that lost piece of paper. I’m debating if I should tear the house up (again) to find it. Wondering where I haven’t looked yet (I have looked everywhere). Searching Google (again) to find that one recipe — even though I know it’s gone. Searching for a new recipe I haven’t seen yet.
Searching for the 100th + time is what brought me here today.
I can’t let it go.
Please post the earlier version(s).
Please.
Hi Emily! Thanks for sharing this story.
Ok- so this recipe is almost identical to the original recipe which was my Tata’s. The only real changes were starting with a bit more flour and adding the note about knowing the dough was done when it pulls away from the bowl.
Have you tried this one? I may have changed the instructions but the changes to the ingredients are super minimal. The old one started with 4.5 cups of flour and used less water, but I always ended up adjusting that as needed. YOu want the dough to pull away from the bottom of the bowl!
I’m sure my grandmother made this by hand but my Mom and I have always used a mixer. Let me know how I can further help troubleshoot.