Chocolate Croissants (Pain au Chocolat)
Back in March, the day I left for Paris, I couldn’t help but give Homemade Croissants a go. I’d always wanted to try them, and it seemed fitting to learn how to make the famous French pastry before eating little else for a few days. A few weeks after I got back from that trip and visited King Arthur Flour for this lovely weekend, I bought a bag of “Pain au Chocolat Sticks” from their amazing baking supply store with the goal of tackling them again, this time in the chocolate variety I adored so much in Paris.
Soon afterwards, summer happened and there was no way that my steamy kitchen could handle the pressure of keeping all those layers of butter chilled. So I popped the chocolate bars into the freezer, waiting for cooler weather. Well, I found them in the freezer last week as I was preparing to use things up before the move, and since I was invited to a brunch potluck Saturday, it seemed like the perfect time for my croissant adventure #2.
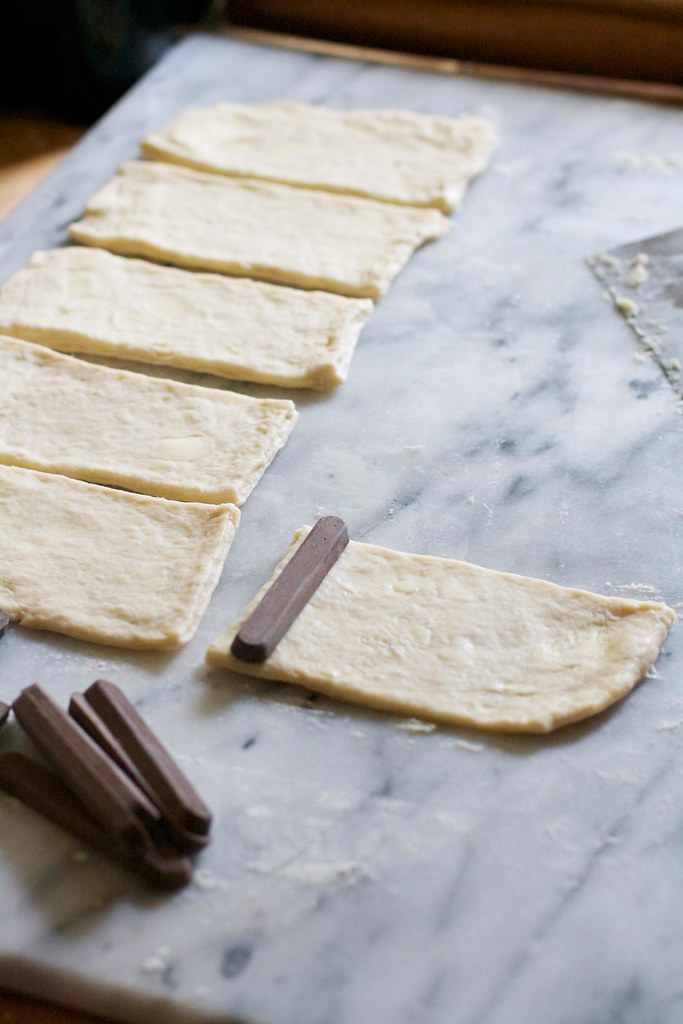
The process of making these begins exactly like regular croissants. (This post outlines all the steps including a picture tutorial.) Instead of cutting the dough into triangles and rolling them into a crescent shape, they are cut into rectangles and filled with either a thin piece of chocolate or some chopped chocolate. (If using chopped chocolate I would probably place it in the middle and fold inwards.)
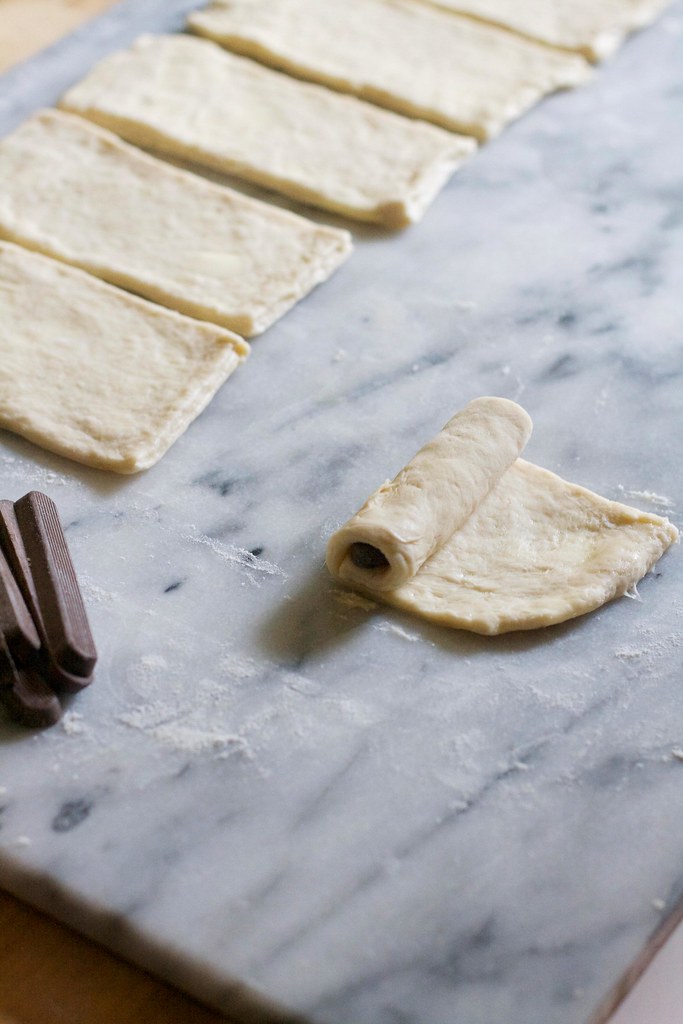
The dough is rolled around the chocolate and placed on a cookie sheet to proof for 45-60 minutes.
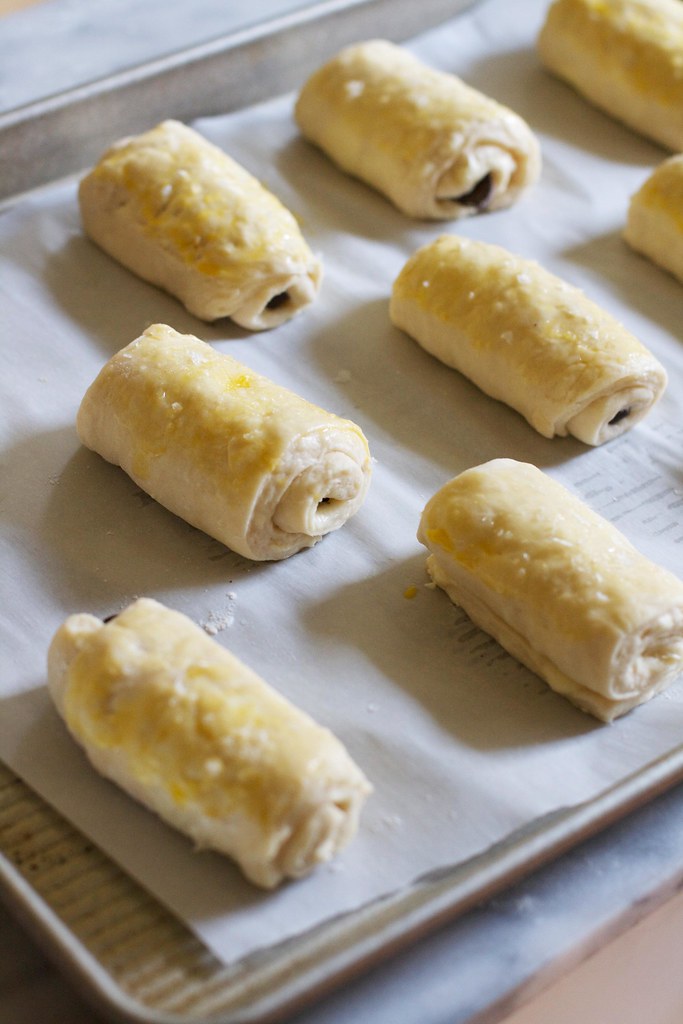
The proofed dough gets brushed with egg and in my case, just a sprinkling of flaky sea salt (which I think makes everything better.)

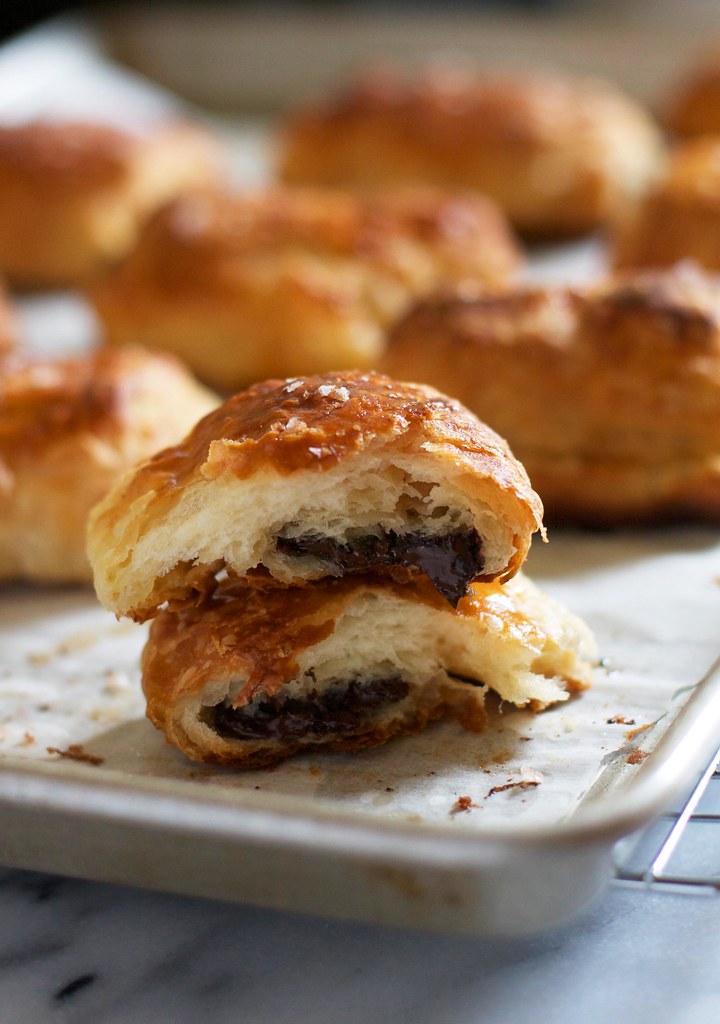
Now, I am not too proud of how non-uniform these babies ended up after baking, if you’ve made pain au chocolat before and know how to make these all look the same size- I’d love any tips. However- they were even better than last time, so flaky, full of the best European butter, and the chocolate inside was just what I wanted. (Now if only they were fast enough to make every day!)

Chocolate Croissants (Pain au Chocolat)
Ingredients
- 1 batch of Croissant Dough, chilled but not rolled out
- 16- 3 inch chocolate sticks, or 1 1/4 cups chopped semi sweet chocolate
- 1 egg, beaten
- flaky sea salt for sprinkling., optional
Instructions
- Cut the dough in half and return the rest to the fridge to chill until you're ready to use.
- On a well-floured surface, gently tap dough to flatten and then roll into a 12x12 square, lifting and dusting with more flour around the edges as needed.
- Using a ruler cut the dough into 4 equal 6x6 squares, and then cut each square vertically making 8 3x6 rectangles.
- Place a chocolate bar at one end of each rectangle and roll dough around it. Place on a parchment-lined cookie sheet- seam side down and flatten slightly.
- Repeat with the rest of the dough. (I only have one cookie sheet that is big enough so I didn't even roll out the second half of the dough until the first batch finished baking. You could bake both at the same time if you'd like as well.)
- Cover croissants loosely with plastic wrap and allow to proof for 45-60 minutes, until puffy. Brush with egg and sprinkle with sea salt if desired.
- Bake at 400F for 16-20 minutes, or until croissants are golden brown. Enjoy warm or room temperature.
Notes
Recipe adapted from Cooks Illustrated.
Nutrition Information:
Yield: 16 Serving Size: 1 gramsAmount Per Serving: Unsaturated Fat: 0g
Pain au chocolat is my favorite baked good ever! Actually, I’ve never tried to recreate it at home from scratch, since the whole process sounded a little intimidating to me and I was pretty sure it would’t have come out the way I wished! But you made it look quite easy and I love that they came out with different shapes and sizes, it makes them look even cuter and gives them that homemade mark that makes everything better!
xo, Elisa
I agree it can be intimidating- but really its more time consuming than anything else. Give them a try! :)
Seriously we need to have a baking day… maybe a French-style baking day! We need to make this happen asap:-)
These look great and remind me of my trip to Paris years ago.
These look delicious! And easy. I love the addition of salt!
These look fantastic and I wish my kitchen smelled like them right now. And that approximately two dozen of them would magically appear in front of me. :)
My one attempt at croissants years ago was not remotely a success. Yours look lovely!
We should make them together sometime!!
I love croissants….plain and w chocolate.
Never tried making the dough myself. Maybe I’d have the guts to try your recipe now???
Hope you’re doing well, Audra doll! xo
I love the KA makes these little chocolate sticks! My BF loves pain au chocolate! Thanks for the inspiration to make croissants again!
This is SO impressive. I still haven’t tried tackling croissants but I’m working up the courage!
Uniform or not, these bad boys look absolutely delicious!! Pretty sure I could devour half the tray. I looooove croissant and wish I had the patience to make them….maybe one of these days. Until then I’ll drool over these photos :)
I’m so jelous because your trip to paris, I never been there and i would love it with all my heart… well at least i can taste a litte part of paris in my own kitchen..
I loooooove chocolate croissants! These look perfect :)
What a decadent treat! I’ve always loved croissants, but I haven’t yet talked myself into making them at home. Yours look absolutely perfect, especially with all the light, flaky layers and the hint of sea salt on top.
You are crazy, girl, because I think these are seriously beautiful!! As soon as I have a bit more free time on the weekends (re: after the marathon) I need to get to making some croissant dough. And these.
This is my favorite French pastry. Yours look amazing! If only we could have them every day.
OMG THESE ARE LIKE EVERYTHING I COULD EVER WANT OR NEED OUT OF LIIIIFE
I need to gather up the gumption to make my own croissants – because pain au chocolat is one of my favorite carby sins. These are beautimus.
Once in awhile, I buy chocolate croissants in a package from the store. I know, I know – so not the same as homemade! I didn’t realize how easy it was to make these chocolate stuffed. Now to make some croissant dough.
Just made these, and oh wow, they are so good!
Thank you for this recipe! I just returned to the states after spending a year in Europe, and was dying to have some pain au chocolat again! I made this recipe with my sisters and they loved it! Best croissants they’ve ever had! The recipe itself was very easy to follow, but definitely time consuming and labor intensive. However, the end result is worth the time!
Thanks again!
Could these be frozen before they are baked?
Where did you find chocolate sticks to put inside the croissants? I’m making croissant dough and would like to make some chocolate croissants. I like the shape of the chocolate sticks you used!
Hi Lee- I got them from King Arthur’s Flour
Thanks so much for posting this detailed recipe! I made it this weekend and the chocolate croissants turned out amazing. I made your croissant dough recipe on a Friday after work and let sit overnight, and then rolled out into chocolate croissants on Saturday morning, which worked out great. It was my first time using active yeast or even a rolling pin, so I really appreciated the pictures and detailed descriptions. I had trouble rolling the dough into perfect squares and ended up with some small scraps that I formed into mini croissants to save for my friend’s daughter and she loved them :) Even though this is time intensive, the active time isn’t unreasonable so I could run errands or finish up other work while waiting for the dough to rise. I would definitely recommend for other beginners to try if you can carve out the time. Thanks again!
I’m so glad- Thank you!