Homemade Croissants

I love me a good challenge. Thousand piece jigsaw puzzles, crosswords, board games- you name it- I want to figure out (and win when it comes to games!)
When it comes to baking related challenges, my own fear of wasting my time and ingredients often stops me from giving tricky recipes a shot. That’s not to say I haven’t done it- but so often I get so comfy making what I know- that I don’t travel far out of my comfort zone.

When Lindsay posted about a “kitchen challenge” series- and that the theme for March was croissants- I felt like it was just the push I needed to tackle these. I also figured that when I get back from Paris I’ll miss these delicious pastries and will appreciate knowing how to manage a homemade version. (Though I’m writing this before leaving- I’m actually in Paris now!!)
I have to say that croissants aren’t nearly as scary as they seem. I did half of the steps Friday- let the dough chill overnight- and was able to bake them up in time for Saturday brunch. (Hours before leaving for the airport… I’m crazy like that.)

I had a bit of panic Friday afternoon- positive that these were ‘t going to turn out and that I’d have to start over late at night. (I even have an extra pound of Europen butter to prove it.) I saw some butter through the dough- and I worried that once baked- those butter chunks would melt and form a huge disastrous mess.
Lucky for me- I followed and advice that everything would be Ok and I went with it. There was a little bit of melty butter on the pan- but barely enough to worry about- and after I had my first bite of buttery flaky goodness I was sold.

I sprinkled a bit of flaky sea salt on top of the these before baking which added a nice touch. I scarfed down a couple of these as is- but I fully intend on making myself a “croissanwich” the next time I make these. Even though I plan on making these again (and again) to perfect my technique, I’m pretty darn proud of how my first attempt turned out!

Homemade Croissants
Recipe from: Baking Illustrated
Ingredients
For the dough:
- 3 cups 15 oz. all-purpose flour, plus more for the work surface
- 1 tbsp. instant or active dry yeast
- ¼ cup 1¾ oz. sugar
- 1¼ tsp. salt
- 1¼ cups whole milk, cold
- 2 tbsp. unsalted butter room temperature
For the butter square:
- 24 tbsp. cold, European-style butter (like Plugra) cut into 1-tablespoon pieces
- 2 tbsp. all-purpose flour
Egg wash:
- 1 large egg, lightly beaten
- Flaky Sea Salt, optional
Instructions
To make the dough:
- Combine 2¾ cups of the flour together with the yeast, sugar and salt in a medium bowl. Whisk together and set aside.
- Add the milk to the bowl of a stand mixer fitted with the dough hook. Add the dry ingredients and knead on low speed until a ball of dough forms, about 5 minutes.
- Cut the butter into small pieces and add them to the dough. Continue to knead until the butter is fully incorporated and the dough is smooth. The dough should form a ball and begin to clear the sides of the bowl, about 5-6 minutes more. The dough should be sticky but if the dough sticks more to the bowl than itself, add the remaining ¼ cup of flour a small bit at a time as needed.
- Wrap the dough in plastic wrap and refrigerate for 1 hour.
To make the butter square:
- Using butter that is cold, but not rock hard will make forming the butter square easier. Leave it out at room temp for 15-20 minutes to soften it just a little. (It shouldn't be room temperature)
- Toss together the butter pieces and flour on a clean work surface. Smear the butter chunks back and forth using a bench scraper against the work surface until they have combined into a smooth, homogenous mixture. This will take some elbow grease, as you really need to make sure the square is smooth and pliable. **
- Wrap the butter mixture in plastic wrap and use the edges of the plastic to form it into a 7-inch square. Refrigerate until ready to use, at least 30 minutes.
- Dust a work surface with flour.
- Roll the dough into an 11-inch square .
- Place the chilled butter square diagonally onto the dough.
- Fold the corners of the dough up over the butter square so that they meet in the middle and pinch the edges of the dough together to seal them.
- Using a rolling pin, gently tap the dough starting from the center of the dough and working outward, until the square becomes larger and the butter begins to soften. Your goal is to push the butter out the the edges in an even way. (though from my experience even though the butter broke up a bit it still worked just fine.)
- Start gently rolling the dough into a 14-inch square, being careful to make sure the work surface stays well-floured and the dough is not sticking.
- Fold the dough into thirds to form a long rectangle.
- Starting from the narrow ends, fold the rectangle into thirds again to form a square. (This completes two turns of the dough.) Wrap in plastic wrap and refrigerate for 2 hours.
- After the dough has chilled, Repeat the folding process, tap the folded dough square starting from the center of the dough and working outward, then rolling out to a 14-inch square. Fold the dough into thirds to form a rectangle and into thirds again to form a square, completing two more turns. Wrap tightly and refrigerate for another 2 more hours.
- To shape the croissants, line two baking sheets with silicone baking mats or parchment paper.
- Place the chilled dough onto the floured work surface and gently roll into a 20-inch square. (My pastry slab didn't fit this so I did half at a time.)
- Cut each half into three rectangles and then slice each rectangle diagonally to yield 12 triangles.
- Working with one triangle at a time, gently stretch the dough so that the two long sides are equal in length.
- Cut a 1-inch slit in the base of the triangle.
- Fold the two corners of the slit outward and begin rolling the triangle up, gently stretching the dough as you roll. Leave the last ¼-inch of the tip unrolled.
- Transfer to the prepared baking sheet and fold the ends toward each other to make a crescent shape. Repeat with the remaining portions of dough.
- Cover loosely with plastic wrap. Let rise at room temperature until puffy, about 45-60 minutes- they won't double in size, but they will puff up- especially on the edges.
- Preheat the oven to 400 F. Brush the shaped croissants lightly with the egg wash- sprinkle with sea salt if desired.
- Bake until the croissants are golden brown, 18-22 minutes, rotating halfway through baking. Allow to cool on a wire rack at least 15 minutes. Store airtight at room temperature for up to 2 days.
Notes
* Butter should be cold but not too cold- let it sit out at room temperature for 15-20 minutes to soften just a bit ** If you don't have a bench scraper, put the butter between two sheets of plastic wrap, and pound it with a rolling pin. You may also freeze half of the unbaked croissants for up to two weeks. Simply freeze before proofing, and when you're ready to bake, allow them to come to room temperature and proof as normal. (though they may need a few more minutes.)
Nutrition Information:
Yield: 12 Serving Size: 1 gramsAmount Per Serving: Unsaturated Fat: 0g
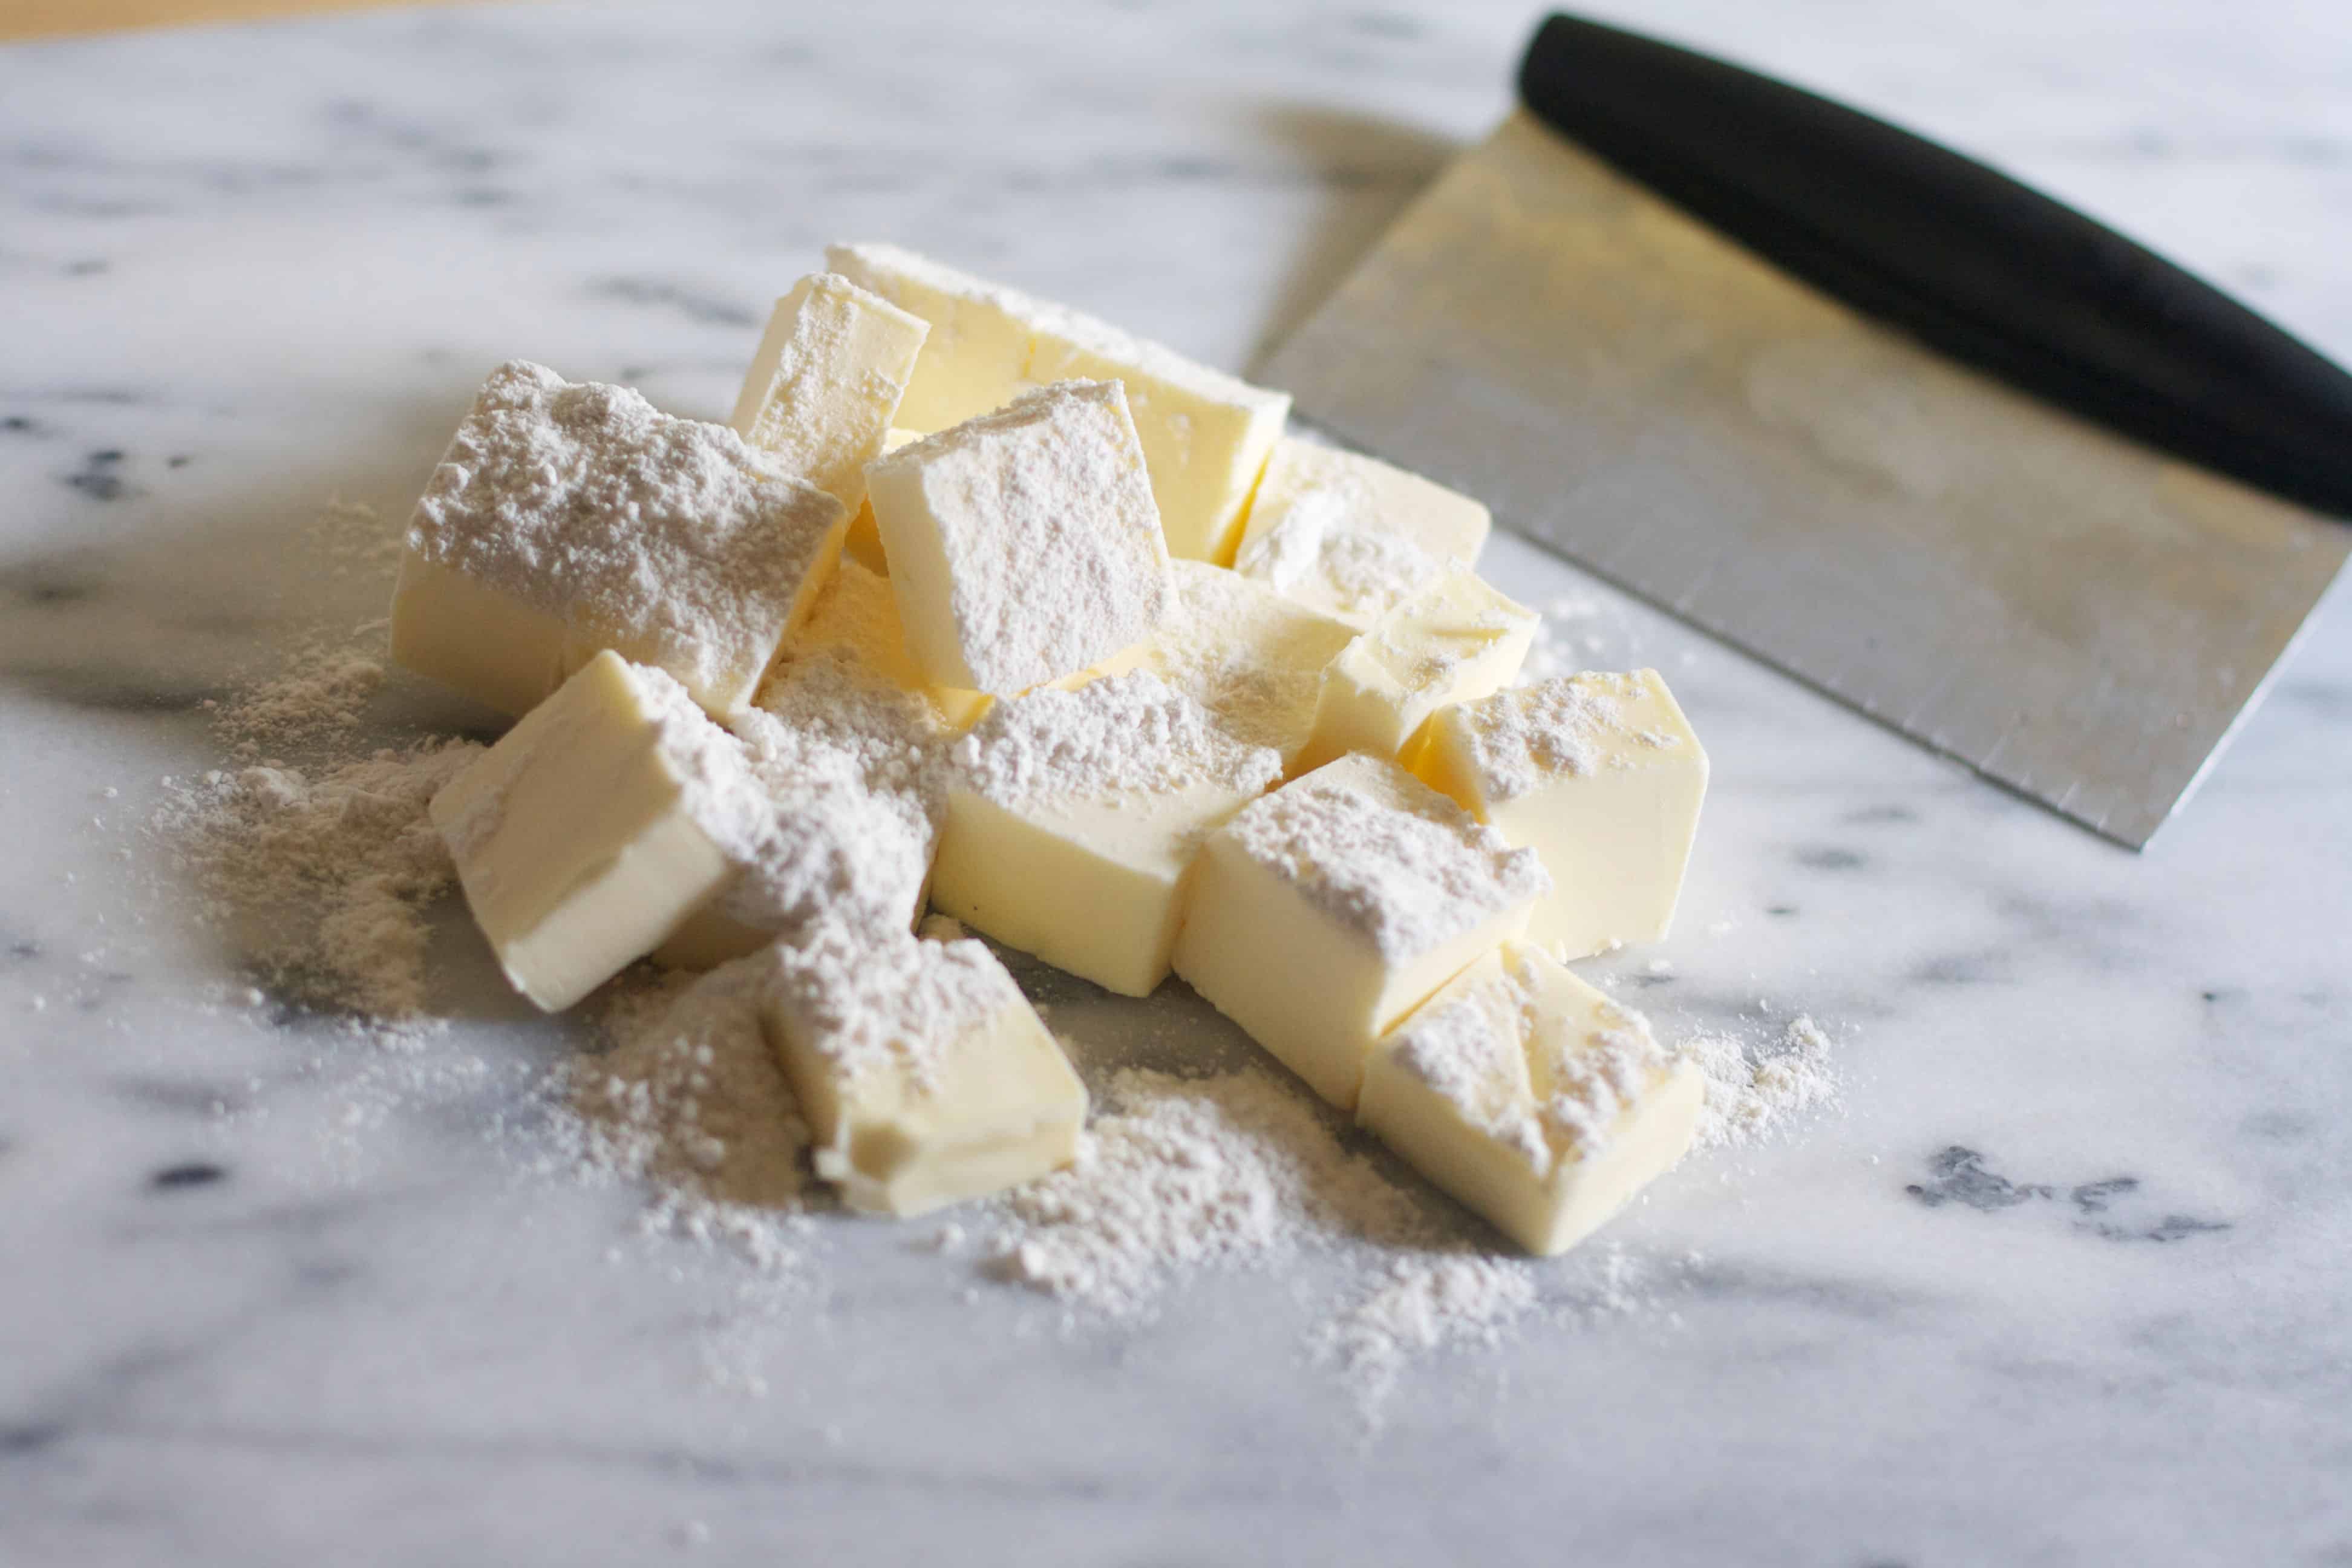
Toss the butter and flour together on a smooth work surface.
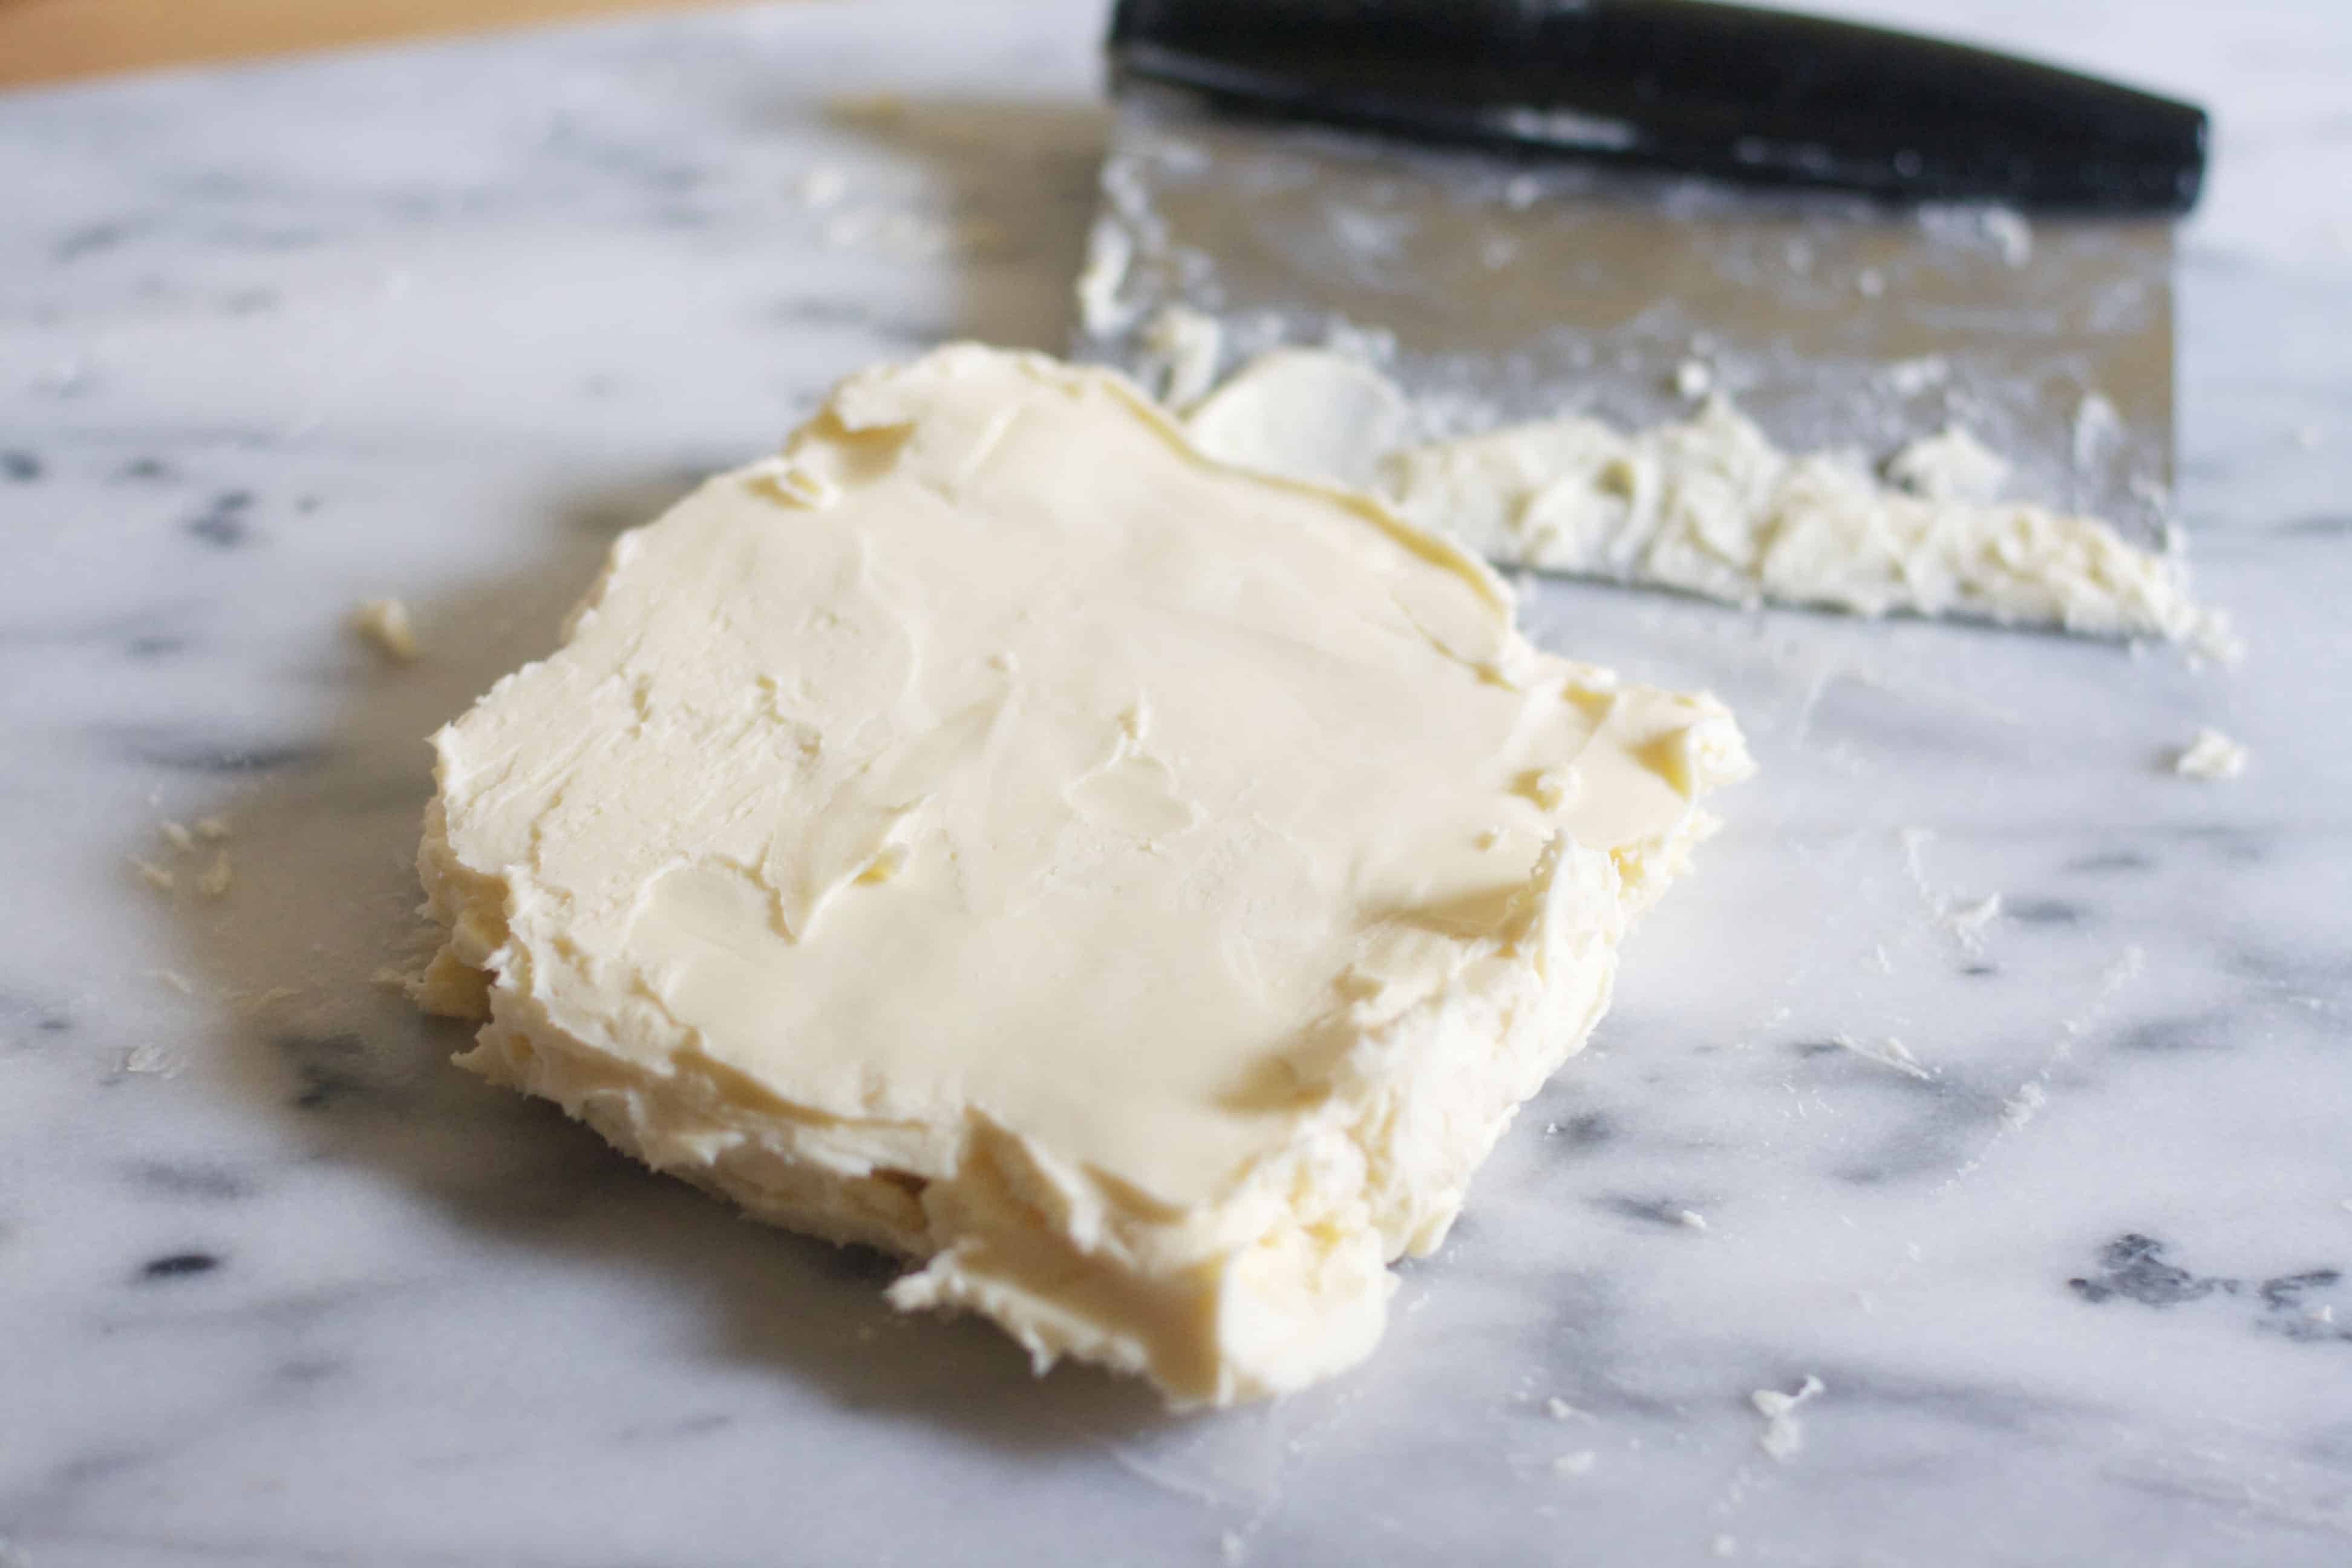
Use a bench scraper to smear the butter back and forth until it is smooth and pliable.
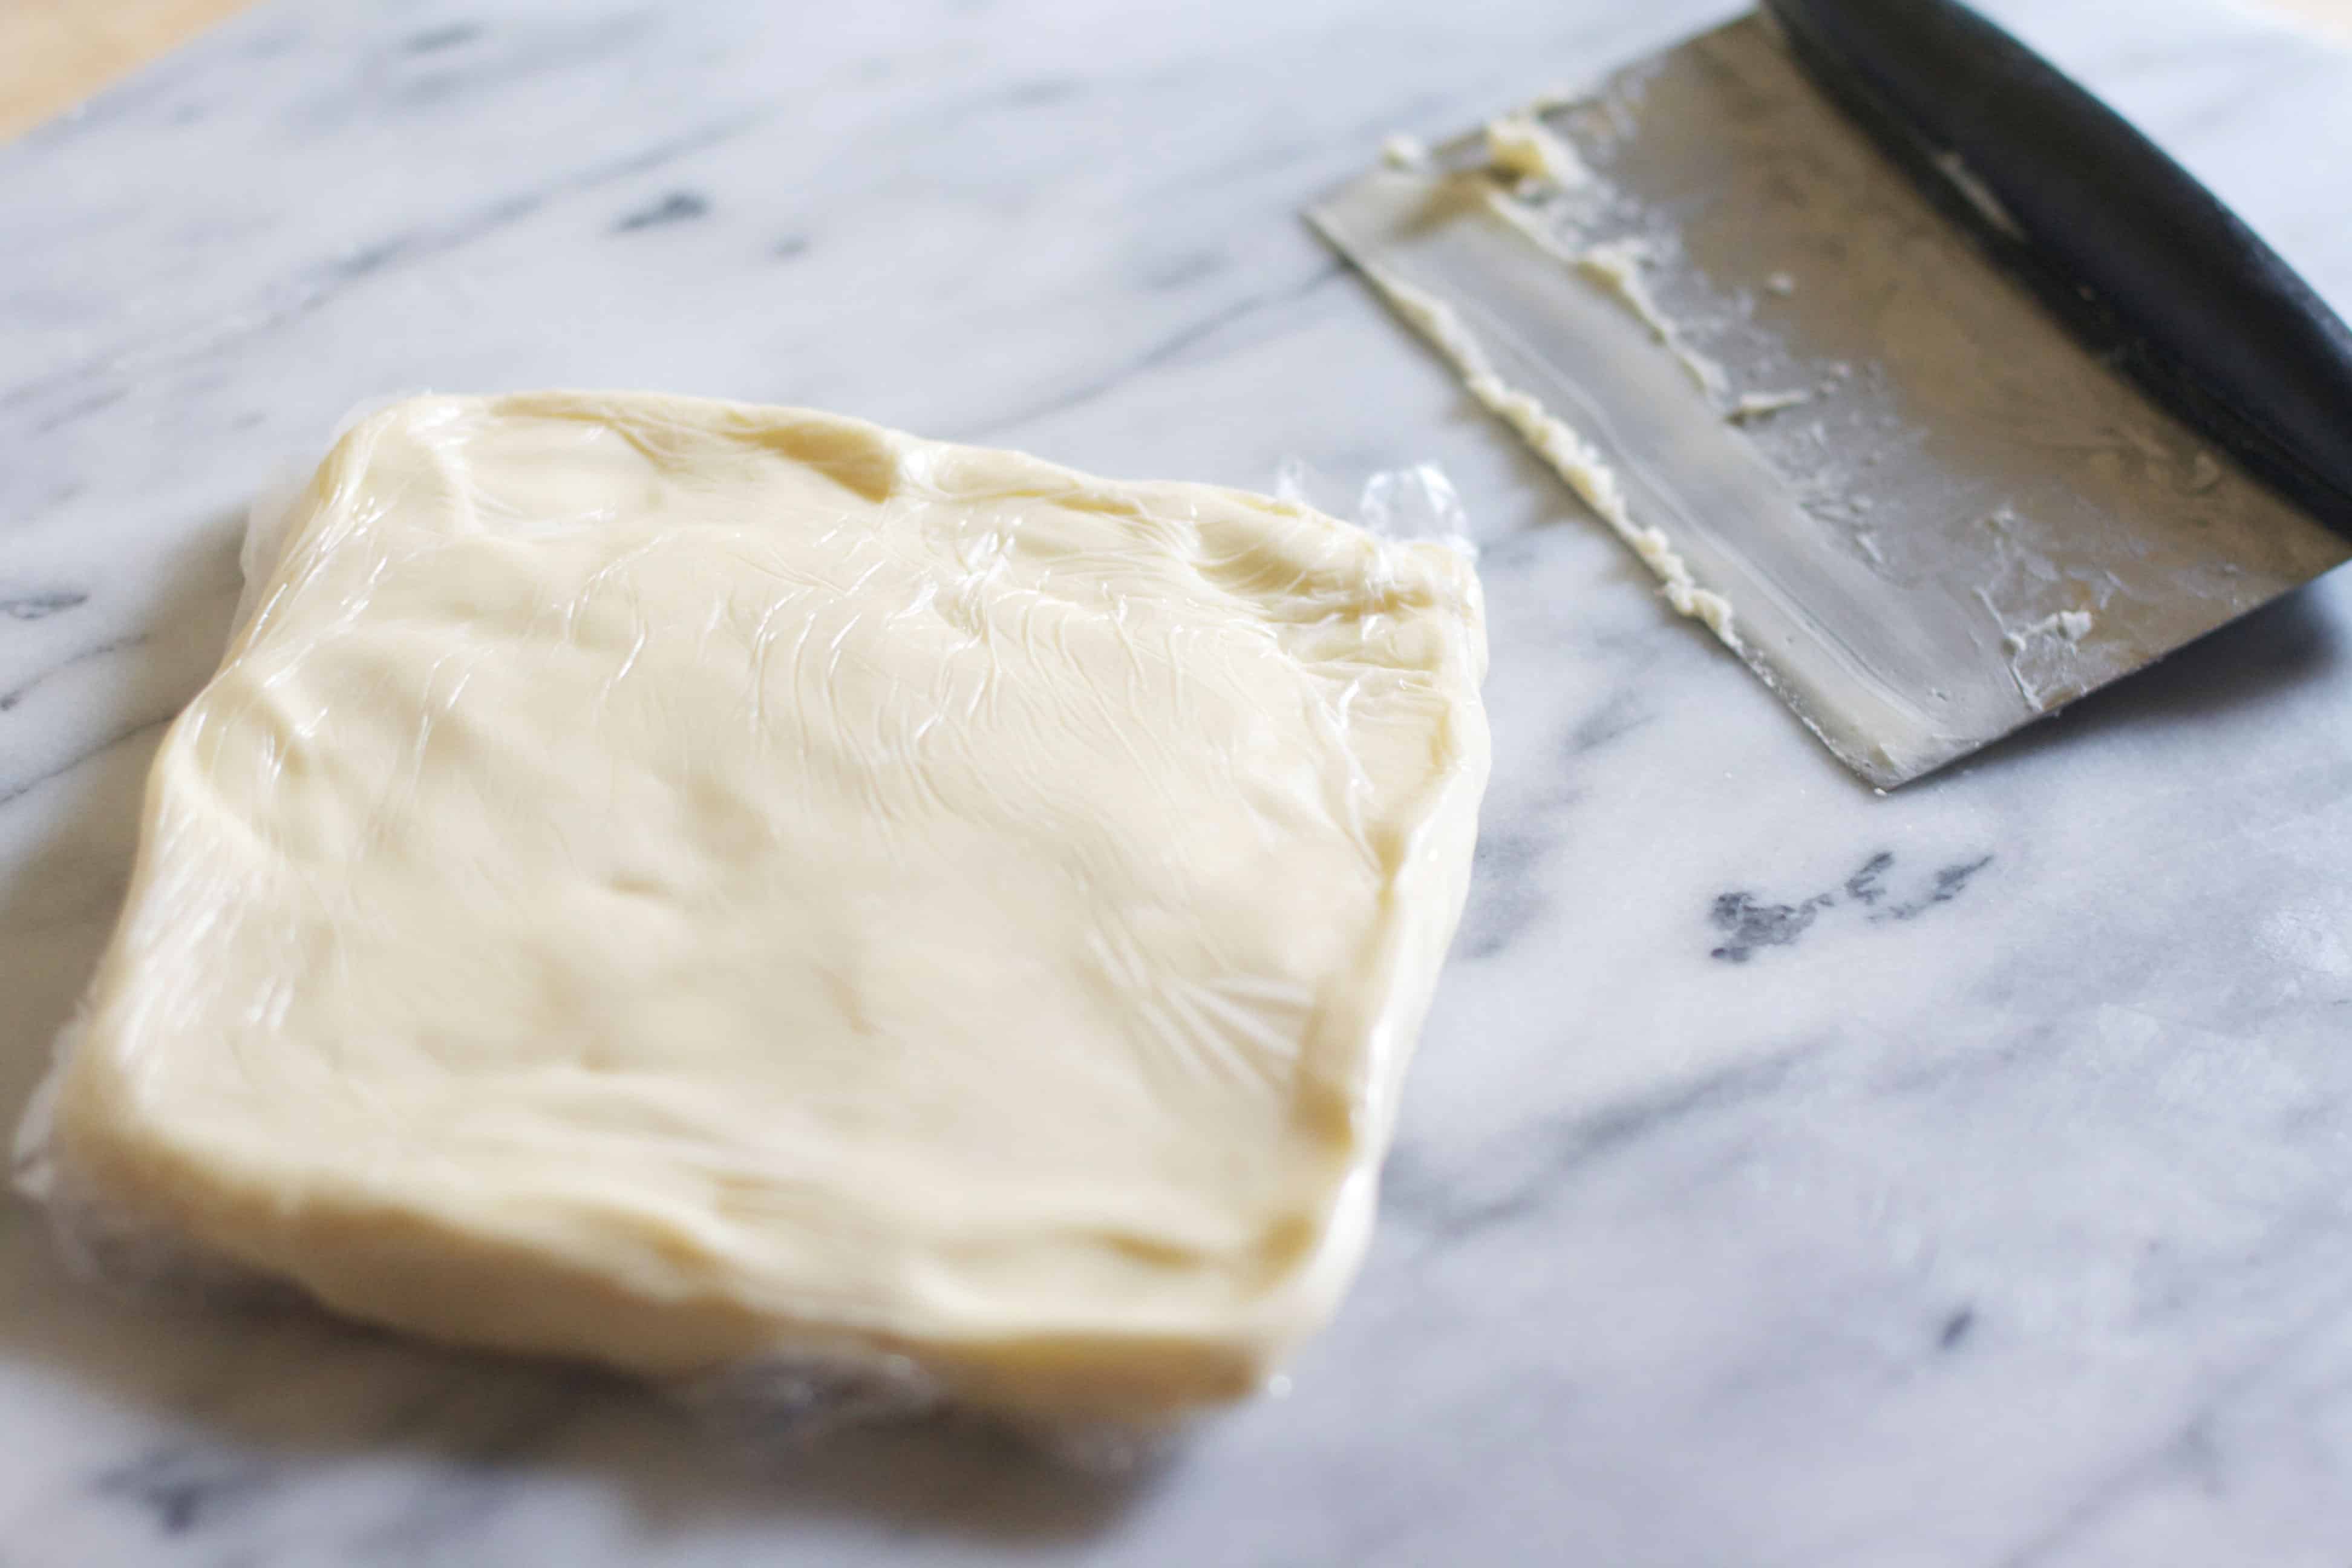
Wrap butter square in plastic wrap and shape into a 7 inch square.
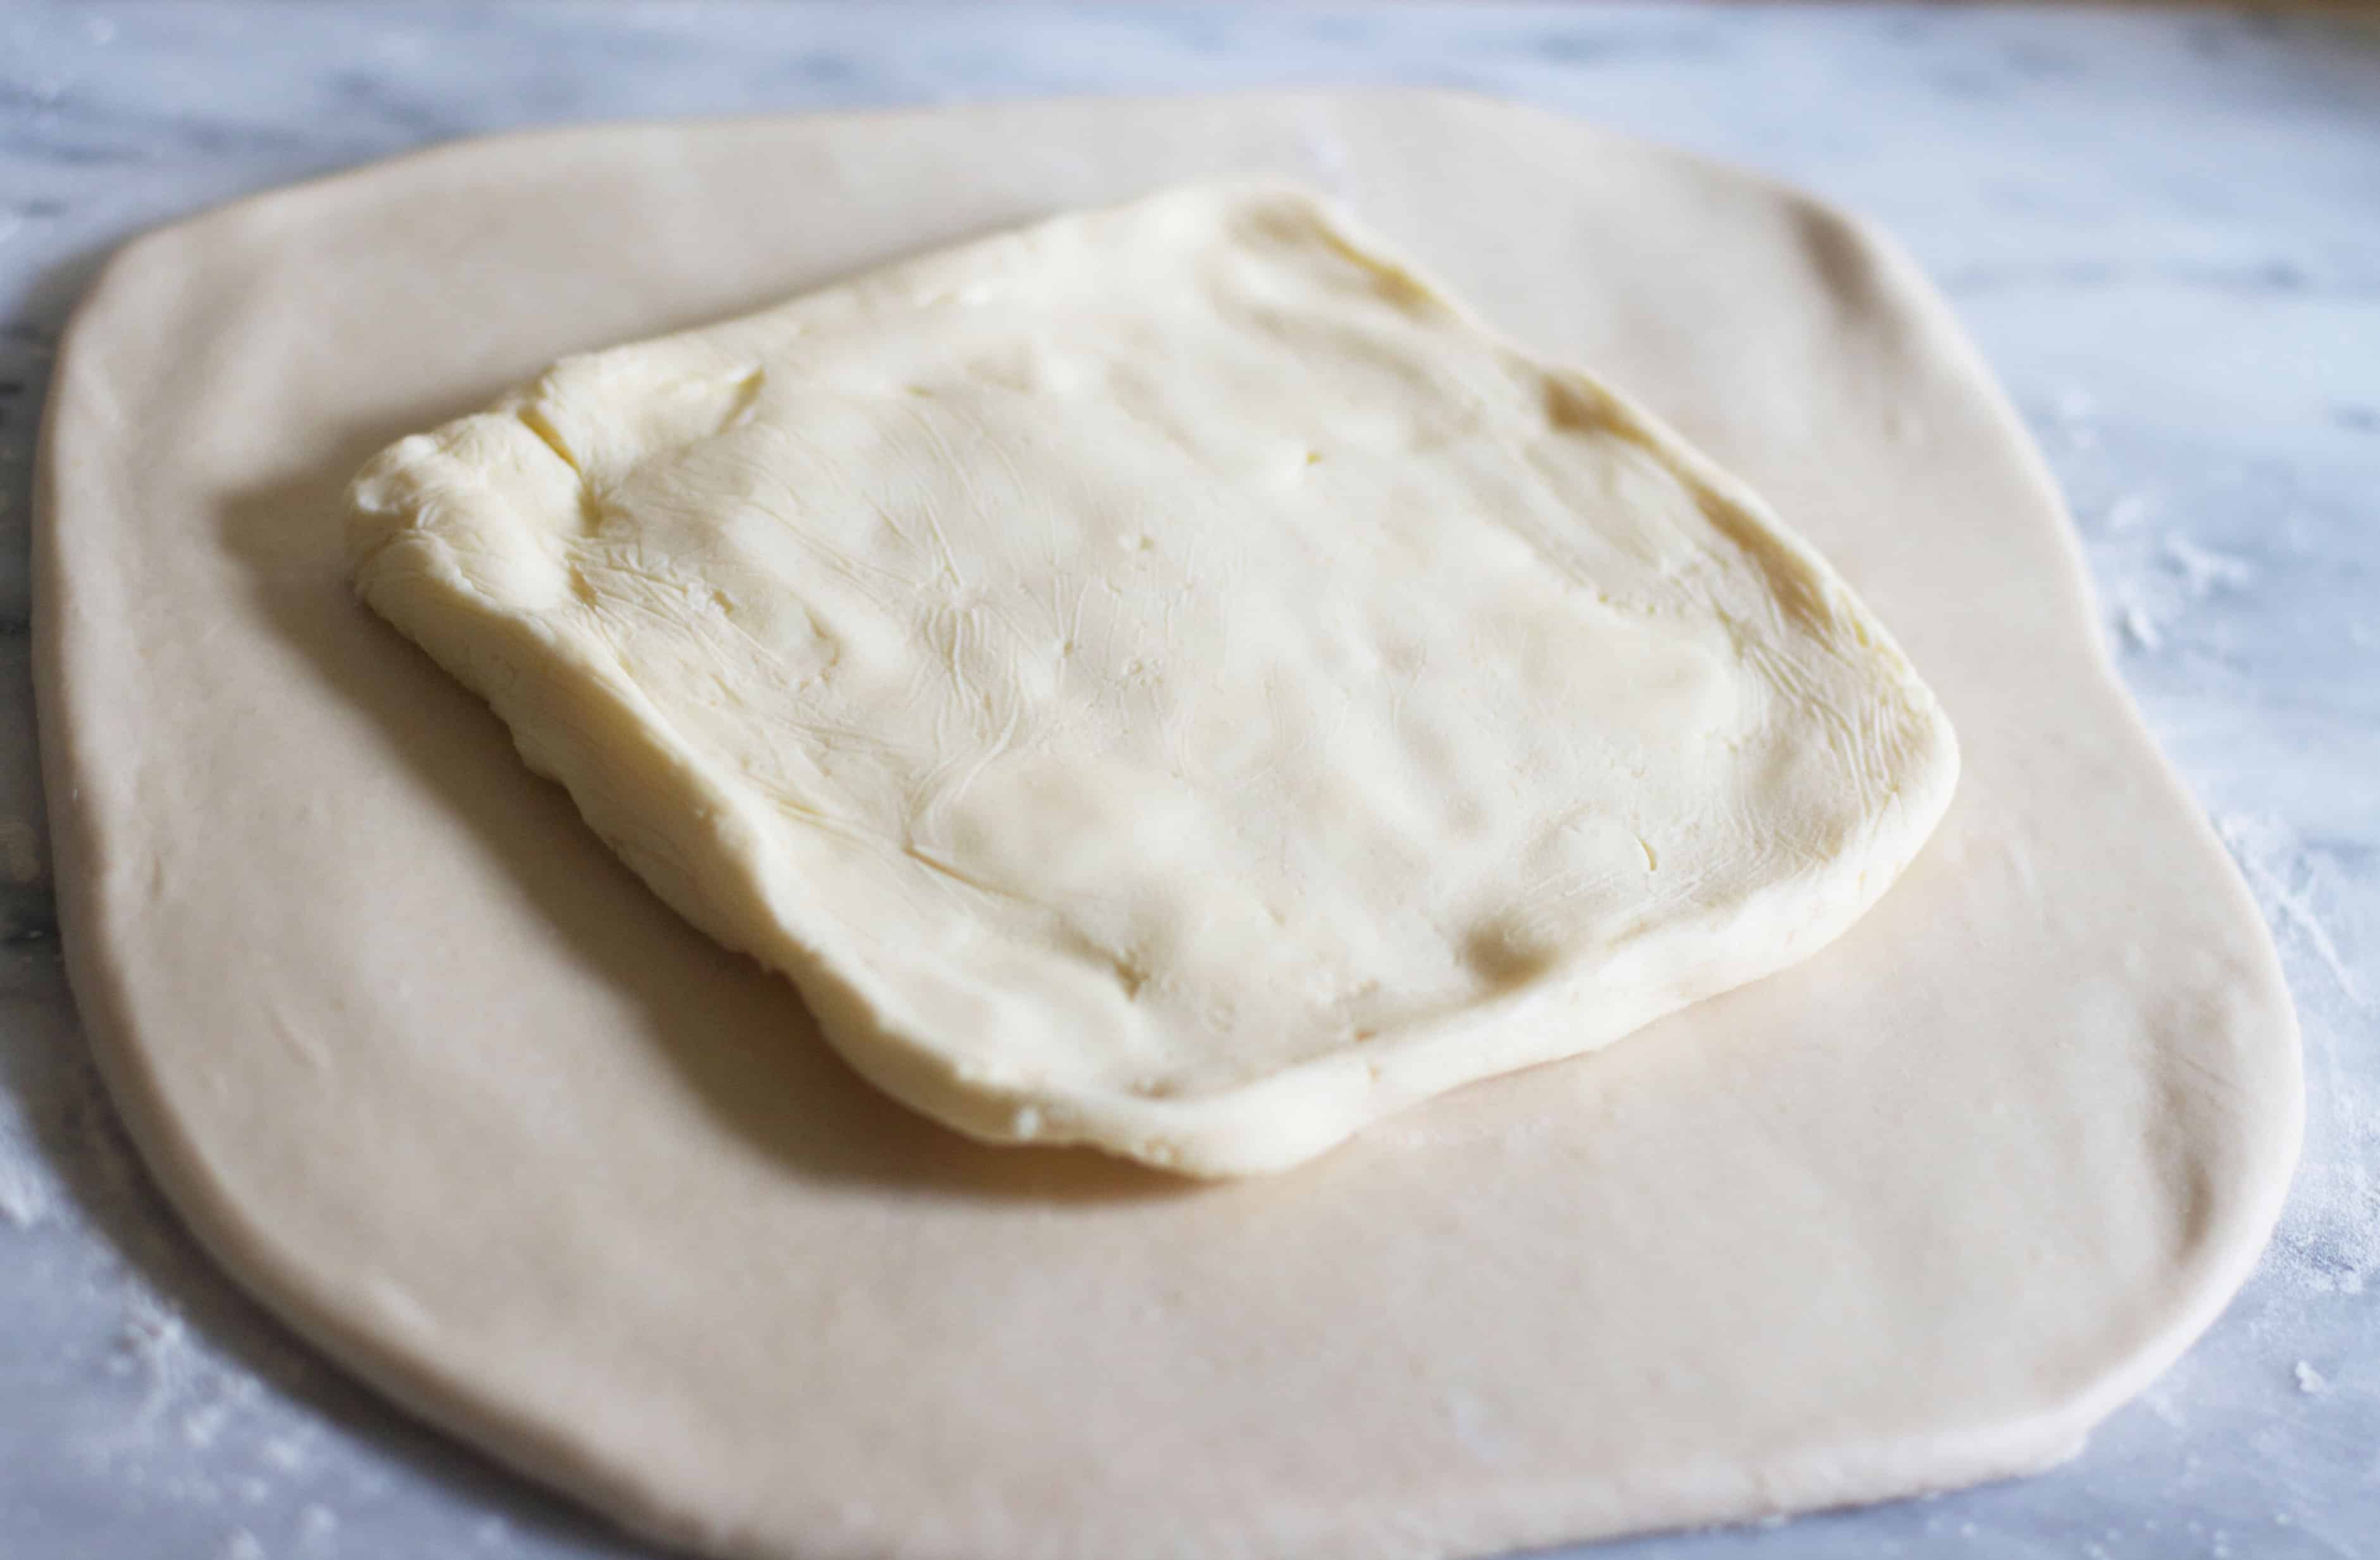
When dough has chilled for an hour, and the butter square for about 30 minutes. Roll the dough into an 11-inch square and place the butter inside- at an angle. (I rotated mine a bit down and to the left from the picture above.)
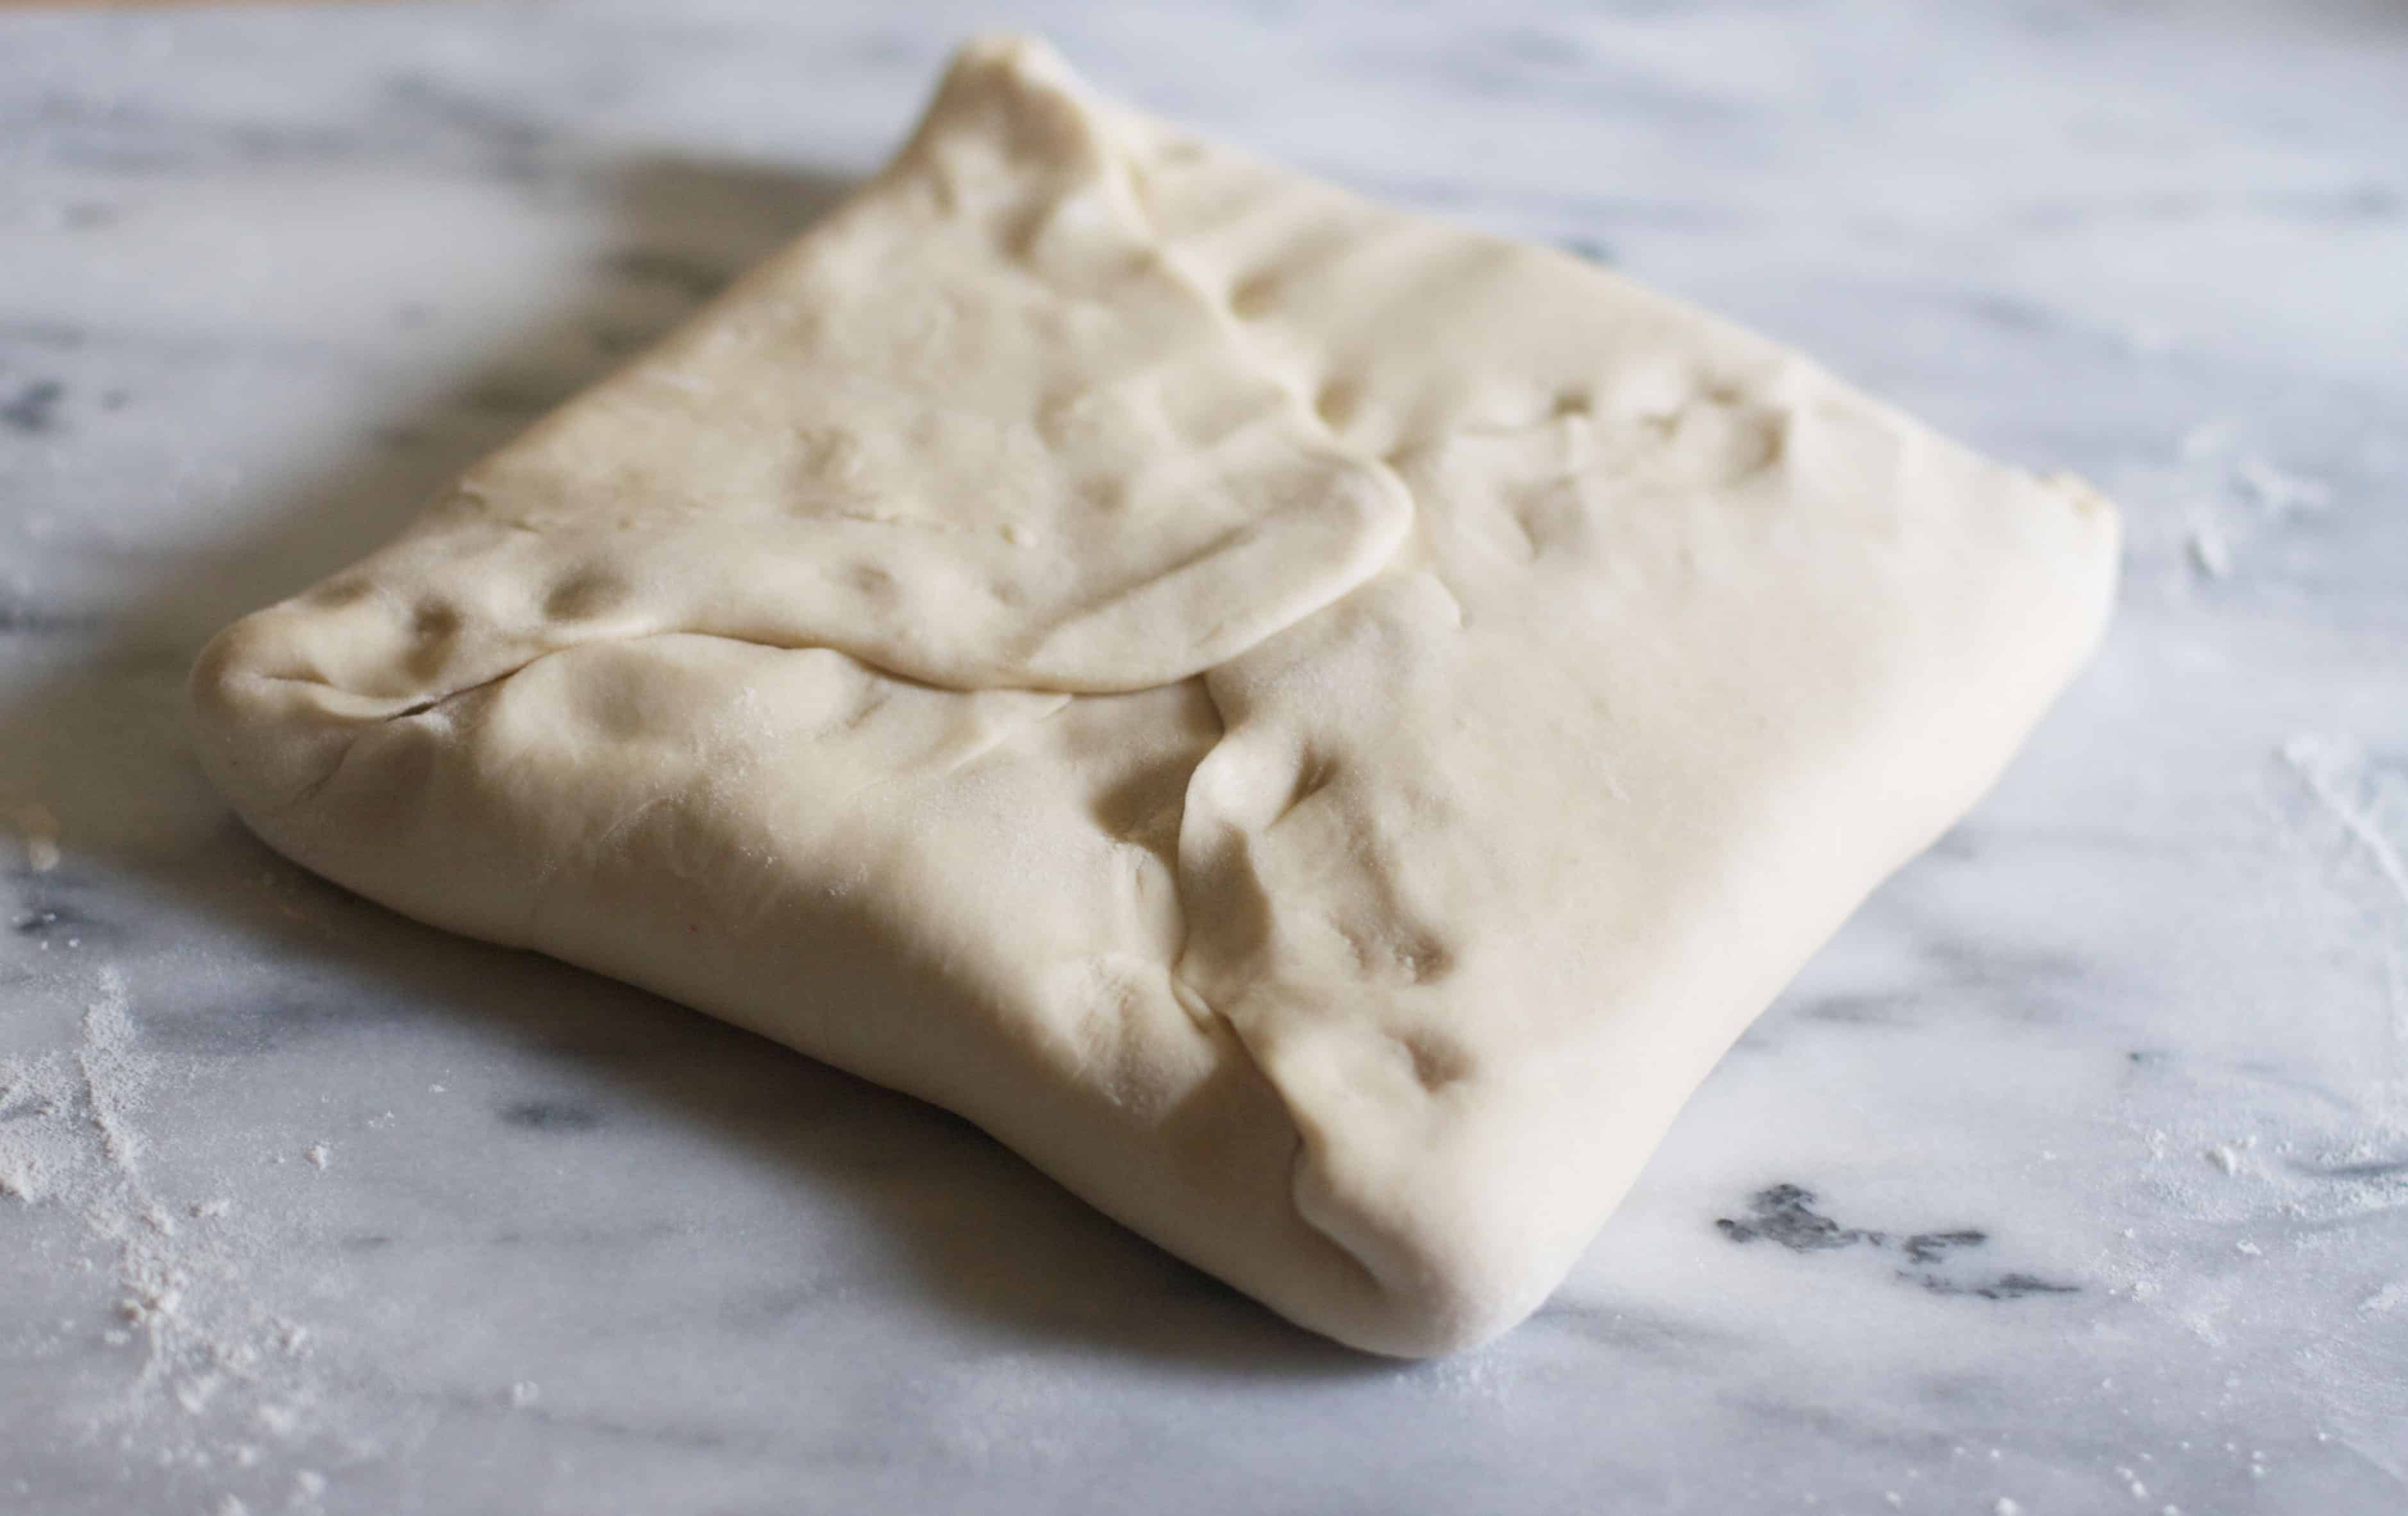
Fold the corners in and pinch to seal.
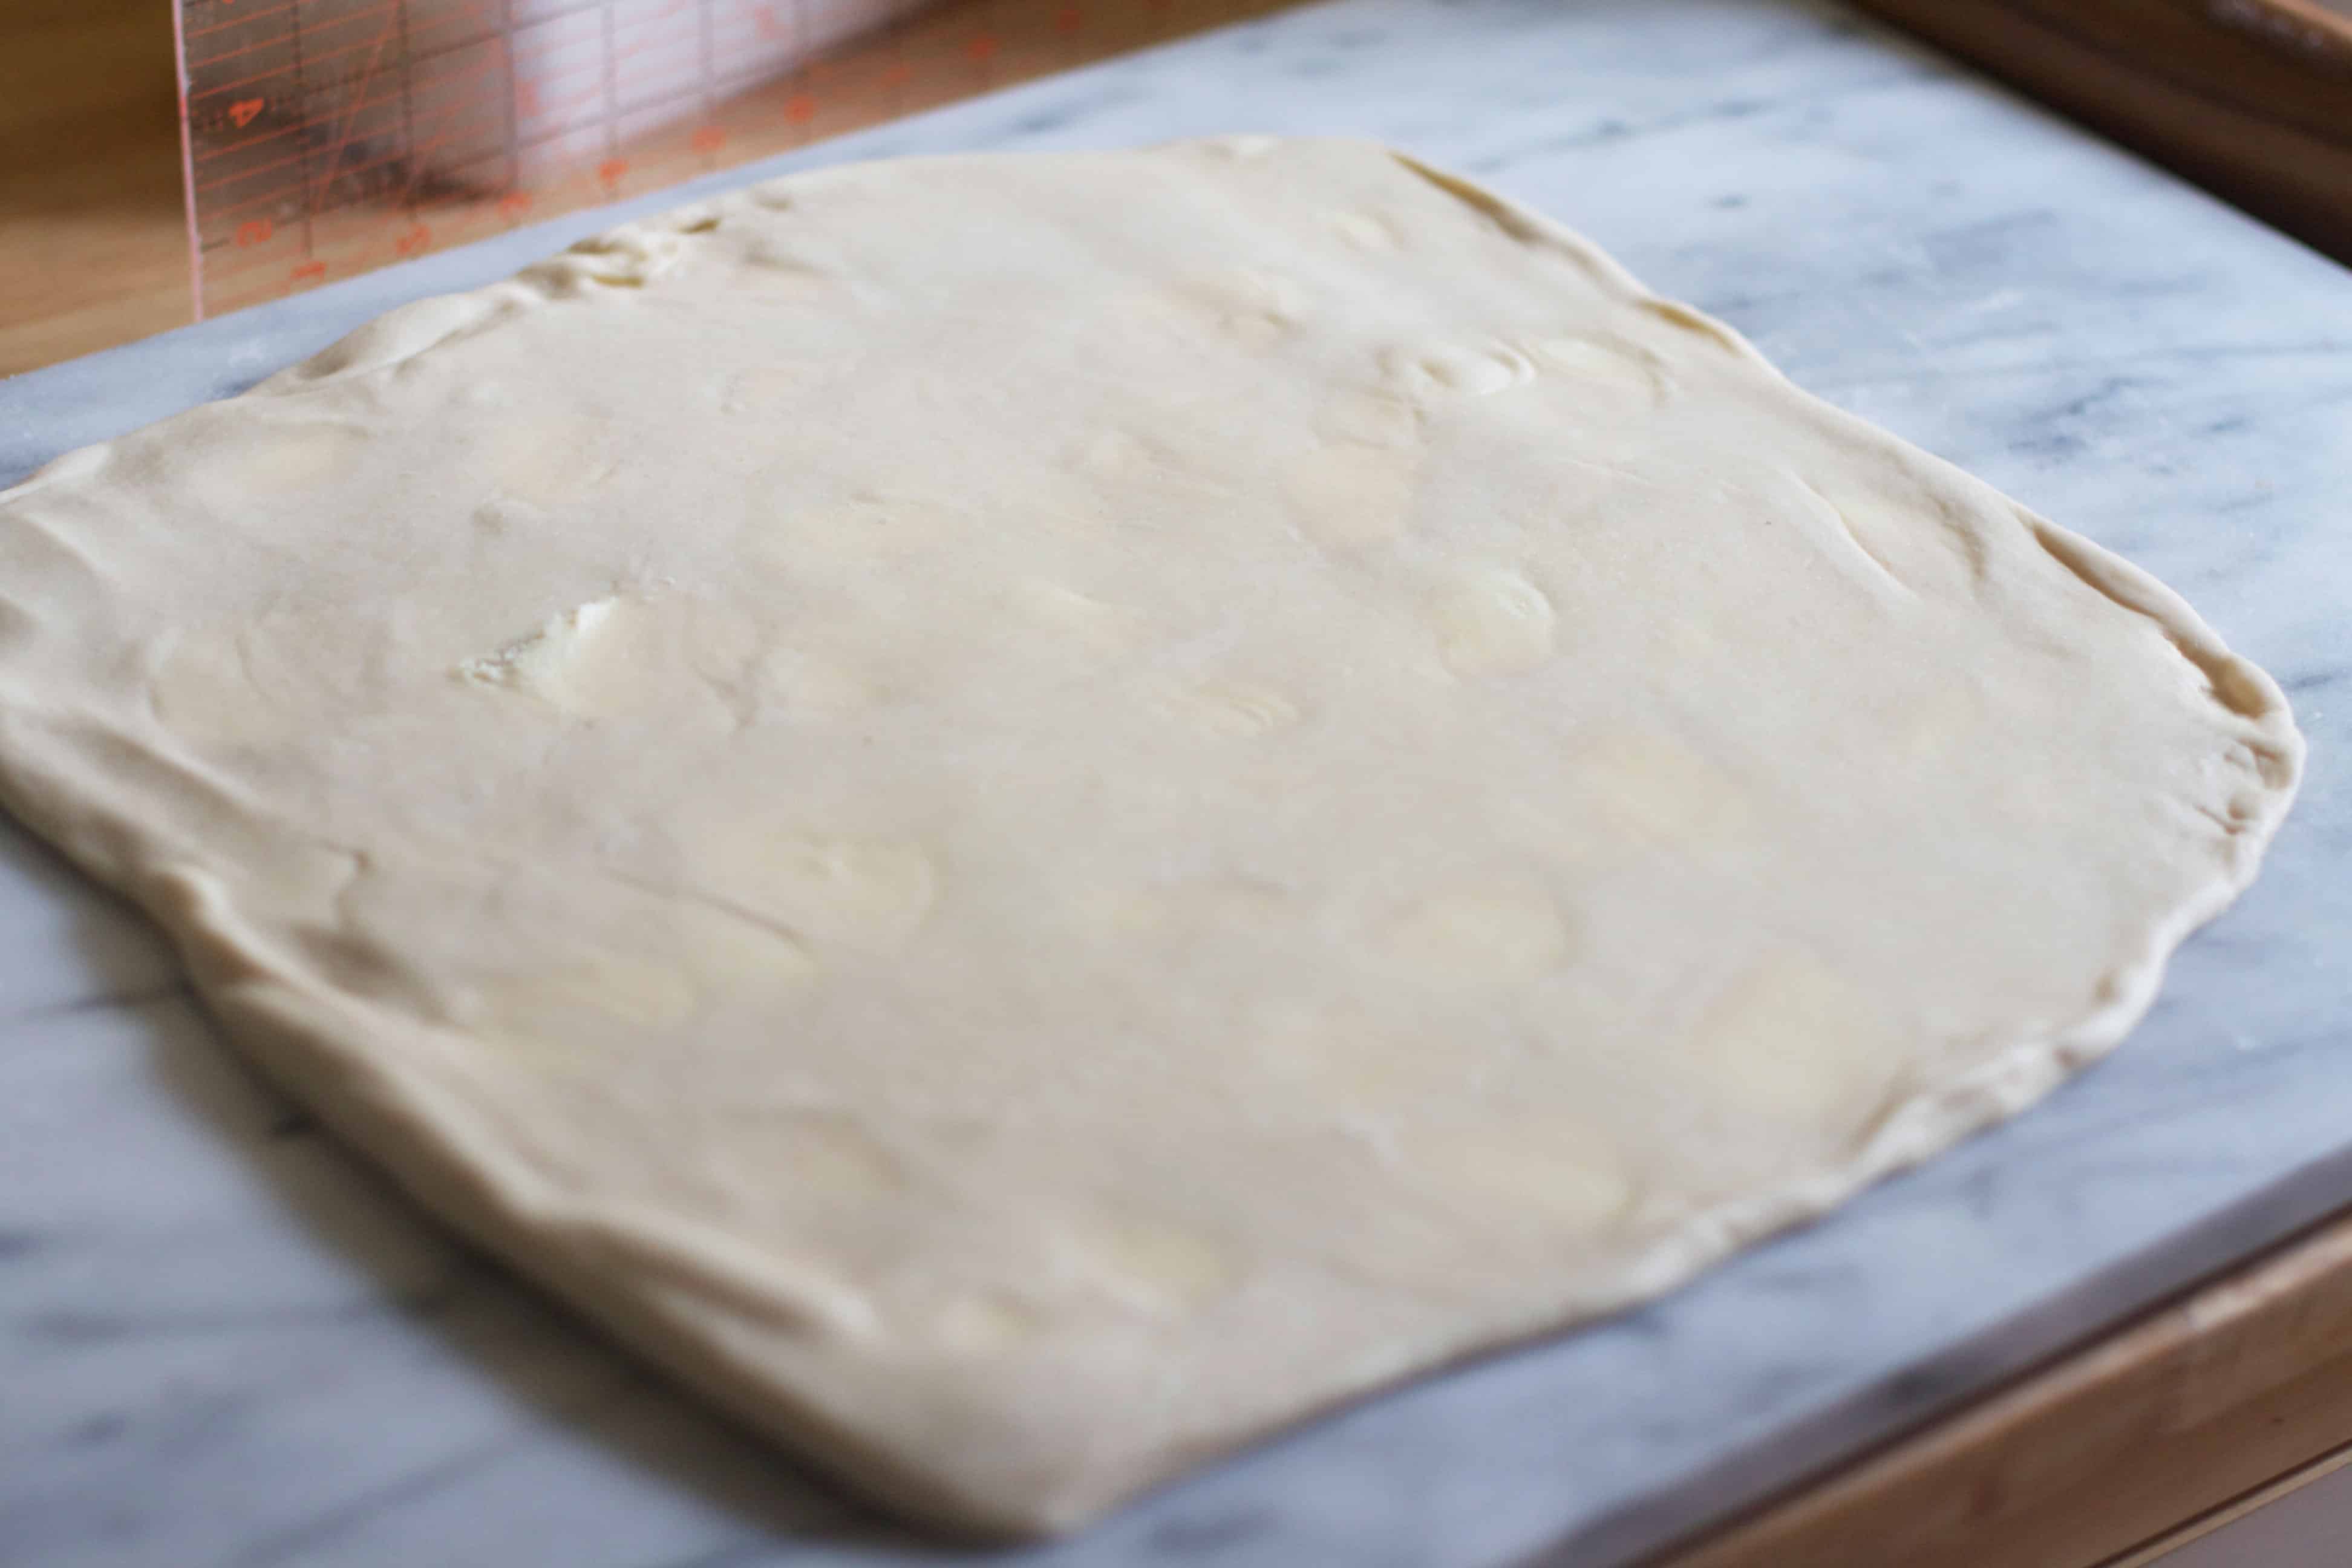
Gently tap the middle of the square and then roll out to a 14 inch square. (You may see some butter peeking through)

Fold the dough into thirds (like an envelope)
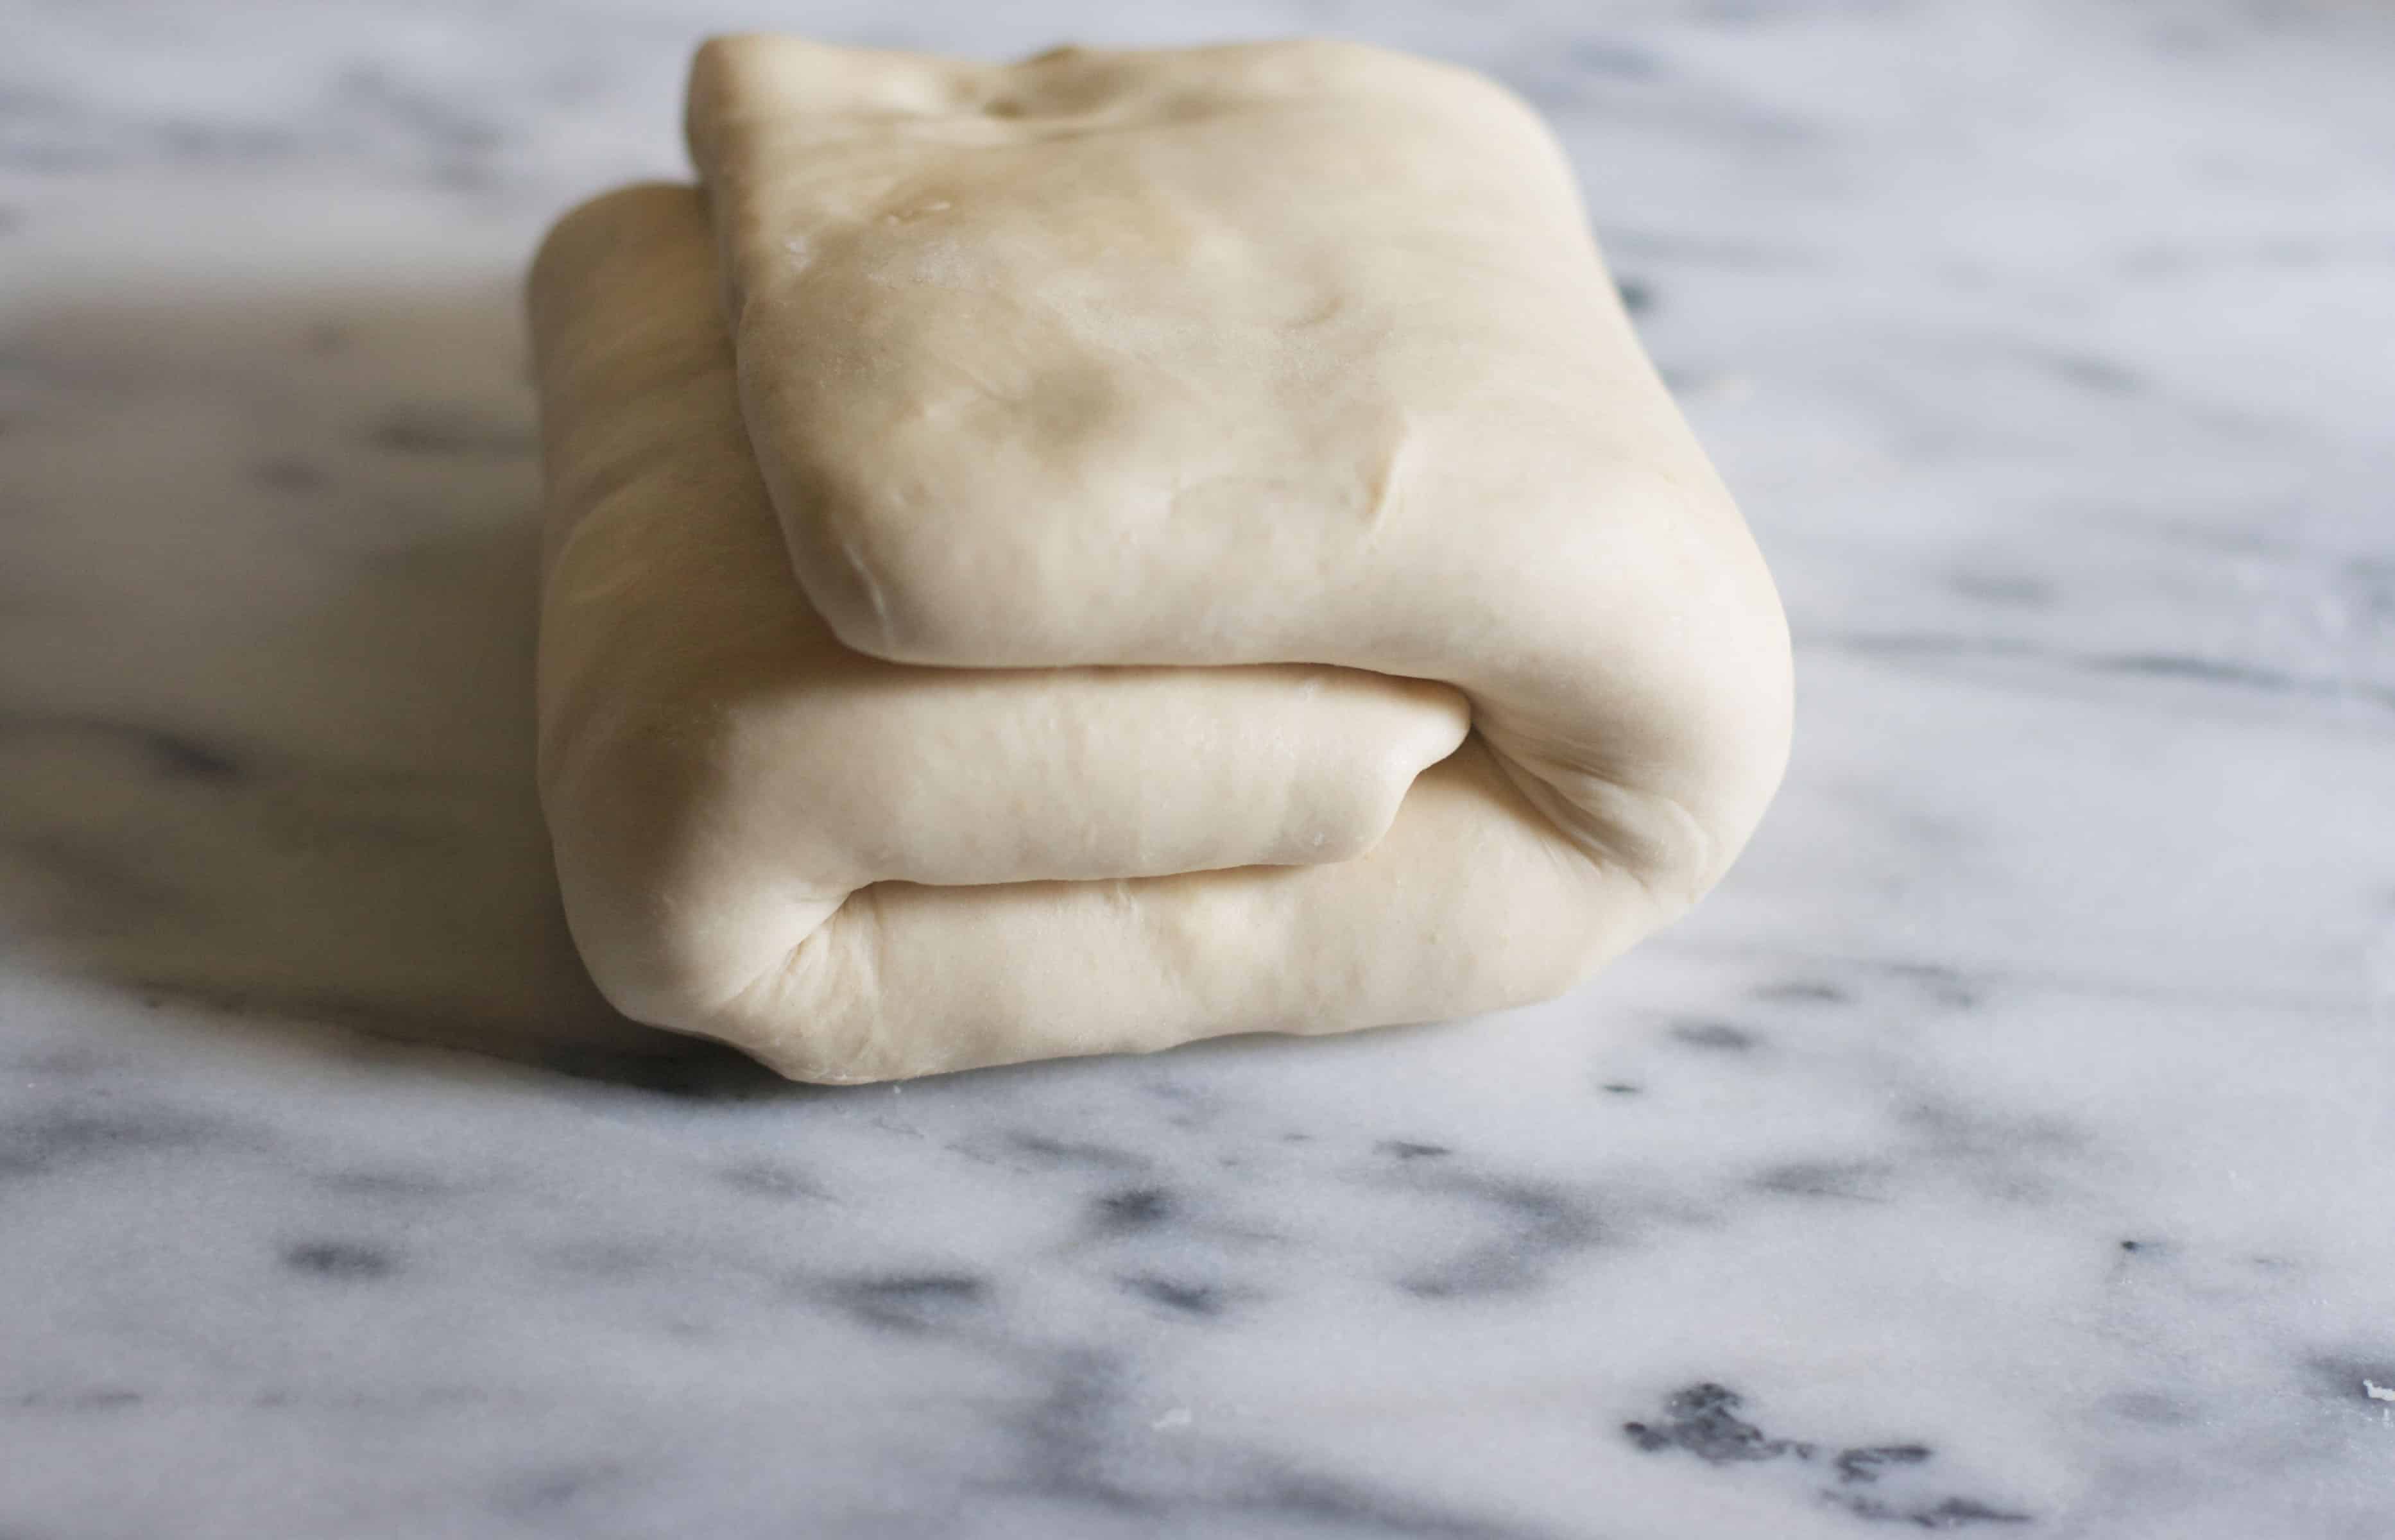
And then in thirds again to form a square. Wrap tightly in plastic wrap and chill for 2 hours. After chilling- repeat the last 3 steps- roll into another 14 inch square- fold into thirds forming a rectangle, and then again into thirds to form a square. Wrap dough again and chill for another 2 hours (or overnight!)
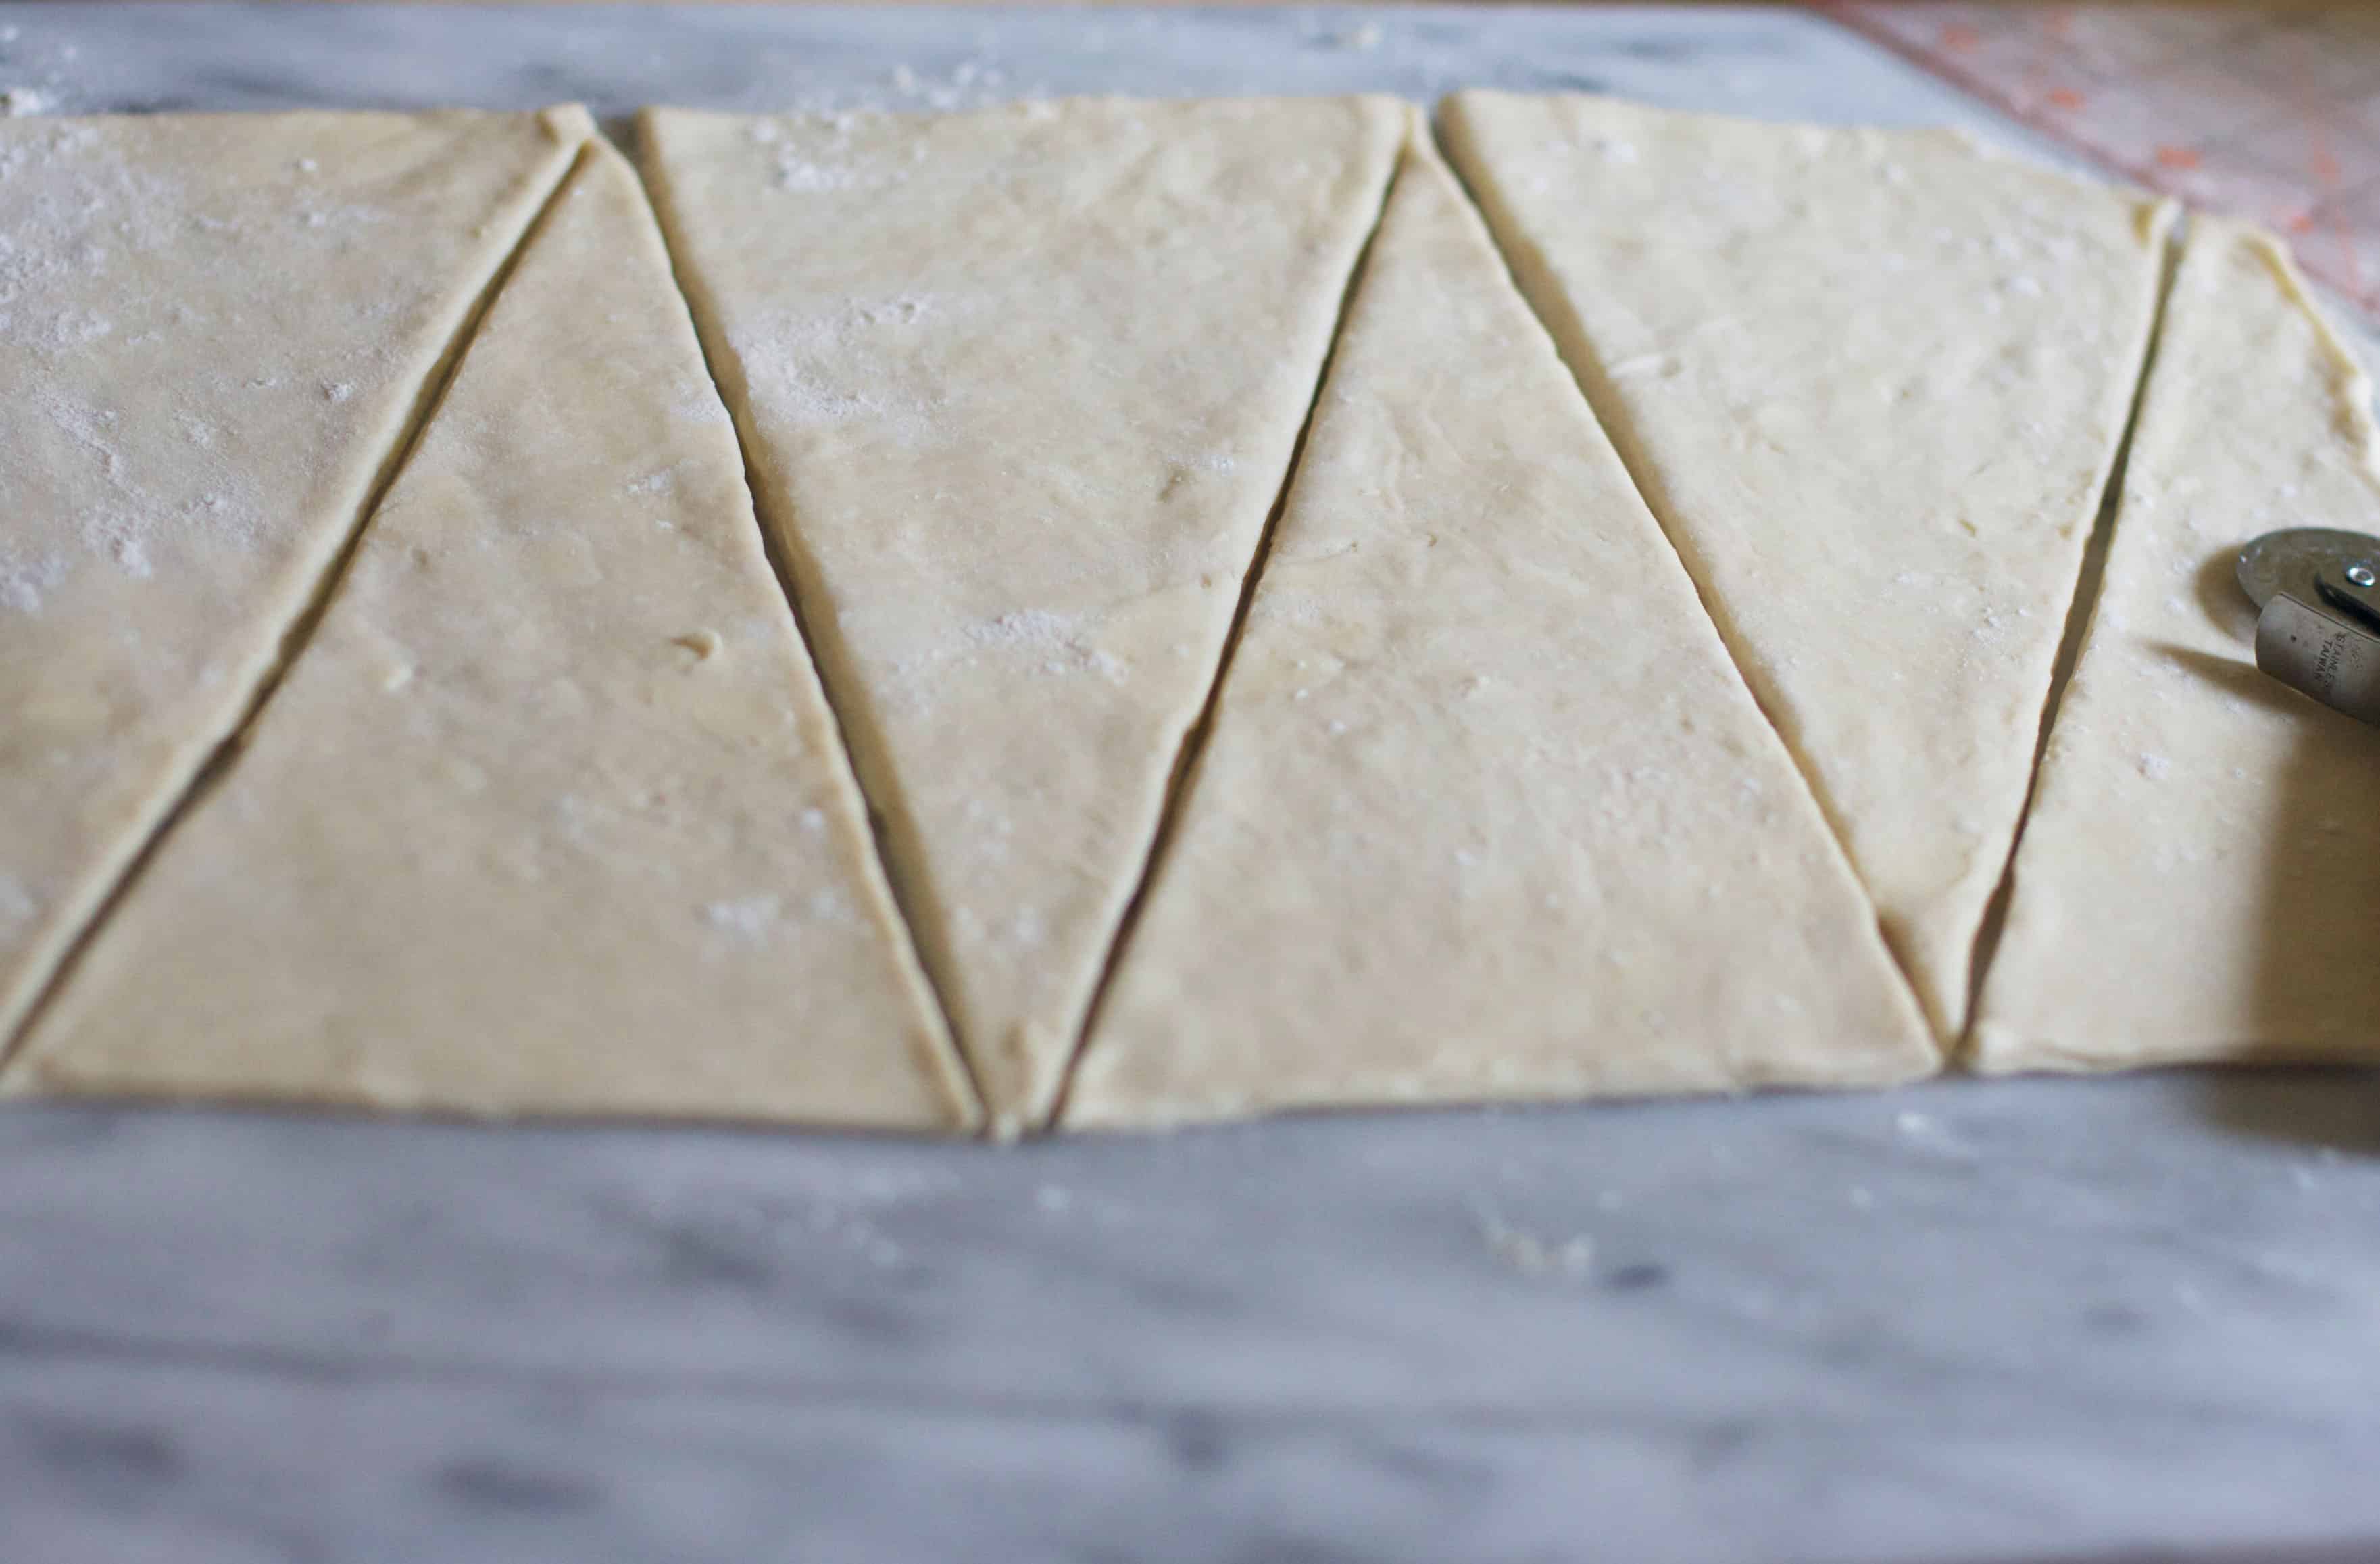
Roll dough on a lightly floured surface into a 20 x 20 square- or in my case- a 10×20 rectangle. Cut into thirds- and then cut each third diagonally to form triangles.
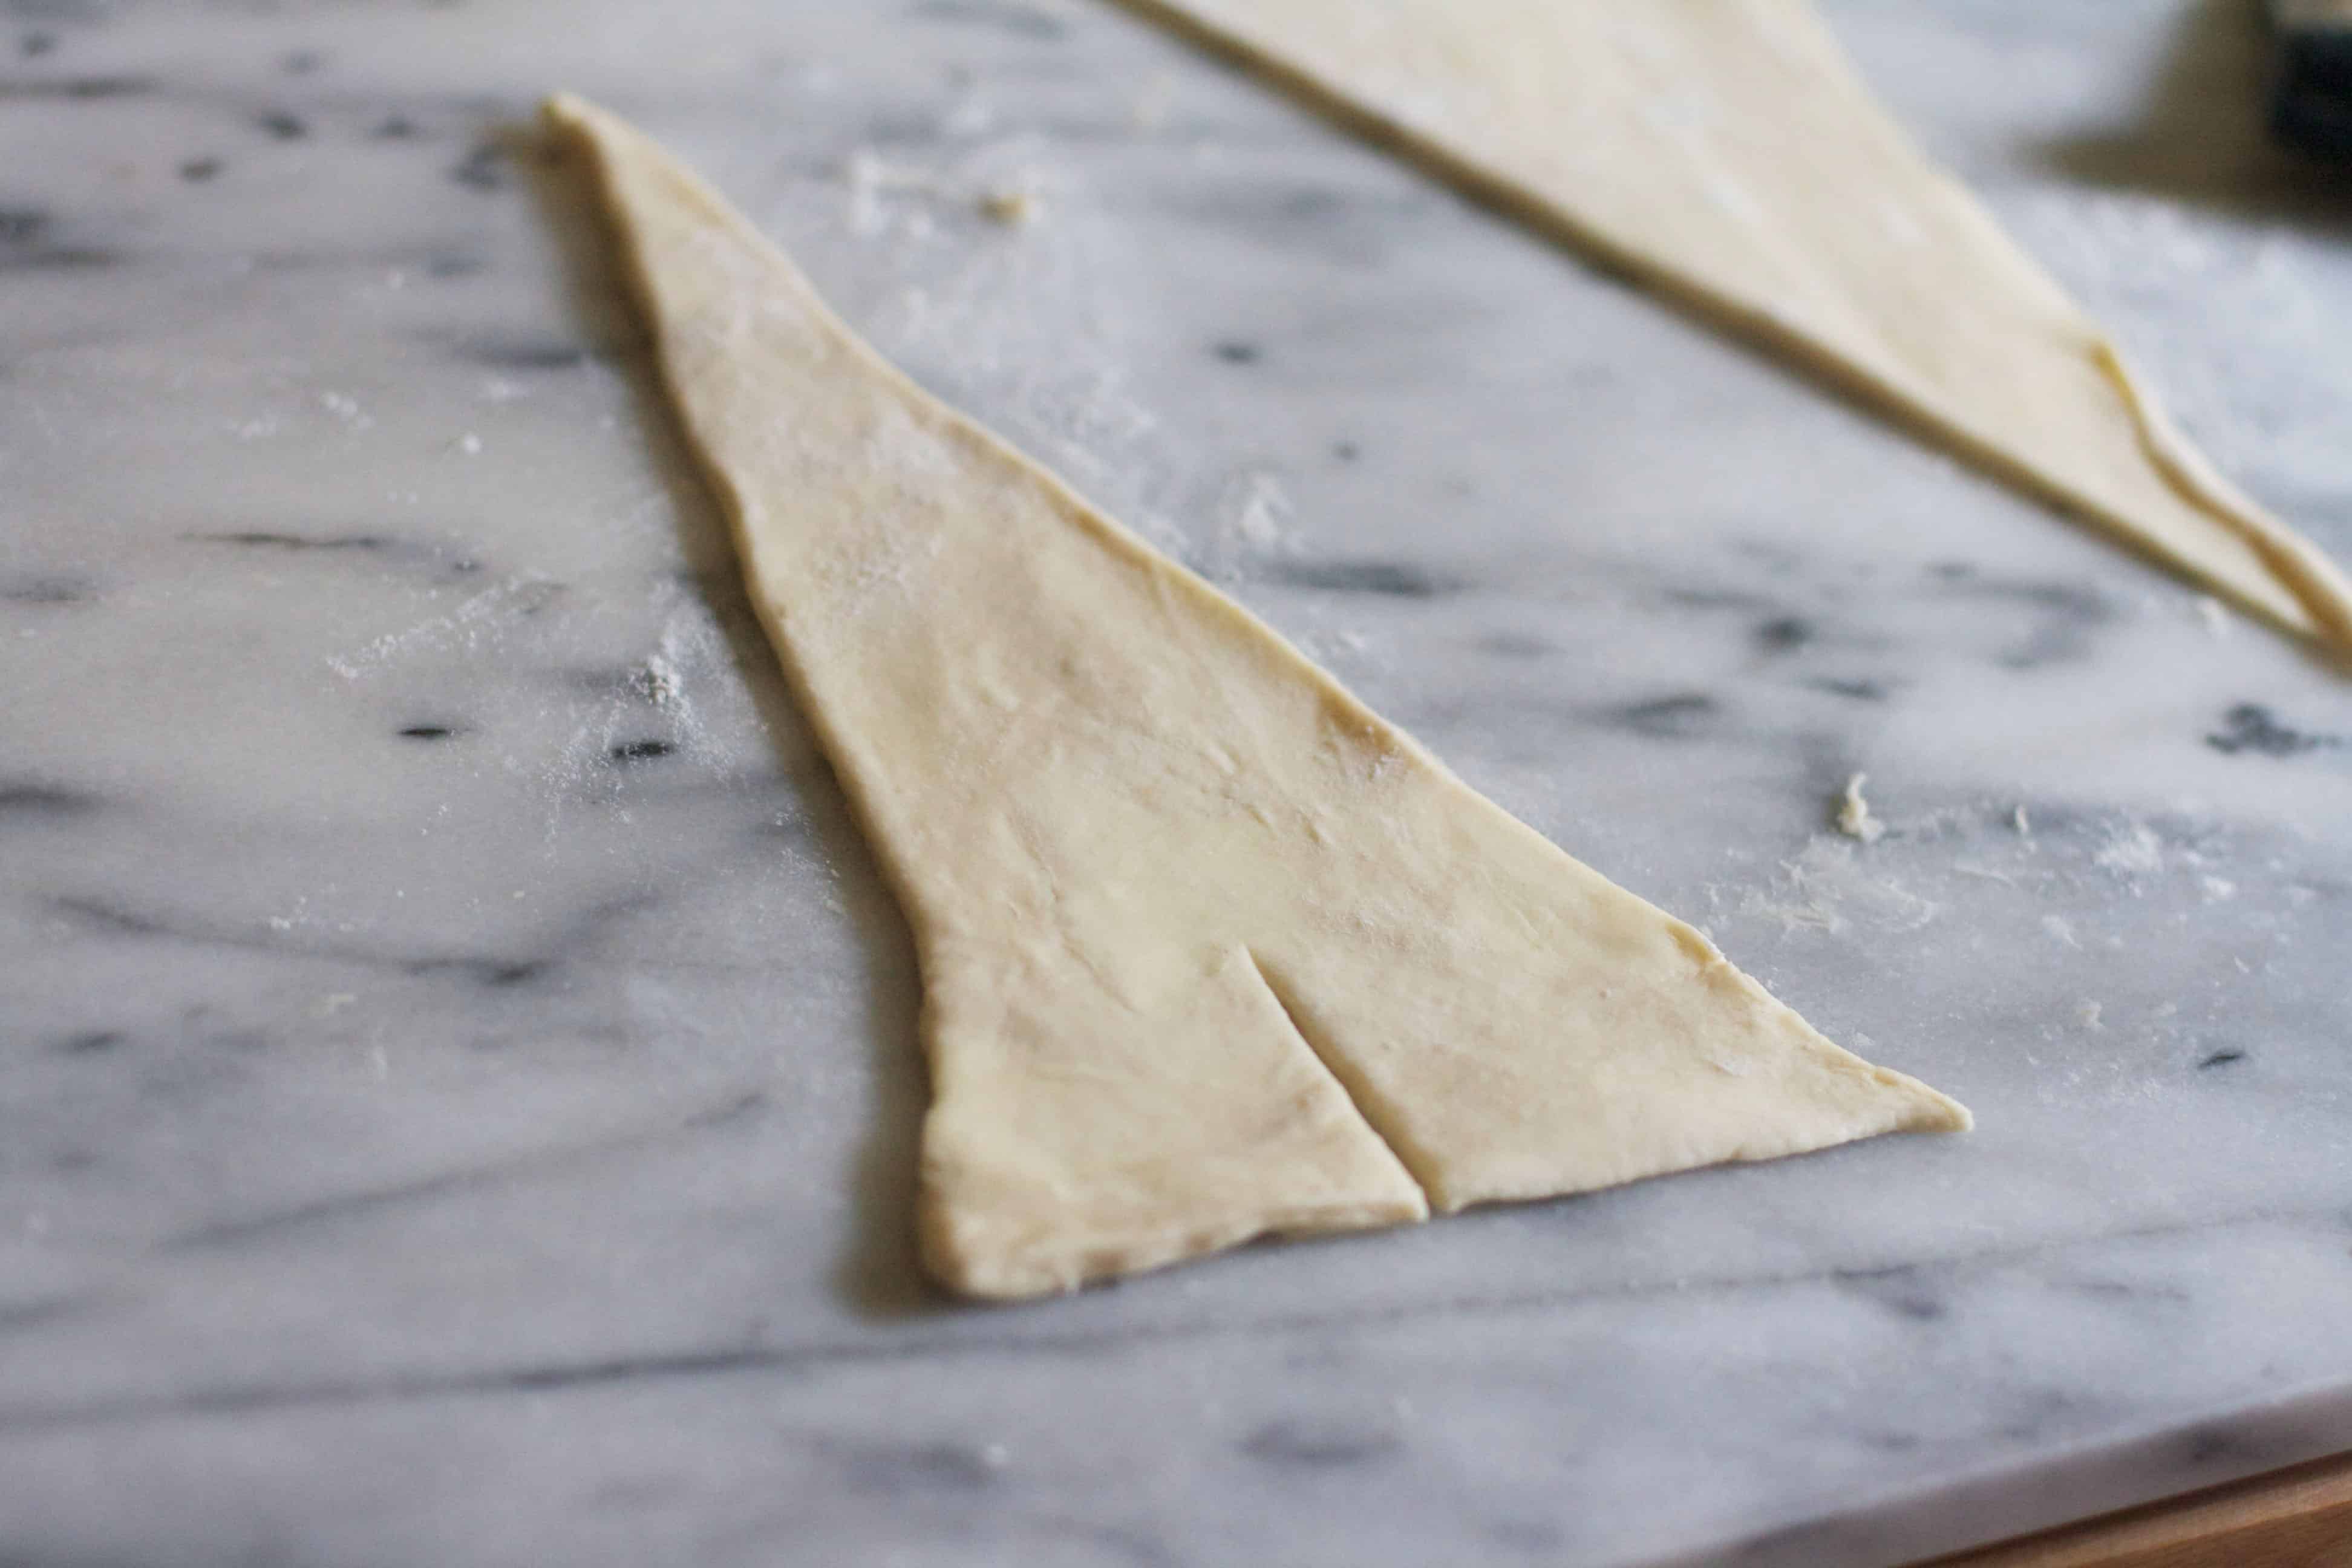
Stretch each triangle a bit so it has equal sides, and cut a small slit in the center.
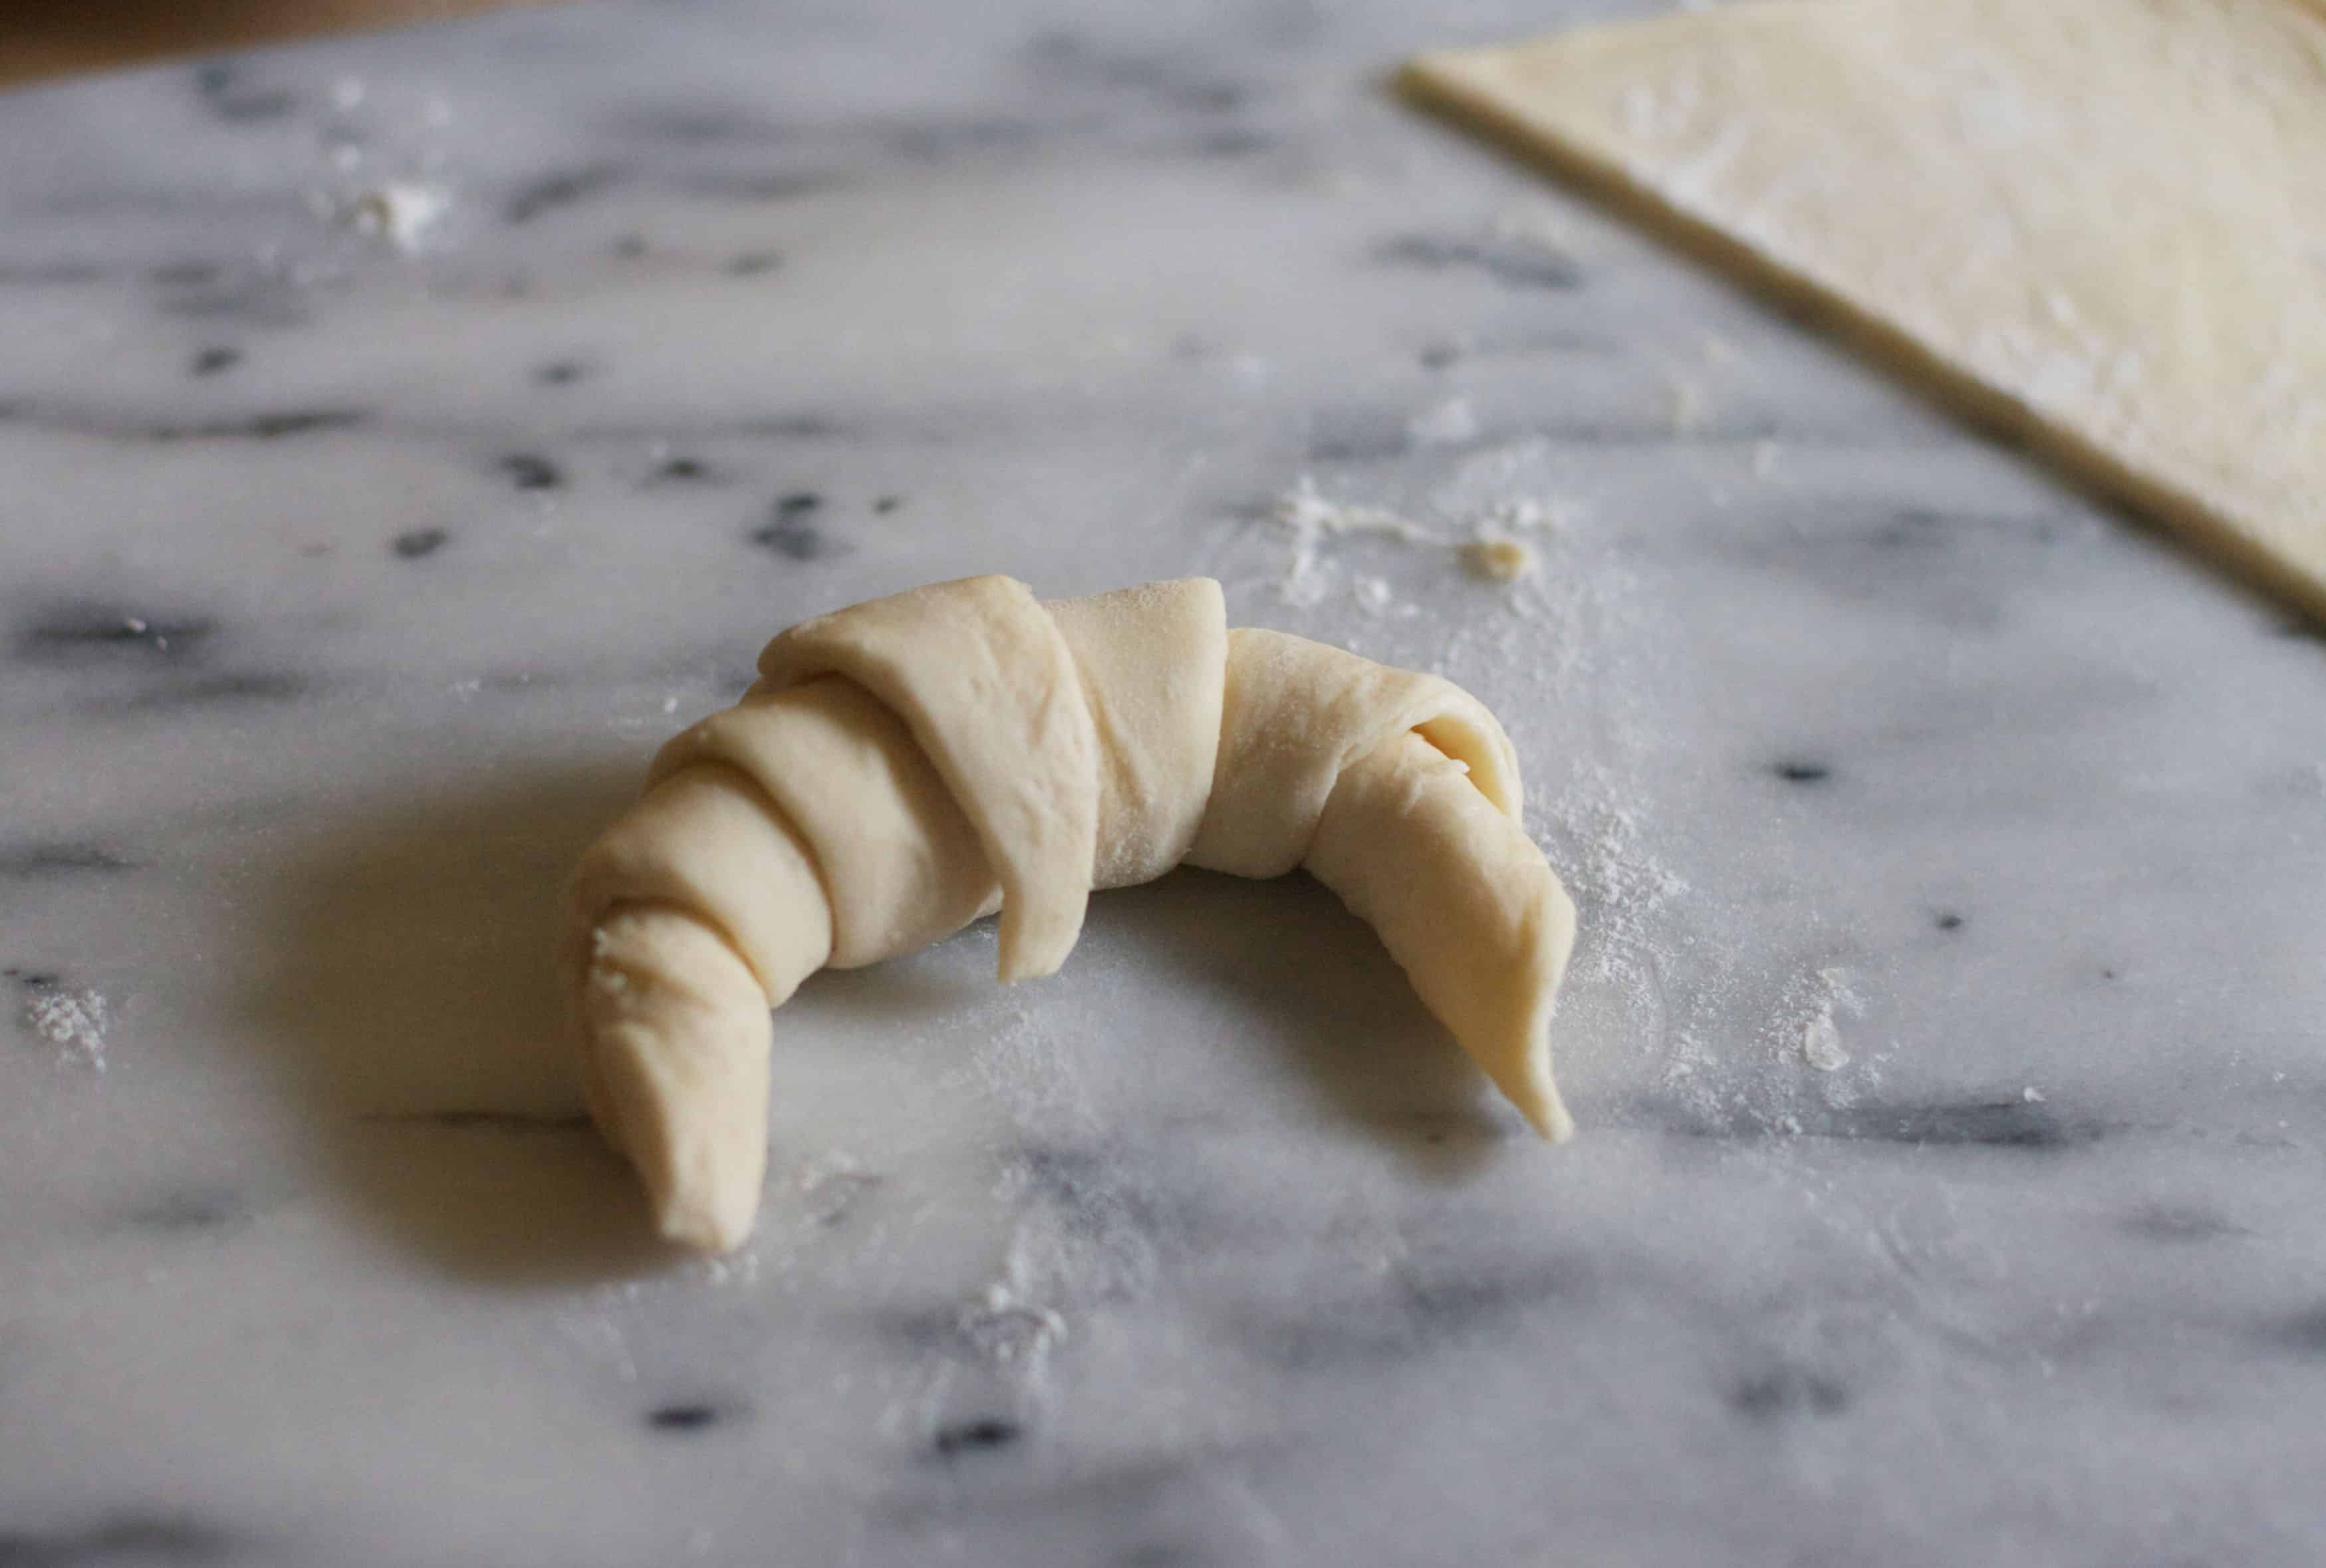
Roll upward from the slit you made and form a crescent. Repeat with the rest of the dough- and place each onto the baking sheet.
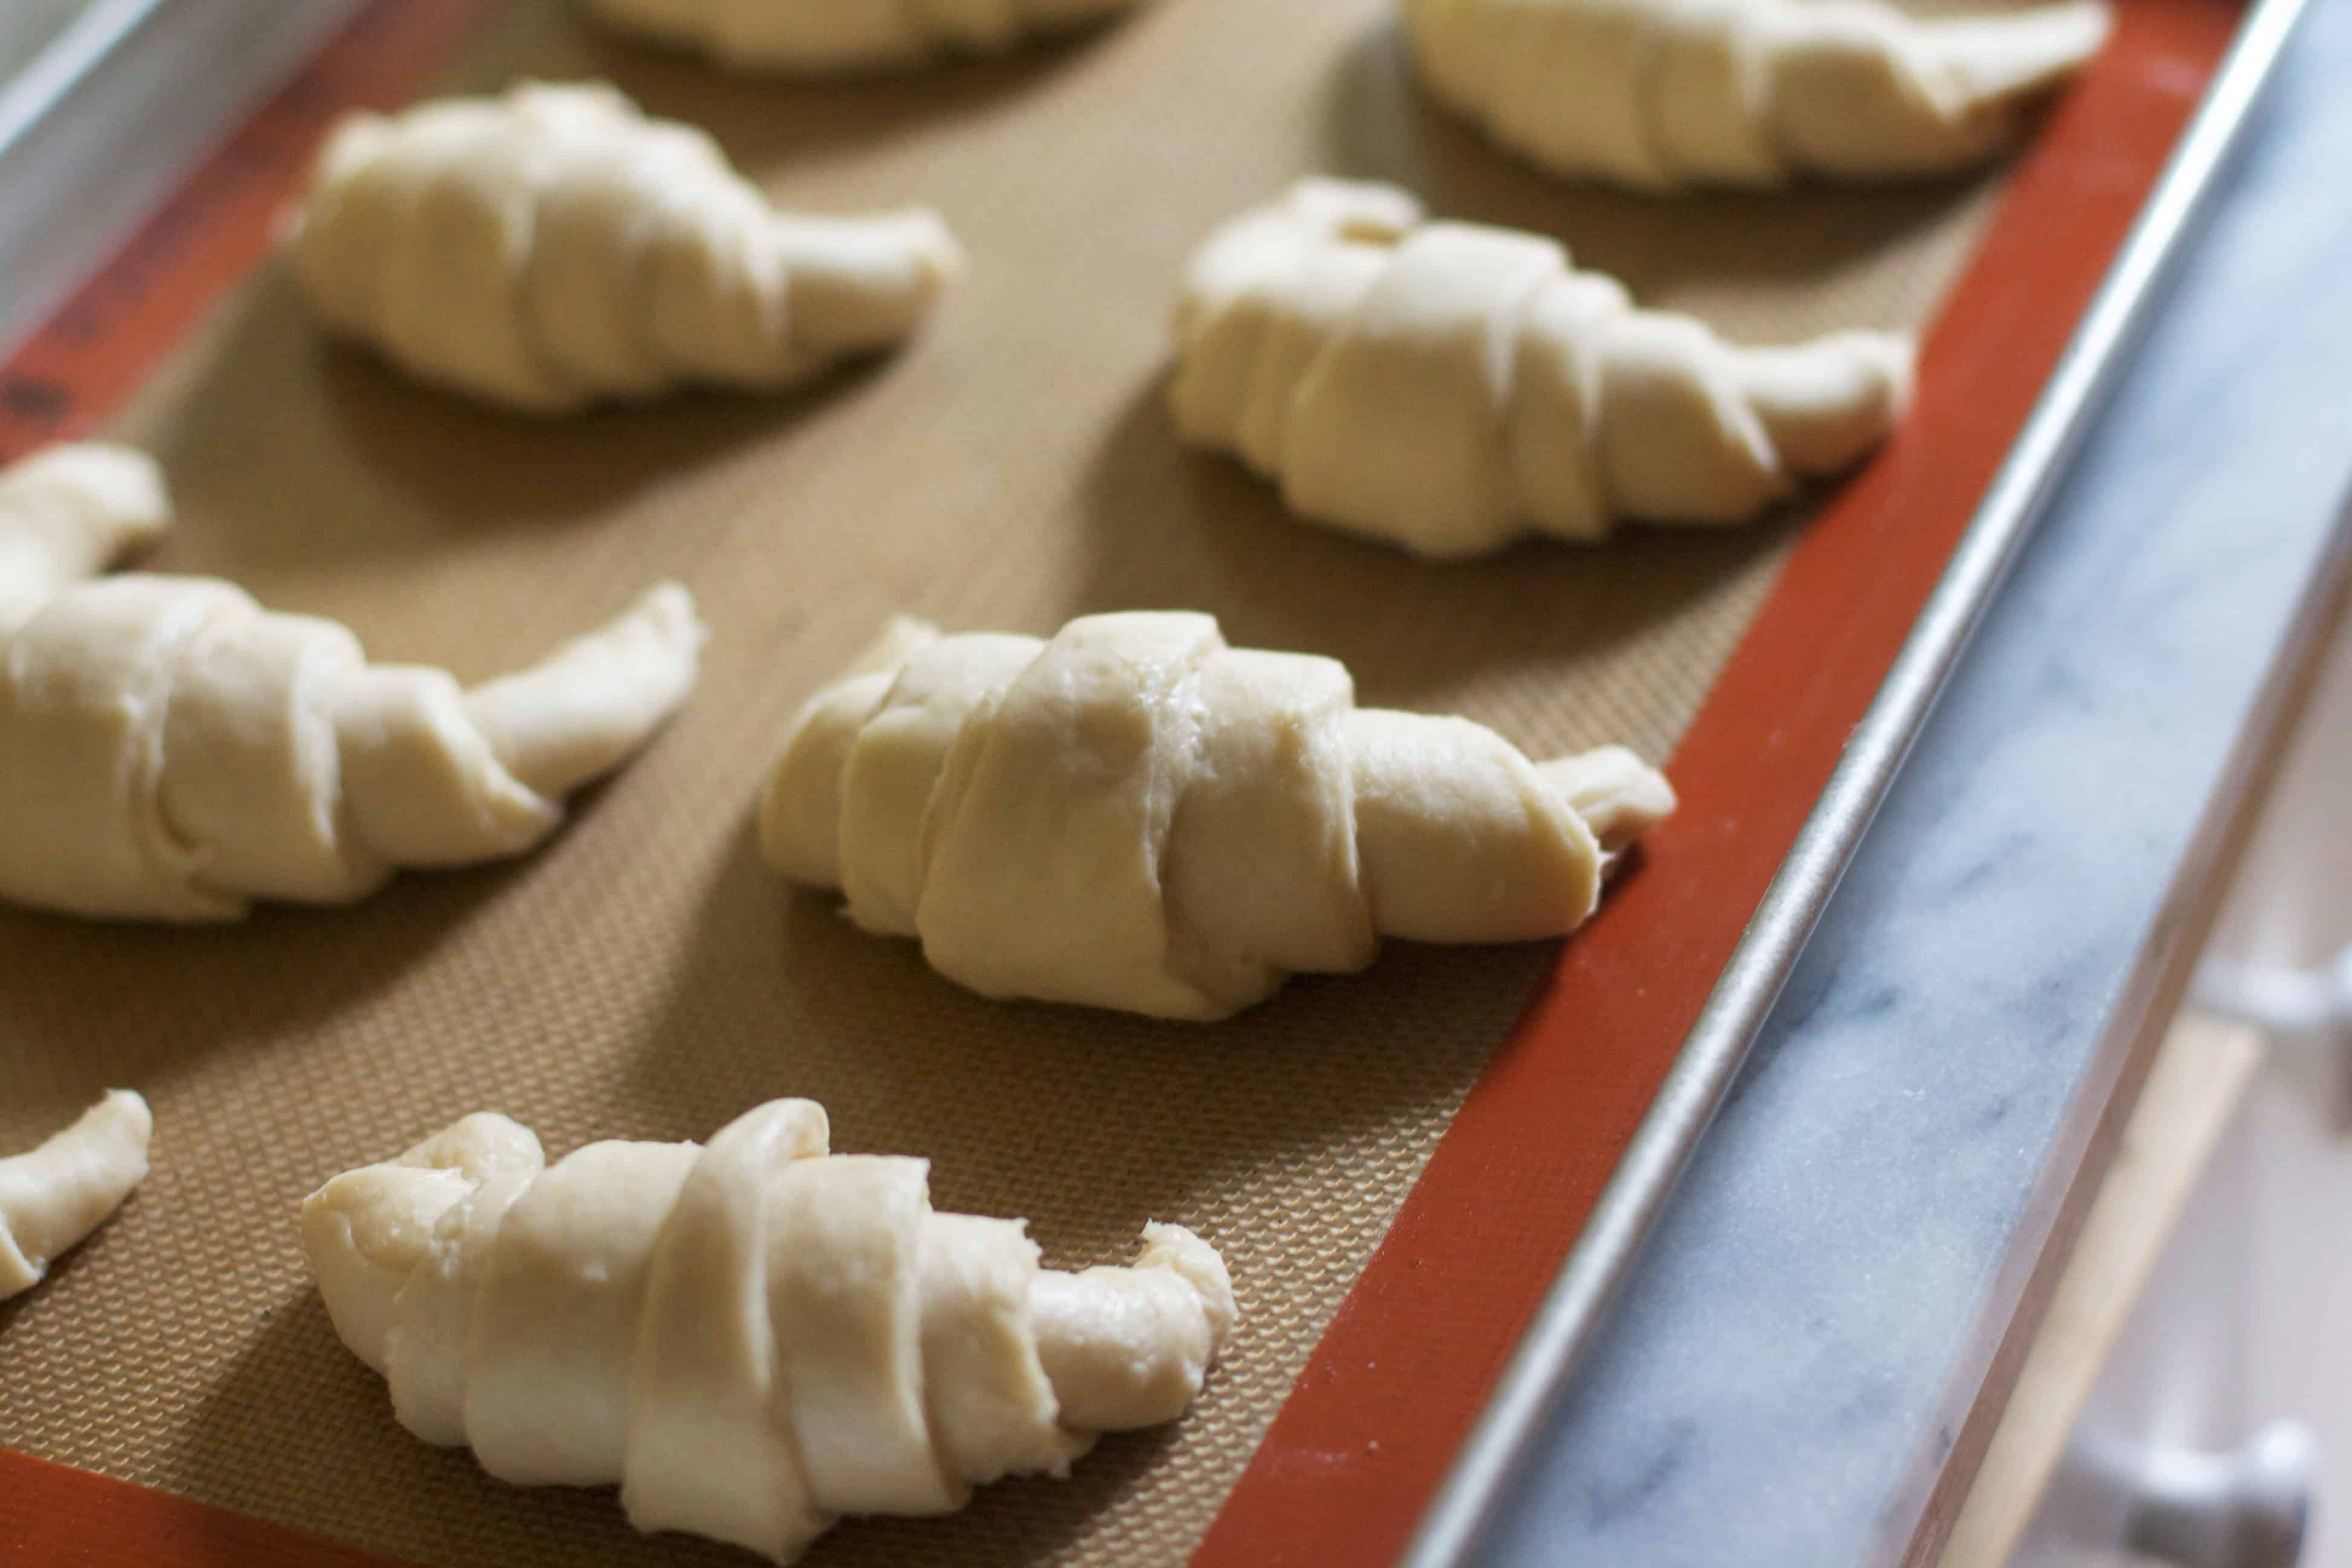
Proof for 45- 60 minutes or until puffy. Brush with egg, sprinkle with sea salt if you want, and bake for 18-22 minutes at 400F.

Let croissants cool (just a little) and enjoy!
These look sooo good, but I’m not going to lie, I’m a little scared by the recipe. I’ll have to work up the courage to make these this month though!
Great job! I wanted to try too, but chickened out. Plus I’m running low on time these days. ;)
Aren’t homemade croissants the best?! Yours look absolutely perfect and make me want to run to the kitchen and pull the ingredients out to make them asap. I suspect your homemade will compete with anything you have in Paris :)
You did a stellar job on these, Audra! I need to set aside a day to try this out!
Your croissants look positively delicious! so flaky and buttery. :) I need to start getting out of my comfort zone when it comes to baking, but it is scary, especially when you’re wasting so much butter and sugar and flour :/
I am in awe, Audra! These croissants are so perfect and gorgeously golden brown. Your photos are so lovely too. You did a great job!
Wow, amazing work! Those look totally professional :) Mmm, I wish I had one right now…
I totally recognize that technique from Baking Illustrated! You’re braver than I am because croissants have been on my to-do list since I spotted this recipe. I’ve gotta work up some nerve and give this a shot! Yours looks nearly perfect!
What an amazing job Audra!
I’ve been ridiculously afraid yet reeeeally wanting to try homemade croissants! You just made me feel a little more like maybe I can do it!
I want to hop on and bake these right now! Going through the printer right now…no lie! Hope you’re having a blast already on your trip! (=
These croissants look like perfection! Such a gorgeous golden brown! Croissants are on my 2013 to do list and seeing you make them makes me want to make them sooner!!! Hope your enjoying Paris!
No wonder croissants taste so good…they’re stuffed with butter! These look wonderful.
wow! these look so so good! need to try making them!
Beautiful! I made these last year as a challenge, and was so proud of myself when they turned out. I completely relate to your comment about sticking to your baking comfort zone… real poached eggs and souflee are two of those things that I keep wanting to make, but haven’t had the courage to try.
p.s Hope you’re having a fabulous time in the City of Lights! I’ve been there every year for the past few years, and I won’t get there this year. :-( Paris will grab hold of you like no other!
Whoa! I had no idea that’s how you make a croissant!! Delicious! Good for you for trying something new! :)
Ooh la la!
I really wanted to participate in her March Kitchen Challenge but i’m so deathly afraid of croissants! I will eventually accomplish it, I just know it, but I couldn’t make time for it this month. With the wedding and a billion meetings, I just didn’t have the time to dedicate to it & i didn’t want to fail! Thanks for the step by step photos! Yours turned out really pretty!!
Absolutely stunning!
I saw the title and got really excited, then I read the recipe and got less excited…. Thank you for the pictures though, that helped make it seem less daunting. I will try these someday!! Enjoy Paris!!
These are beautiful! Great job! Paris!
Great step-by-step pictures
oh these look wonderful! i can completely relate to the fear of wasting time and ingredients. i’m not a happy camper when that happens :( but props to you for tackling these beauties!
these are super gorgeous, Audra!! you needn’t have panicked at all because they are perfect!! Hope you’re eating a ton of these in Paris!
So happy these came out for you! Croissants have long been on my “must make from scratch one day” list. You might’ve convinced me :)
Wow your croissants look so good! I have to admit I’ve never been able to bake croissants successfully so far, so I’m so impressed with yours!
You really are crazy but these look amazing and worth it!
I am in awe! Simple gorgeous!
WoW… I have made croissants once in my life but i remember it was soooo hard.
Now it looks easier, thanks to you. Will try this soon
one question though, why did you make the slit in the base of the traingle?
Thanks Amani!
You know- I’m not 100% sure what the logic is behind cutting that slit- except for that it helps to form them into the tradition “crescent” shape!
I am most definitely looking forward to trying this recipe out over the weekend. I do however have one question about the recipe is the whole milk a must or can 2% be substituted?
I don’t think 2% milk should be a problem. Definitely not skim though- you want some fat!
hermes ワンピース
hermes アウトレット 価格
100%本物&激安
パリ hermes
hermes パリ
hermes カチューシャ
hermes コレクション
hermes ショップ
hermes フランス
エルメス 店舗
バッグ ブランド
フランス hermes
hermes 楽天
品质保证全国送料無料
の人気
hermes アウトレット バッグ
hermes ネックレス
hermes リボン
hermes e store
hermes マテラッセ
hermes 仙台
hermes がま口
hermes 人気
Do you think it would be possible to do the butter layer in the food processor rather than with a board scraper?
I tried it once in my kitchen aid and it worked well! You basically want to break it down/ make it smooth/pliable without letting it warm up too much.
If you do not have access to European-style butter, what do you suggest as a substitute?
With the instant yeast, do I need to use warm water to activate it first?
Nope! :)