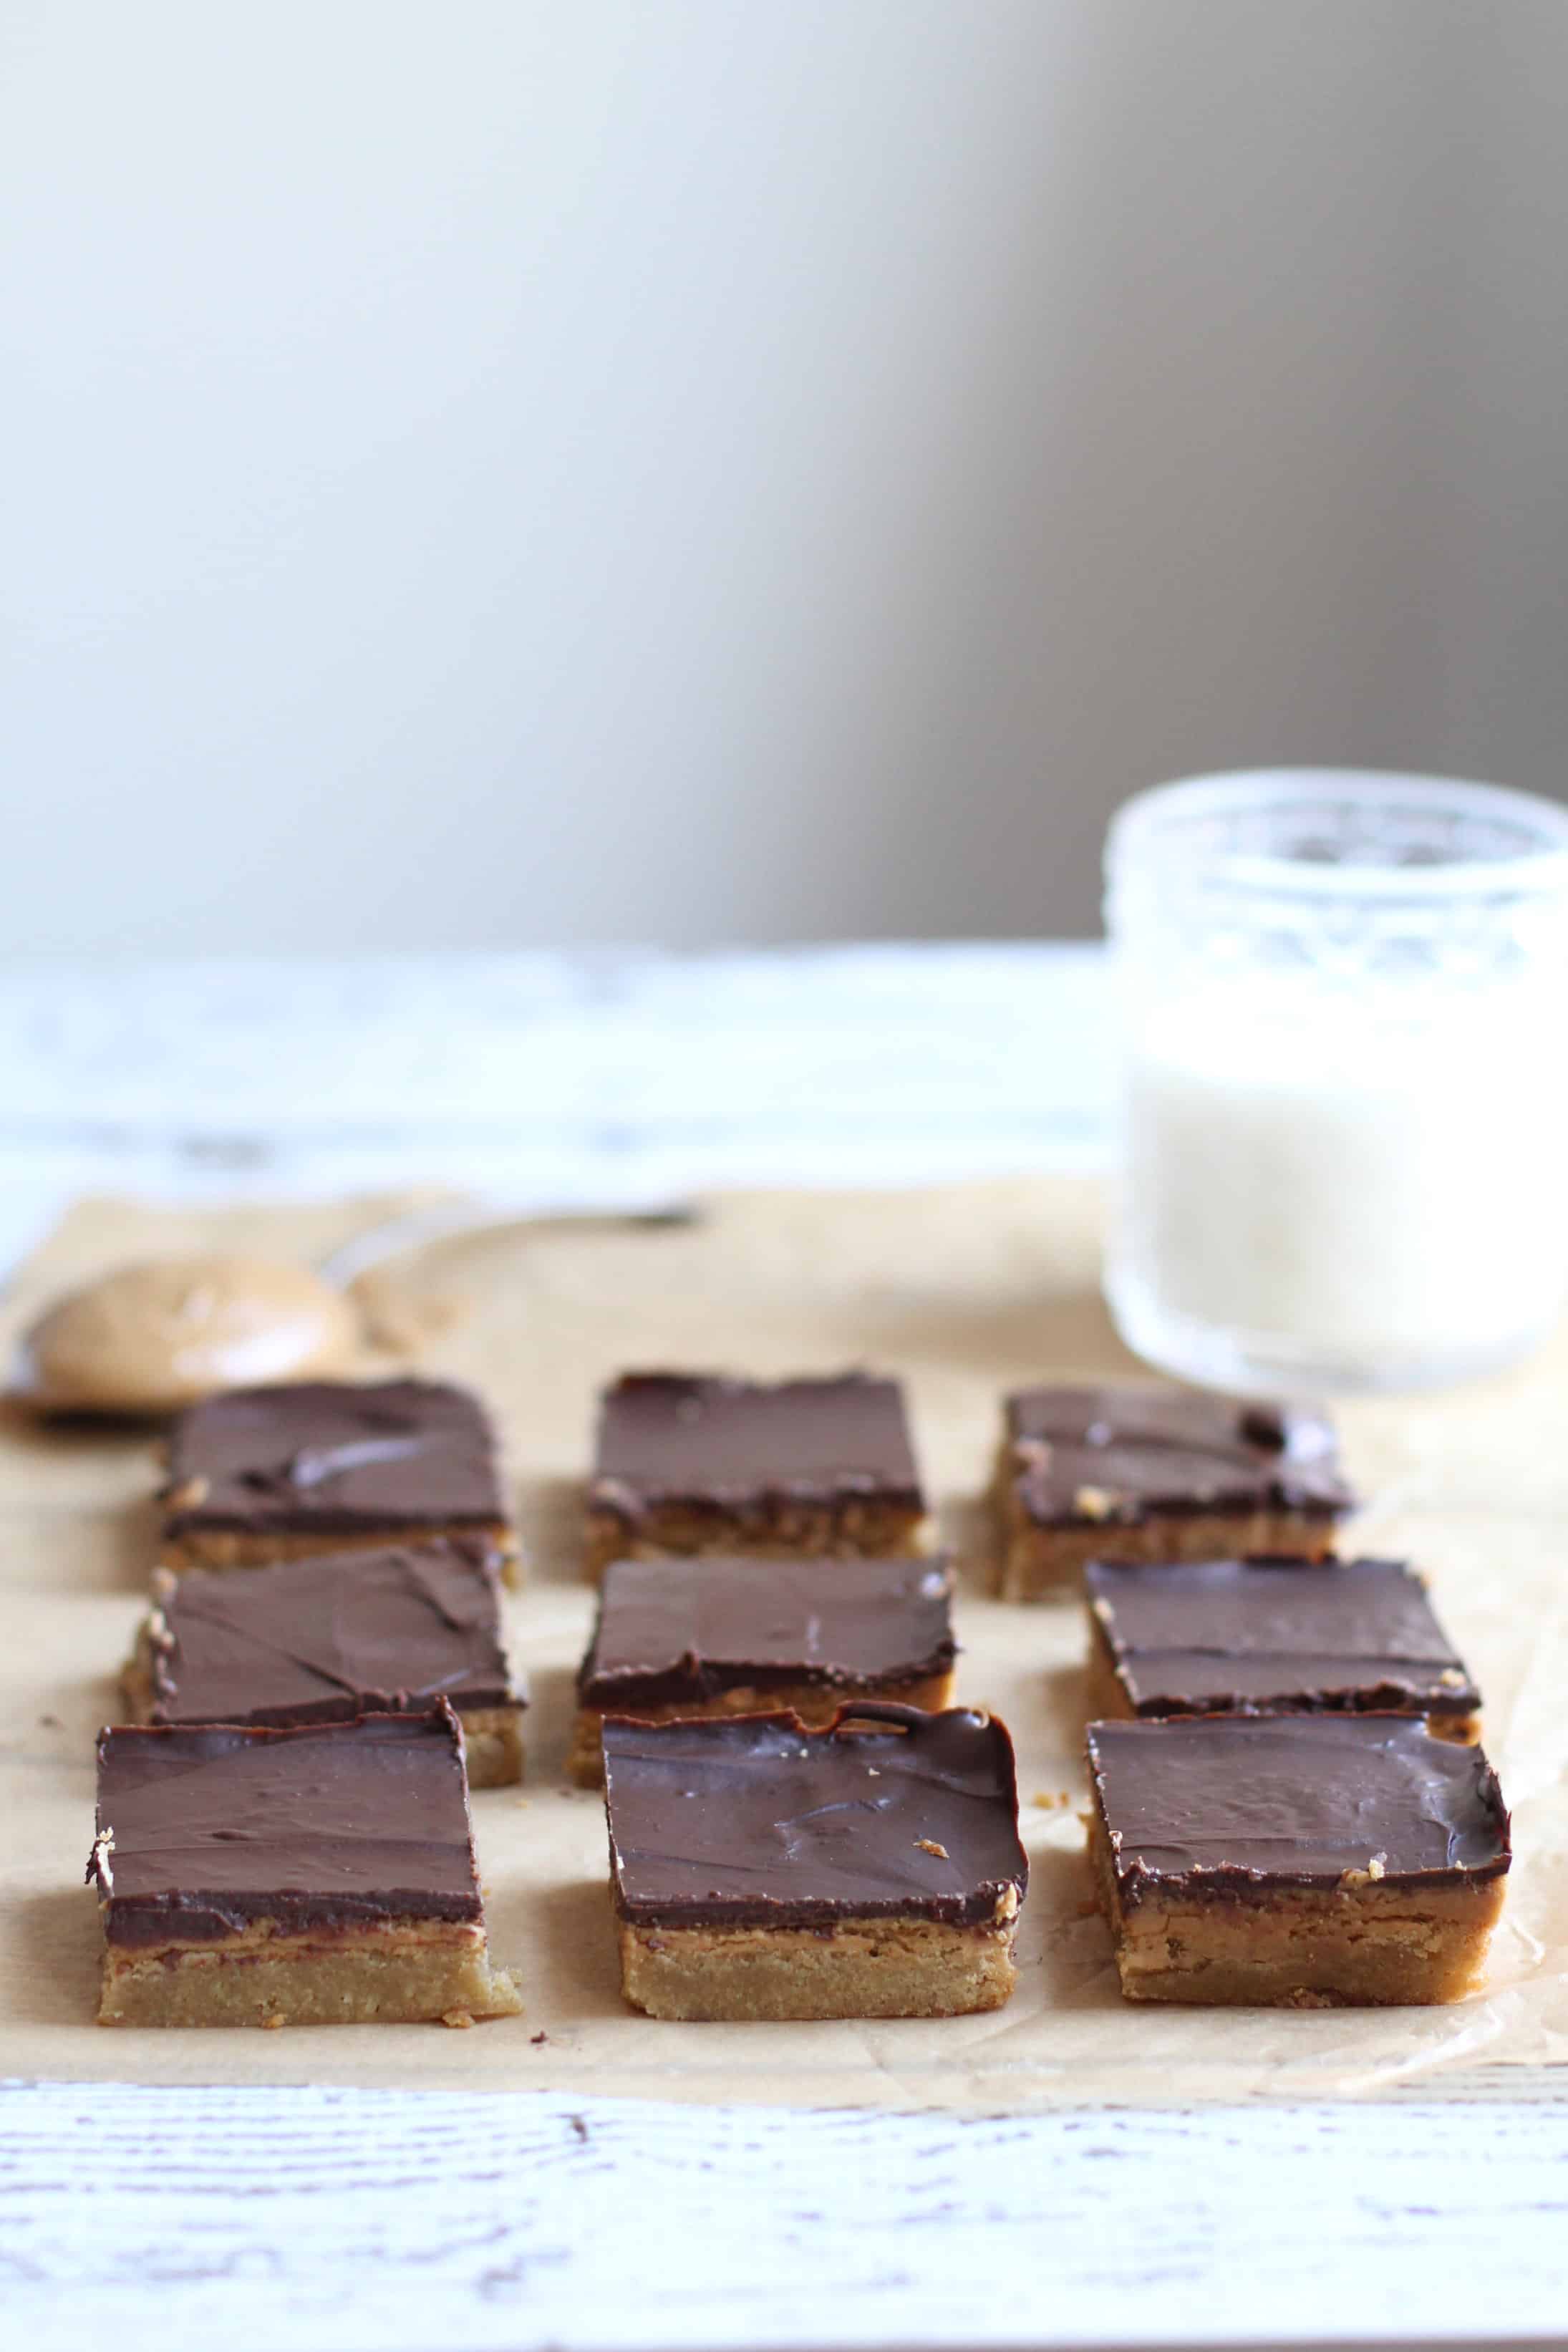
Peanut Butter Cup Blondies
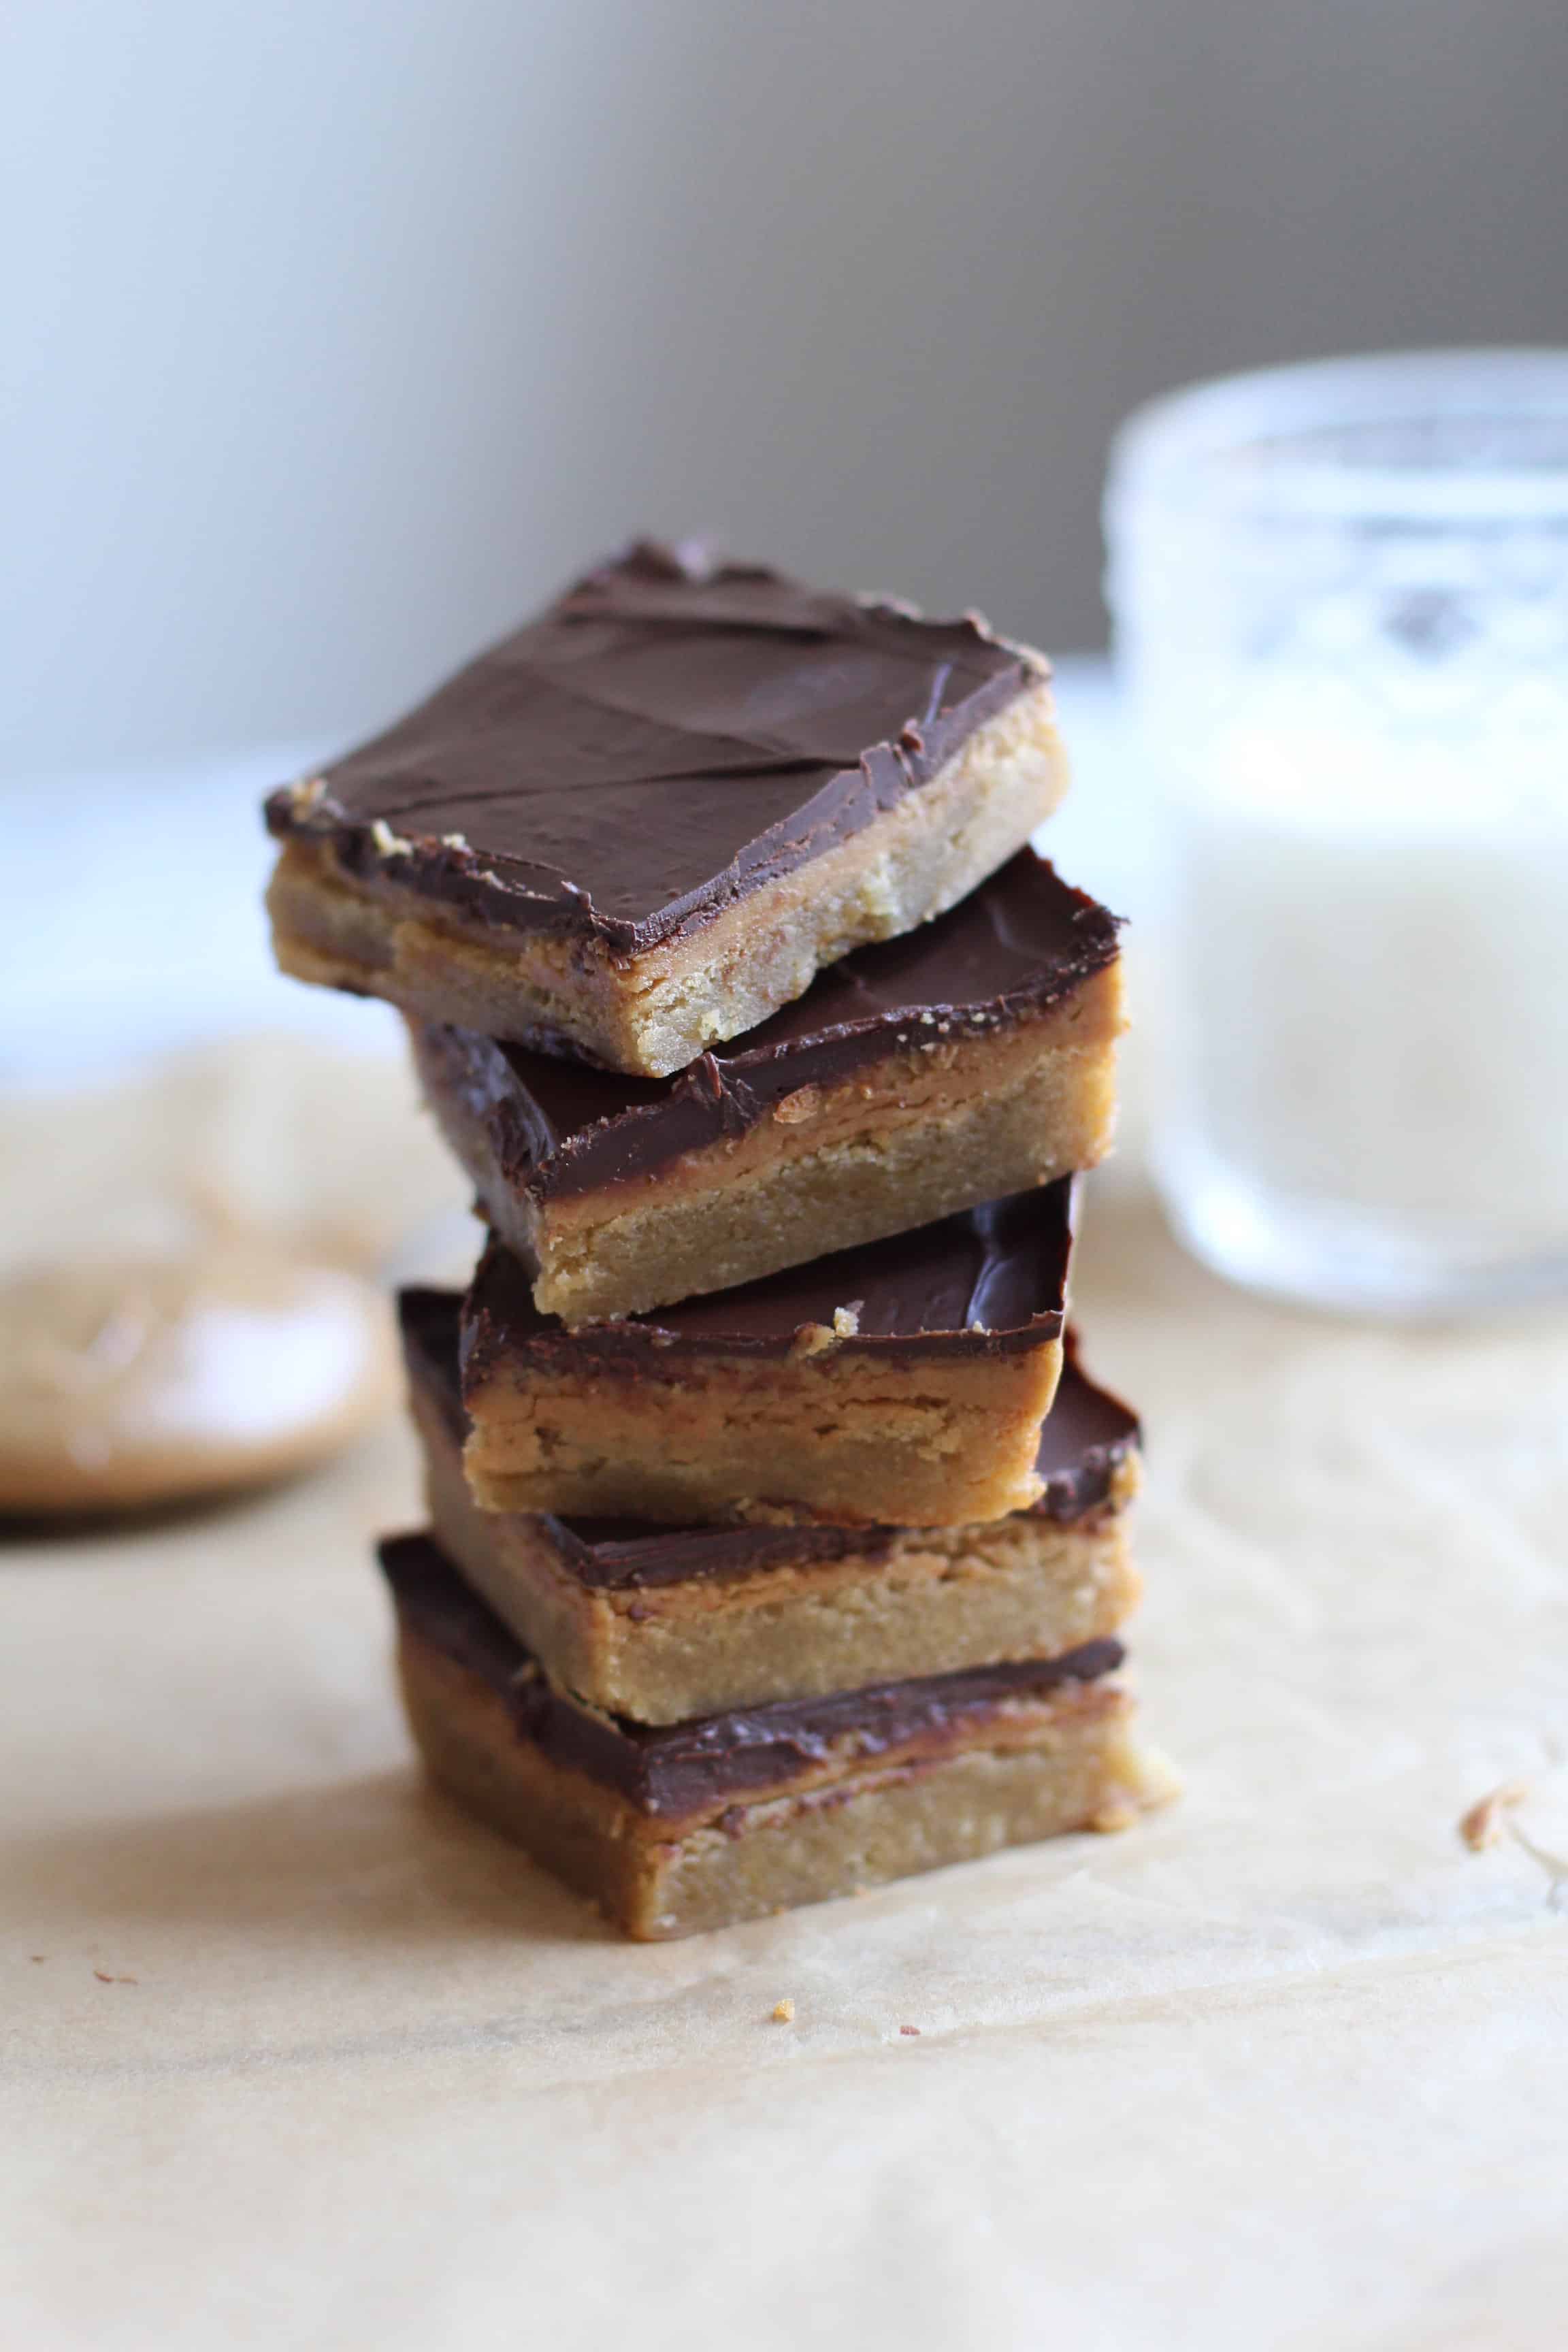
Hugo & I are hosting a sweet sign language class at our apartment these days and it’s adorable. 6 Mamas, 6 Babies, one great teacher and lots of learning- super cute right? I love having everyone over- not only is it extremely convenient to not have to leave during these bitter cold afternoons, but I get a chance to give people baked goods which is the lifelong struggle I seem to deal with. :) I whipped these up for last week’s class and they were a total hit. What’s not to like? Chewy blondie, creamy peanut butter, rich chocolate- are you already sold on these ?
I like this recipe because even though it seems fancy and complicated, it’s actually quite simple to throw together. The base blondie is soft and chewy- and the perfect recipe to adapt any which way. (with mix-ins etc.) Then you spread on a simple peanut butter mixture, melt some chocolate, slather it on top, let it set and dig in. I threw these together in no time and everyone adored them. These are the types of recipes I think every home baker needs to have in their recipe box! (They would be perfect for a bake sale or potluck don’t you think?)
We haven’t learned the sign for “these are delicious” yet, but I promise they are! :)
Peanut Butter Cup Blondies
Ingredients
For the Blondie Layer:
- 8 tablespoons butter, melted
- 1 cup brown sugar
- 1 large egg
- 1 teaspoon vanilla extract
- Pinch salt
- 1 cup all-purpose flour
For the Peanut Butter Layer:
- 1/2 cup peanut butter
- 1/4 cup powdered sugar
- splash of vanilla extract
For the Chocolate Layer:
- 1 cup semi-sweet chocolate chips
Instructions
- Grease an 8x8 baking pan with butter*. Set aside. Preheat oven to 350F.
- Cream together the butter and sugar. Add the egg & vanilla and mix until smooth. Slowly add the flour and mix until just combined.
- Spread batter into the prepared pan (the batter will be thick so a greased spatula helps,) and bake for 20 minutes or until set. (A little under done in the middle is Ok.)
While the blondies bake prepare the Peanut Butter filling:
- With an electric mixer cream together the peanut butter, powdered sugar, and vanilla.
- When the blondies have cooled, spread the peanut butter mixture evenly over the top of the blondies. Pop it in the freezer while you melt the chocolate.
- Either place the chocolate chips in the top of a double boiler, or microwave in 30 second increments, mixing in between each one until smooth and melted. Spread the melted chocolate over the peanut butter layer.
- Pop the whole pan back into the freezer to set. You want the chocolate to harden completely, but let it soften a bit at room temperature so it doesn't crack when you cut into it.
Notes
Next time I would definitely double the peanut butter layer- It was good as is but I think extra creamy peanut butter would be amazing and make these even better. Base blondie recipe adapted from: Smitten Kitchen *To make it easier to lift the bars out, you can make tabs by lining the pan with two over-lapping pieces of parchment paper.
Nutrition Information:
Yield: 16 Serving Size: 1 gramsAmount Per Serving: Unsaturated Fat: 0g
Love the idea of these and your pictures make them look so yummy! Pinned this recipe :)
Love these!! The peanut butter and chocolate layers have my name written all over them…and I love that it’s all on a chewy blondie base. Pinned!
These look awesome! Thanks for the recipe!
We made these this past weekend, absolutely delicious!
Would it be reasonable for me to crash your sign language get-togethers just so I could snag some of these treats?!
Audra, these look so good! Blondies are one of my favorite desserts, and you can tell by my blog that I have an affinity for the combination of chocolate & peanut butter.
Btw, it seems like we have a lot in common! We’re both Midwest transplants now in NYC. What borough do you live in?
ah! I so want to learn the baby sign language stuff for when I have kids!
and these blondies are like the best lil treat! So rich and peanut buttery and chocolatey and I’m sure they were a COMPLETE hit!
Made these today- they are so delicious. I took your advice and doubled the peanut butter layer- so glad I did ☺️
WOW!! I could eat the whole pan RIGHT NOW!! Yum!!