Old Fashioned Dinner Rolls Recipe
When it comes to family dinners and holiday meals, nothing beats the smell of homemade dinner rolls filling up the kitchen. Today I’m sharing a recipe for old-fashioned dinner rolls that are not only easy to prepare but also melt-in-your-mouth delicious. Follow these step-by-step instructions for creating the perfect batch of buttery, fluffy rolls that will elevate any occasion, from Thanksgiving dinner to everyday family gatherings.
Ingredients for homemade rolls:
- Flour
- Sugar
- Active dry yeast
- Milk
- Melted butter
- Salt
- Warm water
- Eggs
What you need for Old-Fashioned Yeast Rolls:
- Large bowl
- Baking sheet
- Whisk
- Bench Scraper if you have
- Warm spot for proofing (I like a barely preheated oven)
- Electric mixer with dough hook (optional)
The Process:
- Warm the milk until it’s at room temperature. In a bowl, combine the warm milk, sugar, and butter. Let cool until room temperature.
- In the bowl of a stand mixer, or a large bowl with hands, combine half the flour, yeast, and salt. Add the eggs and milk mixture and knead, adding the rest of the flour as needed. Use the dough hook attachment and mix on low speed until a soft dough forms. You’ll know the dough is ready when it easily releases from the sides of the bowl.
- First rise- Transfer the dough to a oiled bowl and cover with plastic wrap or a tea towel. Let the dough rise in a warm place for about 1-2 hours or until it doubles in size.
- Punch down the risen dough and on a lightly floured surface divide it into equal pieces. Shape each piece into a ball and place them in a greased baking dish or muffin tin.
- Cover the dough balls with plastic wrap and let them rise for a second time until they puff up and fill the baking dish. This step ensures that your rolls are light, airy, and perfectly fluffy.
- Preheat your oven to 350F. Uncover the rolls and bake them until they turn a beautiful golden brown on top.
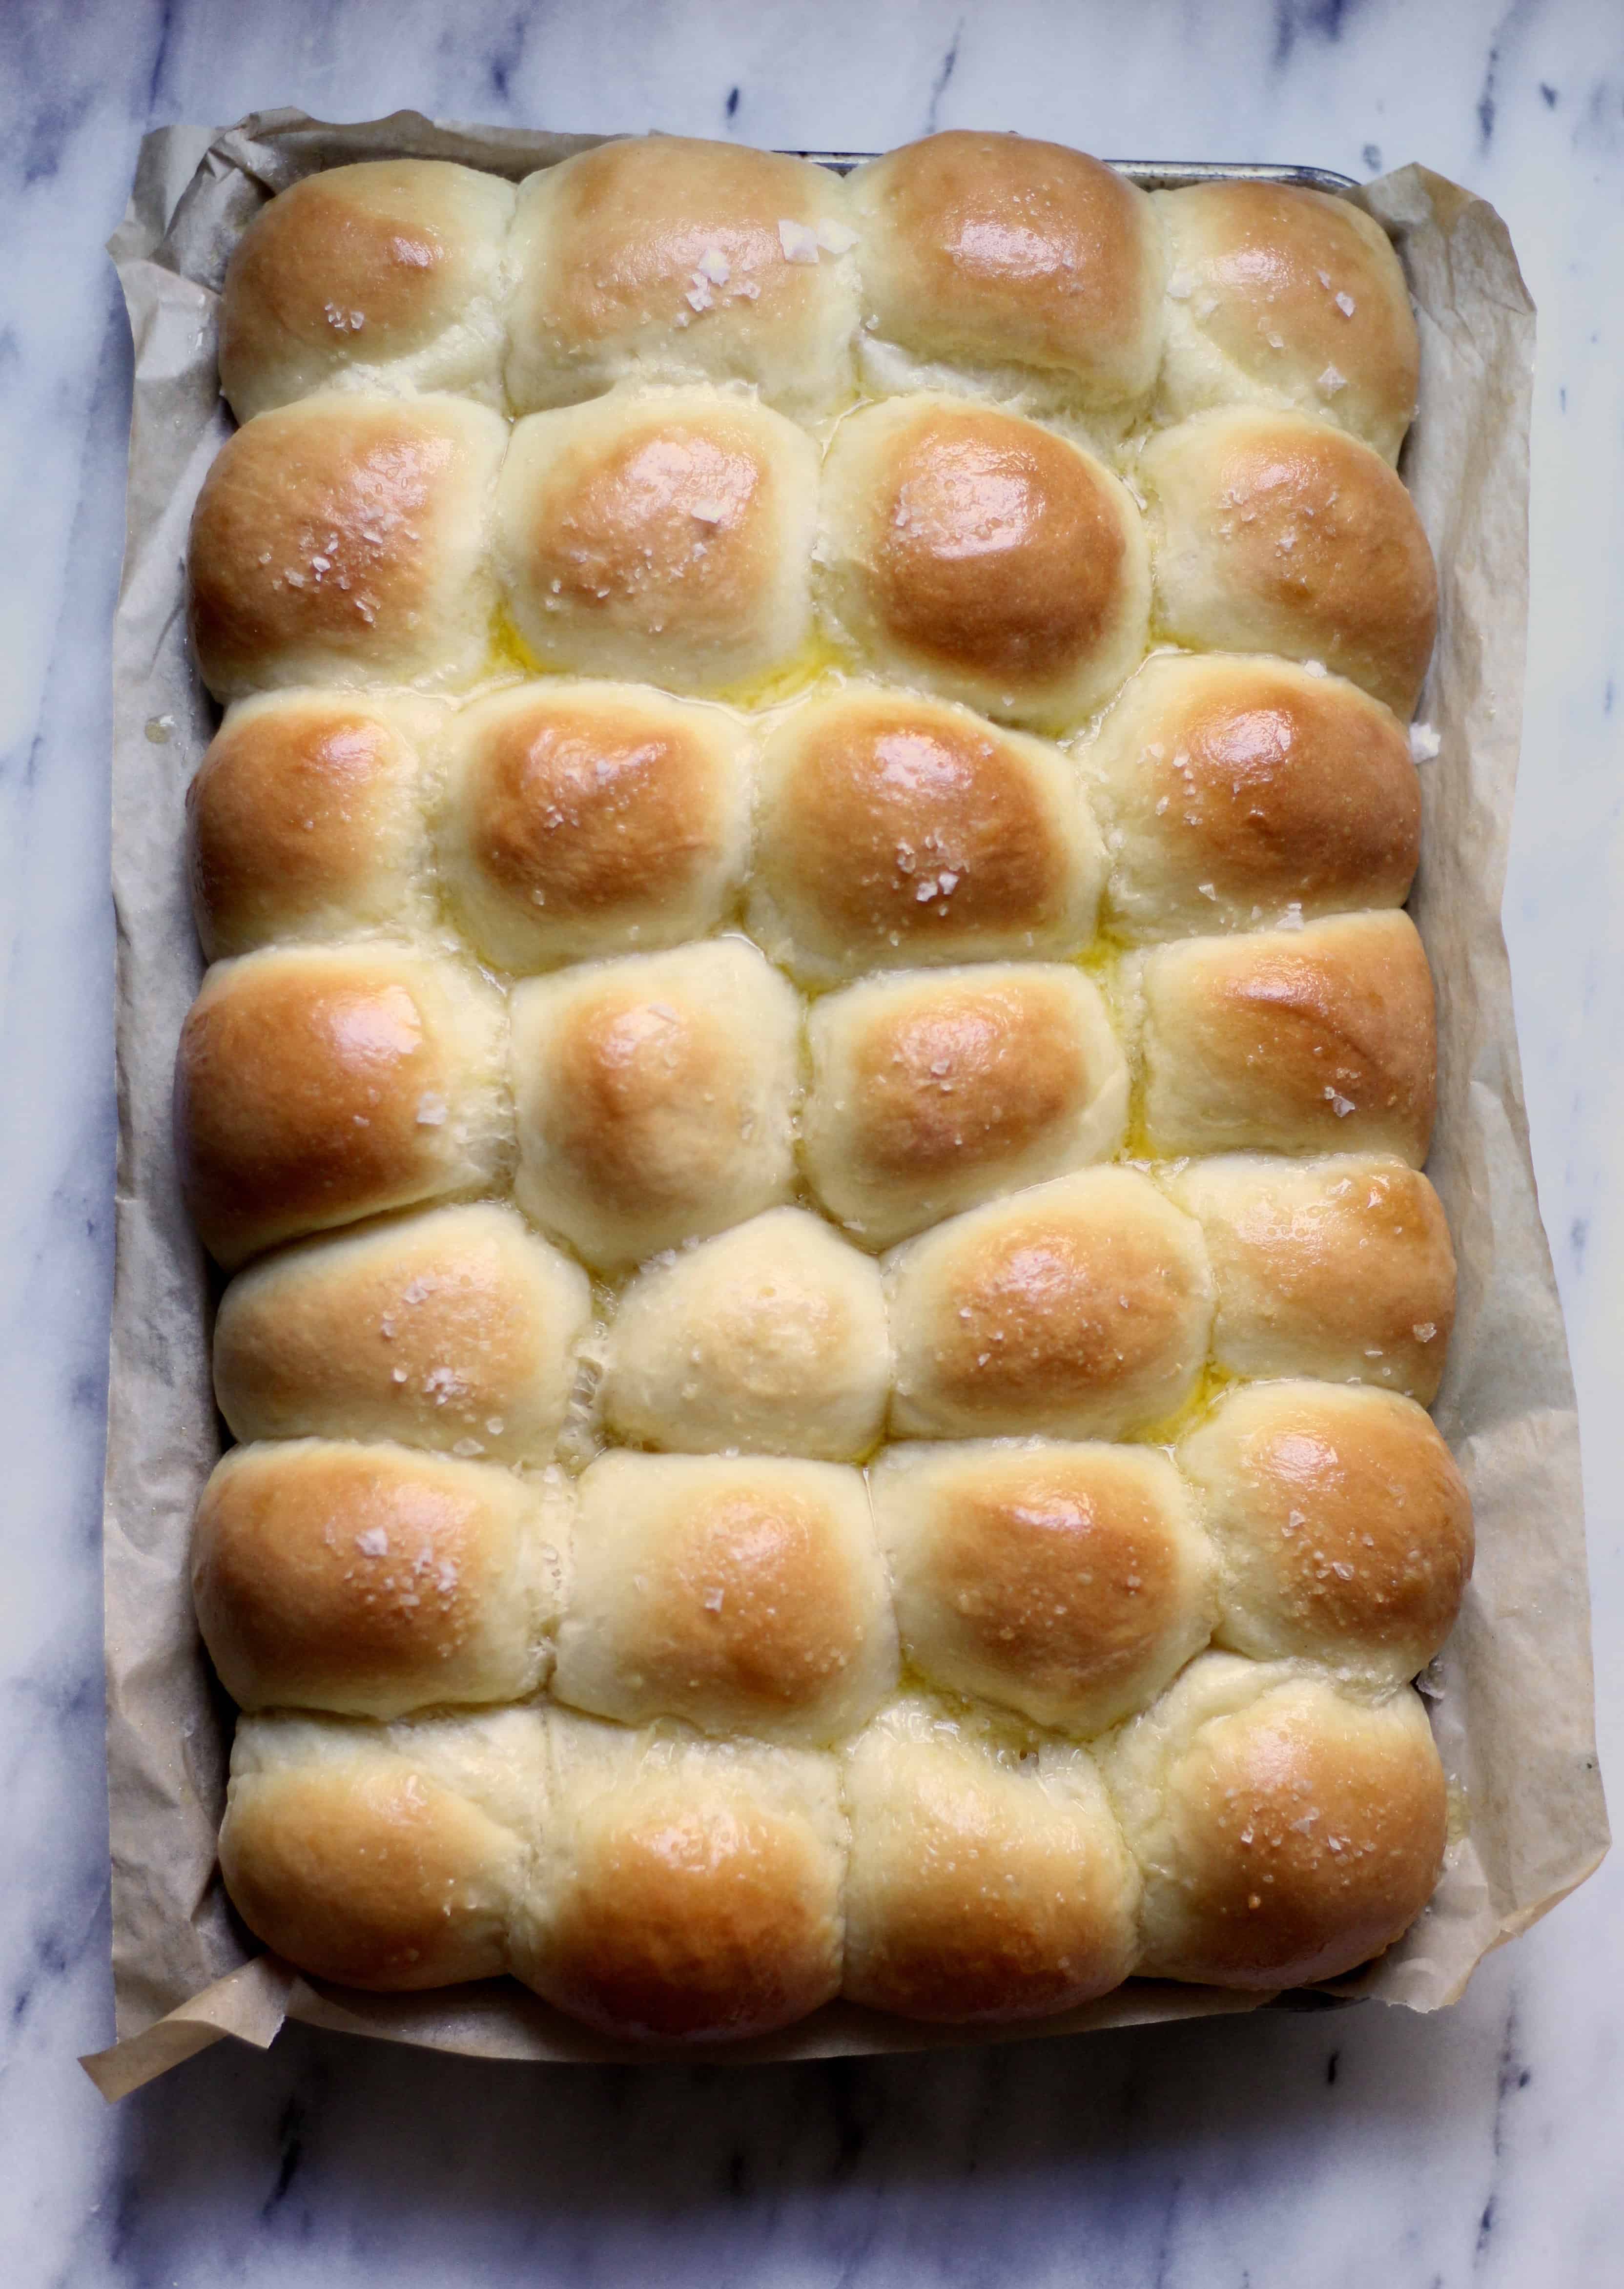
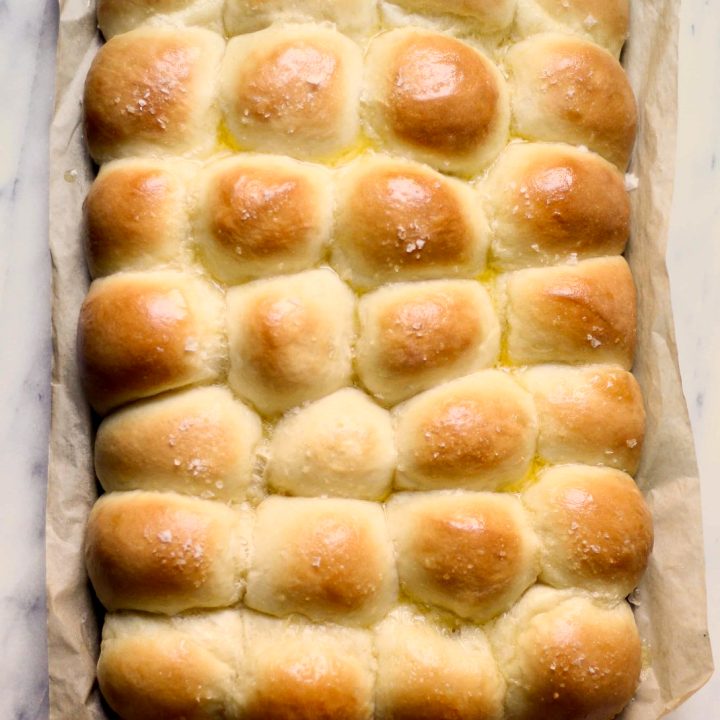
- Once out of the oven, brush the warm rolls with a little butter and sprinkle with sea salt. Allow them to cool on a wire rack.
- Enjoy your buttery rolls with soup, for mini sandwiches, or as a side for your holiday meal!
Make-Ahead Options:
These old-fashioned dinner rolls are perfect for make-ahead preparations. After shaping the rolls, cover the baking dish with plastic wrap and refrigerate overnight. The next day, let them come to room temperature and go through the second rise before baking.
Storage:
Store any leftover rolls in an airtight container or wrap them in aluminum foil. They can be reheated in the oven or microwave, making them a convenient and delicious addition to your meals.
Interested in more homemade bread recipes?
My famous Brown Butter Cinnamon Rolls are always a crowd pleaser!
Pumpkin Parkerhouse Rolls are another amazing holiday bread option!
Old Fashioned Dinner Rolls Recipe
Ingredients
- 1 1/2 cups milk
- 1 stick unsalted butter, cut into pieces, plus more for brushing
- 1/4-1/2 cup sugar*
- 1 package active dry yeast
- 1/2 cup warm water
- 3 large eggs, lightly beaten
- 1 1/2 teaspoons salt
- 6-8 cups all-purpose flour
- Sea Salt for sprinkling
Instructions
- Place milk in a small saucepan and bring to a simmer. Remove from the heat, stir in the butter and sugar stir until sugar is dissolved. Let cool to luke warm.
- In the bowl of a stand mixer fitted with the dough hook, combine the yeast, warm water, milk mixture, eggs, salt and half the flour.
- Mix for a few minutes until combined, scraping the bowl down with your spatula if needed. Add the remaining flour, 1/2 cup at a time until dough comes together and forms a soft, loose ball. (The dough will be very soft but shouldn't be too sticky. I used 7 cups total flour.)
- Turn the dough onto a floured surface and knead by hand for about 5 minutes, adding a bit more flour if the dough is still very sticky, until smooth.
- Place dough in a greased bowl, cover with a clean towel, and proof in a warm place for 60-70 minutes, or until doubled.
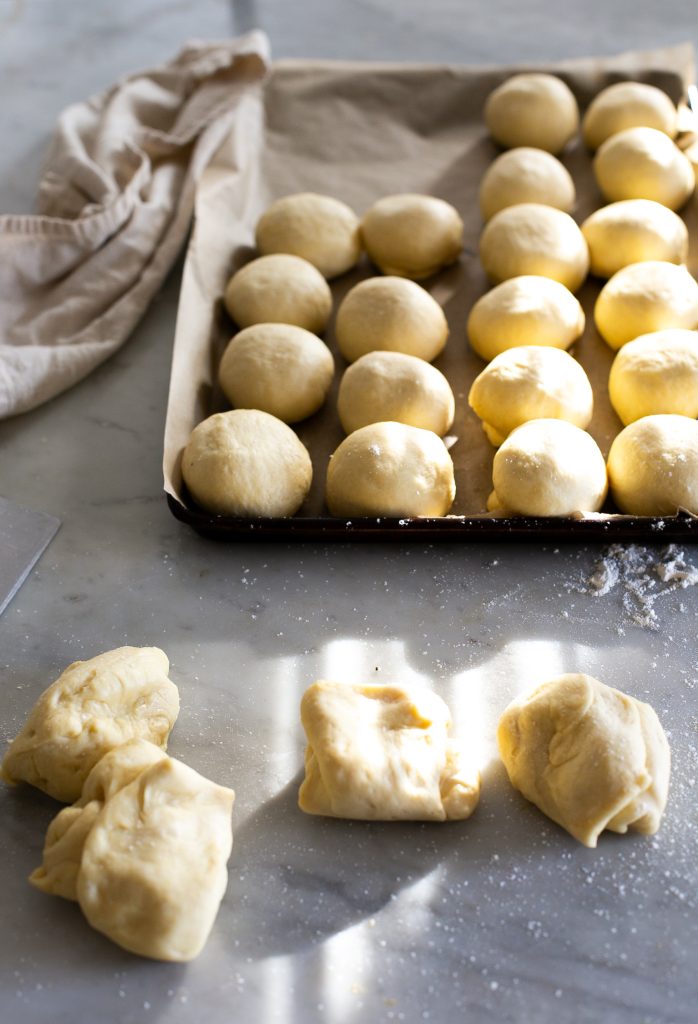
- Turn proofed dough onto your floured surface, punch it down a bit, and roll or spread the dough into a rectangle. Shape into rolls and place them on a parchment lined baking sheet. **
- Cover again and let rise for another 20-30 minutes.
- Preheat oven to 350 F. Bake for 20 minutes or until golden.
- Brush with melted butter and sprinkle with sea salt.
Notes
*The original recipe calls for 1/2 cup of sugar, which definitely gives the rolls a little bit of a sweet taste. I didn't mind it, but will cut it down to 1/4 cup next time just to make it a bit more subtle.
** If I had wanted these to be perfectly the same size, I would have measured each one to weigh 1.5 oz on my kitchen scale. I eyeballed it though and was fine with them being a bit more rustic. To shape them into round rolls, I cut off the portion of dough, turned all the edges under and pinched them together to form a ball.
Recipe adapted from The Food Network
I made these last year for Thanksgiving and a number of times over the rest of the year. They are so good and fairly easy, even if yeast makes you nervous.
What if you don’t have a mixer like that? Should you hand mix them? Or is a hand-held mixer ok?
remember i made these at that restaurant in california? i wonder if its the same ratio of ingredients! i’m thrilled to have your recipe as the one i have is to make like 100 and its in metric measurements!
one thing i thought you might want to mention in your recipe is measuring the rolls so they are equal and then how to roll them into the shape with a cupped hand? i feel like thats an important detail on how to get these to look the way you did…at least for me this specific detail was super important and it took me a while to get the hang of it…unless did you wing it? i mean how did you get these rolls to be round? i REALLY look forward to making these again so thank you for this recipe!!!
ahhhh i just found my recipe and this is what this pastry chef said: Scale to 1.7 oz and degas the dough and boule into the center forming a ball. Does this help anyone? I hope so!
So- I didn’t really measure the dough or weigh it for these, but I would have done 1.5 oz if I wanted them to be absolutely perfect. I eyeballed it! I cut the dough into what looked like equal parts and then just turned the edges under to make a ball. I wish I had a more precise way of describing it- I will add this to the notes though! :)
Hello, might you share your recipe for 100 rolls as I need a recipe for large party I am hosting. I would be appreciated. Thank you. Laura
Editor, please!? The instructions are cut and pasted wrong so at number 10 I am supposed to knead and punch them down while shaping them again AFTER baking the first time?…Yikes!!
No worries except the rise time is different between the two competing instructions; I assume the first kneading and rise time is the real deal?
My mistake- I blame pregnancy brain. :) I rewrote the directions and forgot to delete the other ones. Thank you for letting me know!
Whew! I thought maybe you posted a recipe for Twice Baked Dinner Rolls by some obscure artisan bakery and I was the only one confused. Thanks for the recipe which is not too complicated amongst a busy Thanksgiving meal plan. I’m part Italian, so you say BREAD and I say GRAZIE!
I find the instructions from point 6 on confusing…perhaps my brain is still sleep muzzy or…
I would really like to make these…please clarify – surely these are not meant to beshaped into rolls, baked for 20 minutes and then kneaded again and allowed to rise and then shaped into roles and baked again?
Thanks.
I made an error but it should be fixed now. So sorry! :)
That is one seriously gorgeous and impressive pan of rolls!! I want to grab one off the screen and slather it with butter :) I definitely want these with my Thanksgiving dinner!
These look scrummy!! So excited. Can’t wait to make them.
*jaw drops* these rolls look FLAWLESS!
Is there any aspect of this recipe that could be done ahead of time and then, say, refrigerated? We’re driving 3 hours to our family and I want to bring rolls and stuffing. These look amazing but I don’t have time to do the whole process after we arrive. Thanks!
I replied to another comment but I want to make sure you see it too :) You have two options. One is fully bake them, allow them too cool, freeze, and then warm them again before your meal. I would wait to brush them with the butter/sea salt until right before you serve! OR- you could shape the rolls, seal air tight, and then freeze un-baked. Day of- let them thaw room temp and the proof until they are puffy. Then bake as directed! :)
They lasted all week and just made a new batch for this week! The shutdown has us not shopping, and these were a total neighborhood hit…i cant stop making them! Awesome!
Hi! Can you make these ahead of time? And if so, how long can these be kept? (I’ll probably keep them in the freezer)
Oh wow, did not see the comment above me, LOL. Anyways, I’m looking to make these today or tomorrow for Thanksgiving on Thursday. Is that possible?
Yes I think so! You have two options. One is fully bake them, allow them too cool, Freeze them, and then warm them again before your meal. I would wait to brush them with the butter/sea salt until right before you serve! OR- you could shape the rolls, seal air tight, and then freeze. Day of- let them thaw room temp and the proof until they are puffy. Then bake as directed! :)
this is similar to a brioche recipe I have been mixing in bread machine, then shaping into rolls. They are addictive and I don’t brush with butter, yet they are plenty buttery-eggy-milk-tender for us.
Thanks for the recipe, I’m going to try it in the bread machine today.
For those asking about make ahead options, it should be possible to make the day before, shape and refrigerate for a cold rise (meaning don’t leave it out for the second rise; shape, cover and refrigerate instead. The rolls will rise overnight.).
Thanks Eli! I agree with what you said about making them ahead of time!
Must. Have. Now. That is all.
We always had store-bought Parker House rolls for Thanksgiving. As a baker, I’m really looking forward to trying this recipe this week. Hope I can get them looking as beautiful as yours!
Hello,
If I make these today and heat up tomorrow will they be just as good? Any suggestions? Thanks!
They will still be great. If you haven’t already baked them you could make the rolls but not bake them and let them proof overnight. I’m guessing you already made a decision on this though :)
I have made Parker House Rolls many times over the years but misplaced my family recipe. This looks like an almost identical one so I plan to make tomorrow for Thanksgiving. I do have one question, have you doubled this recipe with success? I know sometimes things need to be tweaked a bit and was just wondering if you had doubled and what the outcome was. Thank you. Gobble Gobble and Happy Thanksgiving!
I haven’t doubled this recipe but I can’t imagine you’d need to do anything special. Happy Thanksgiving!
I’m making these now!!How many does the recipe make?Also do you only put half the stick of butter in the dough then use the other half to brush on after?doesn’t specify…
Thanks!
One stick in the dough and extra for brushing :) today they made 40 rolls when I weighed them each to be 1.5 oz. last time they were larger and made more like 30!
I made these for a catered dinner this past weekend. It was my first attempt at rolls and they turned out beautifully. I used only the 1/4 cup of sugar but might use a bit more next time.
I got over 3 dozen rolls( I even weighed them out)! I will definitely use this as my go-to recipe.
These looks so great, what size baking sheet do you use?
For these I used a 13×18 half sheet pan
I made these rolls last night to go with a beef stew, and they were delicious. It was my first time baking with yeast, so I was a nervous wreck, but they were a breeze. I did find they took longer than 20 minutes to cook-more like 30, but maybe I put them too close together in the pan or my oven is a bit off?? That was one thing I wanted clarification on. How closely should they be set in the pan? Also, i have a kitchen aide standing mixer that I love. This was the first time I used the break hook. I found the hook only circulated right in the middle of the bowl. I actually had to unlock my bowl and move it around so the hook could mix the dough more thoroughly. Does this sound like my mixer wasn’t really working properly?
Hi Tracey! There’s really no right answer to how to fit them in the pan- I like them super close together as well as more spaced out- both options are delicious. Every oven is different so an extra 10 minutes to bake it’s too odd- it’s good to monitored them to see when they were truly done :)
You mixer is working just fine. I have the same stand up mixer and I can tell you that once you put in the right amount of flour the hook will automatically pick up and form the dough. Just add flour slowly. Also no hand kneading is needed should you own a mixer like this. Once the dough has formed in a ball just lower the speed and keep kneading for the five minutes required…
If I wanted to make up several batches to freeze, should I do steps 1-7, and then freeze until baking? THANKS
Should I use whole milk or will 1% work just fine? Also, what speed on my mixer should i use to combine the liquid ingredients and then when I add the flour?
I always think higher fat is best- but I don’t think 1% milk will make or brea the recipe. I always add flour on low so I don’t overmix. Otherwise medium is a good place to start as long as you’re not over-mixing.
I couldn’t find an answer to Lauren’s question about a mixer… a stand mixer is a luxury I don’t have. Can you please provide directions for those of us without? Thank you :)
Without a stand mixer you can absolutely just knead those rolls by hand!
how many rolls does this recipe make?
24-30!
Absolutely perfect and delicious! I opted for a scant 1/4 c of sugar and it was a nice hint of sweetness. I will definitely keep these in our rotation!!!
Made these tonight. Is a little labor intensive from start to finish but soooo worth it. Couldn’t believe how much flavor the sea salt added so my next batch I will put just a little sea salt on the bottom of the pan as well as on top of the rolls. That way, when you slice open you get the sea salt on both halves. Thanks for sharing this fabulous recipe.
When do you add the water in? Was that suppose to be mixed with the yeast? Does not specify!!
Hi! In the recipe card you’ll see that adding in the water is part of step 2.